Ghost Mannequin Photography on a Zip-Up Hoodie
Follow this tutorial to discover how to photograph a zip-up hoodie on a ghost mannequin using PhotoRobot’s_Cube and automation software.
How to Create a Ghost Mannequin Effect on a Zip-Up Hoodie
Expanding on our product photography tutorials, this guide shows how to photograph a zip-up hoodie on a ghost mannequin. Using a ghost mannequin, you make apparel appear to be worn by an invisible model. Some also call this the “hollow person” effect.
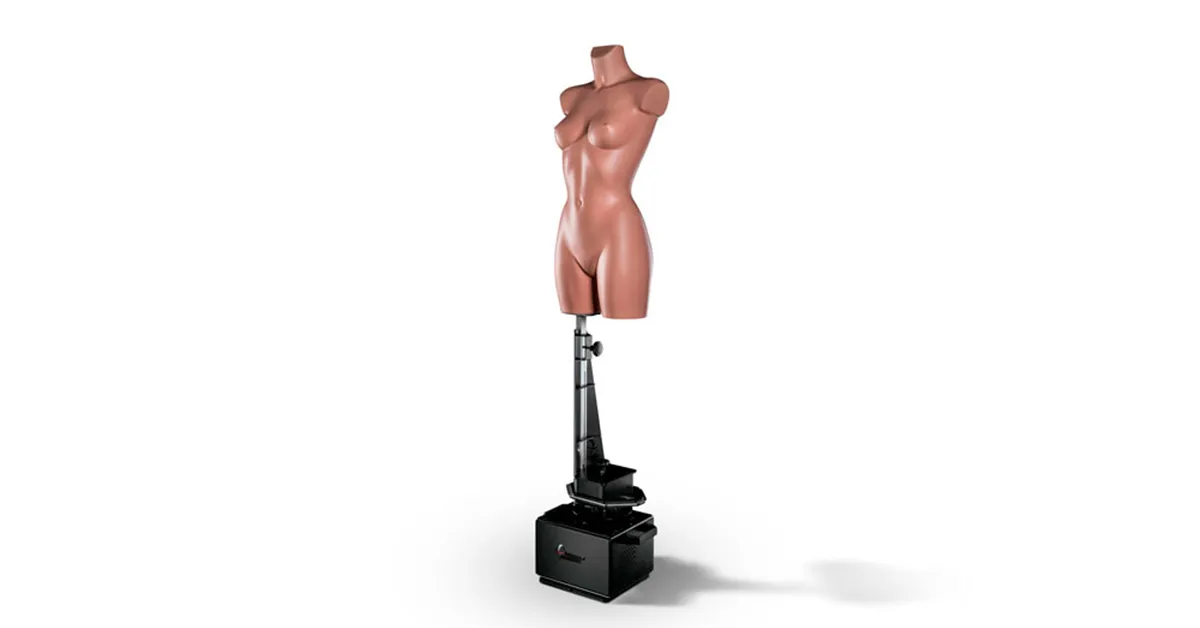
To achieve the effect, we use PhotoRobot’s_Cube, and our ghost mannequin - a special mannequin with removable pieces. Removing parts such as the arms, neck, and chest allows us to photograph clothes without the mannequin visible.
Ghost mannequin photography creates a “full-bodied” 3D effect on clothing. This allows customers to your online fashion store to more effectively visualize how your brand’s clothing would look on them.
Read further for a step-by-step tutorial of the process. We’ll share how to photograph a zip-up hoodie on a ghost mannequin, and what cameras, lighting, and equipment to use.
PhotoRobot Photography Equipment and Editing Software
Our standard setup for any ghost mannequin photography revolves around the_Cube. This device quickly transforms into a rotating mannequin for fashion photography. It boasts a system for quick mannequin exchange, and together with PhotoRobot_Controls streamlines workflow in the studio no matter the project.
The software has functions for style guides and for what we call Chromakey, which automatically removes mannequin poles in final images. It also automates the process of compositing photos to create the ghost mannequin effect.
Beyond the_Cube, you also need the following equipment in your workspace.
- Camera - PhotoRobot systems support compatible Canon camera. For professional results, we always recommend higher-end models.
- Studio lighting - Our setup uses a combination of strobe lighting and LED panel lights to create the ideal exposure, shadows, and contrast from all angles.
- Ghost mannequin - Here, we use our quick-exchange mannequins. These provide us a way to prepare another torso off to the side at the same time we photograph styled mannequins.
- Your zip-up hoodie - Today, we’re photographing a zip-up hoodie. However, the process will be the same for all hoodies, whether or not they have a zipper.
- Styling accessories and tools - As with most fashion photoshoots, you’ll want tools such as pins and clips on hand for styling the clothing. You’ll also want some tissue paper for padding the hood.
How to Style a Zip-Up Hoodie on a Ghost Mannequin
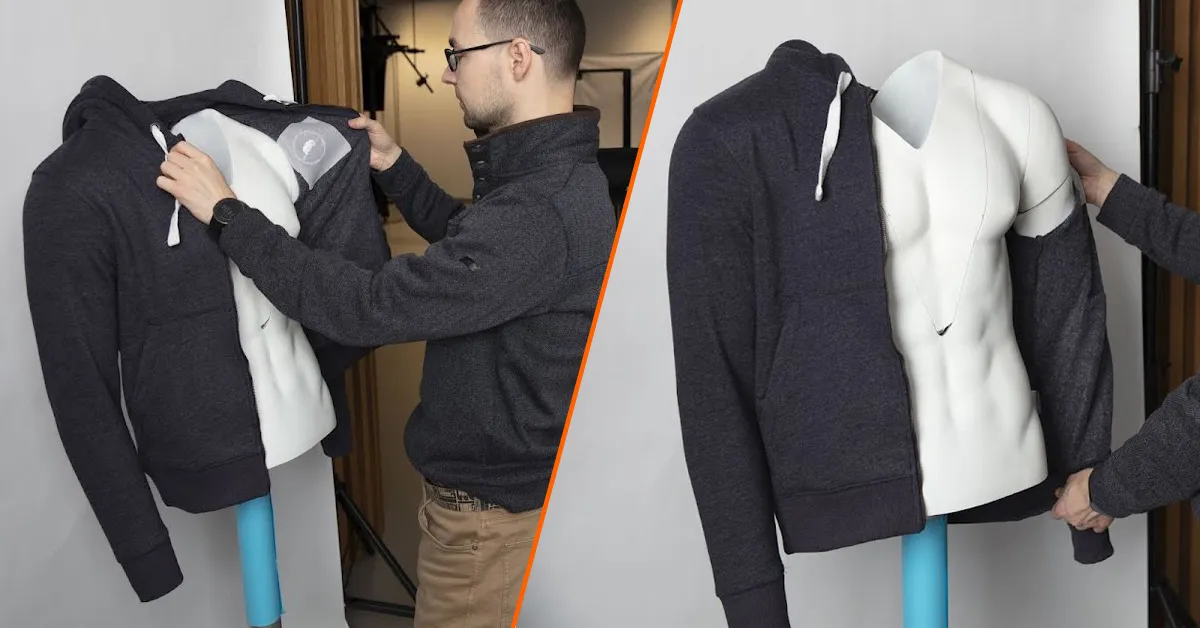
1 - Put your zip-up on the mannequin
Getting started, the first step is simply putting the zip-up hoodie on the ghost mannequin. Unzip the hoodie, pull the arms into the sleeves and then pull them down neatly.
Pay careful attention that there are no visible creases and that you style the shoulders straight and even.
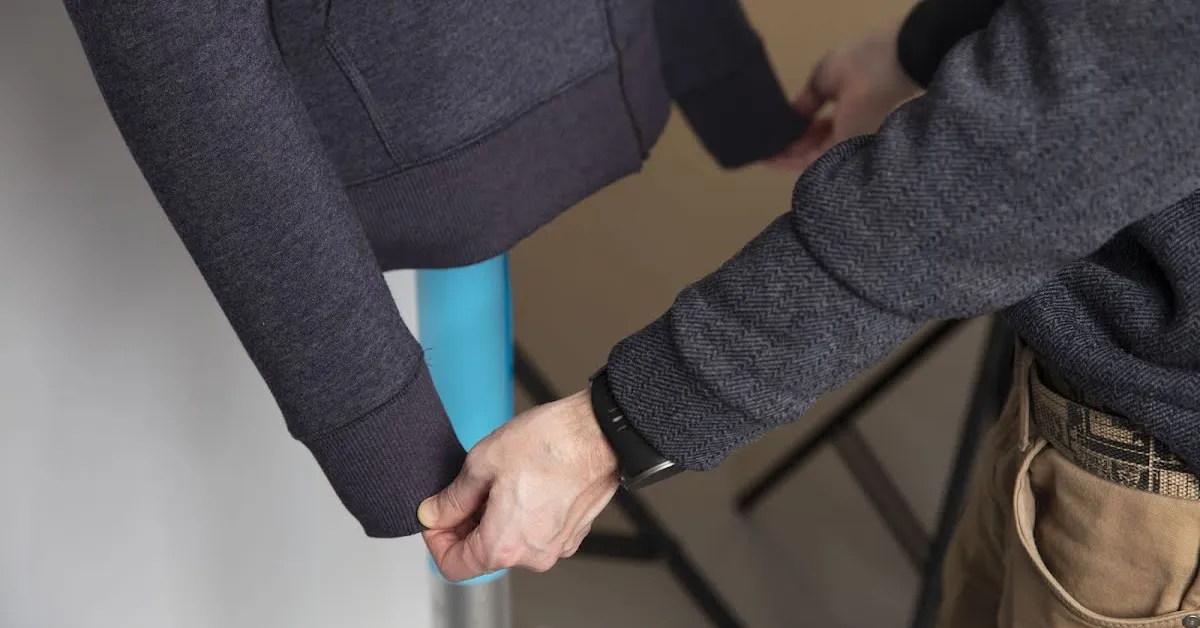
2 - Ensure the arms are symmetrical
Next, we need to ensure both sleeves are symmetrical for the photoshoot. Level the arms, making sure they’re both in identical positions.
The main thing here is that you don’t want one arm sticking out more than the other for the camera. Line the arms up evenly, checking they look the same from the side and front views.
3 - Detach the removable neck part
Now, we need to remove the neck piece from the mannequin. This way the camera can capture the zip-up’s inner lining. Detach the neck and move it out of the scene.
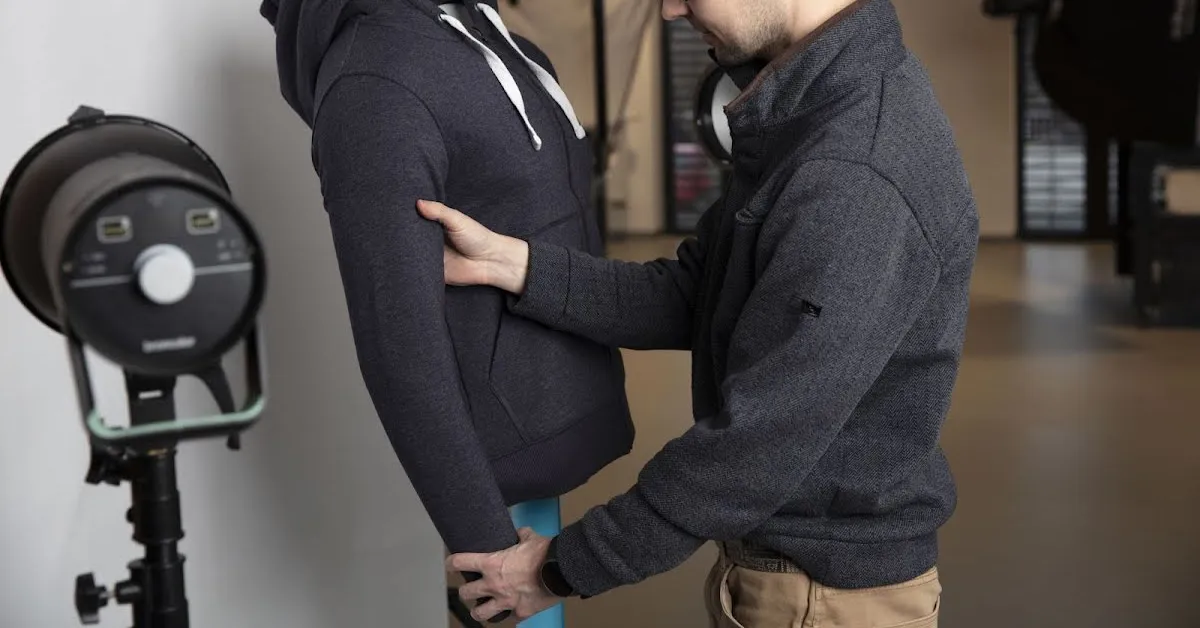
4 - Prep the hood of your zip-up
In the next step, we style the hood for a ghost mannequin effect. This is where we use styling accessories and tools, including clips, pins, and tissue paper.
Use the styling clips and pins to give the hoodie a fitted look around the neckline. Then, showcase the hood by padding it with tissue paper to make it look more attractive and rounded.
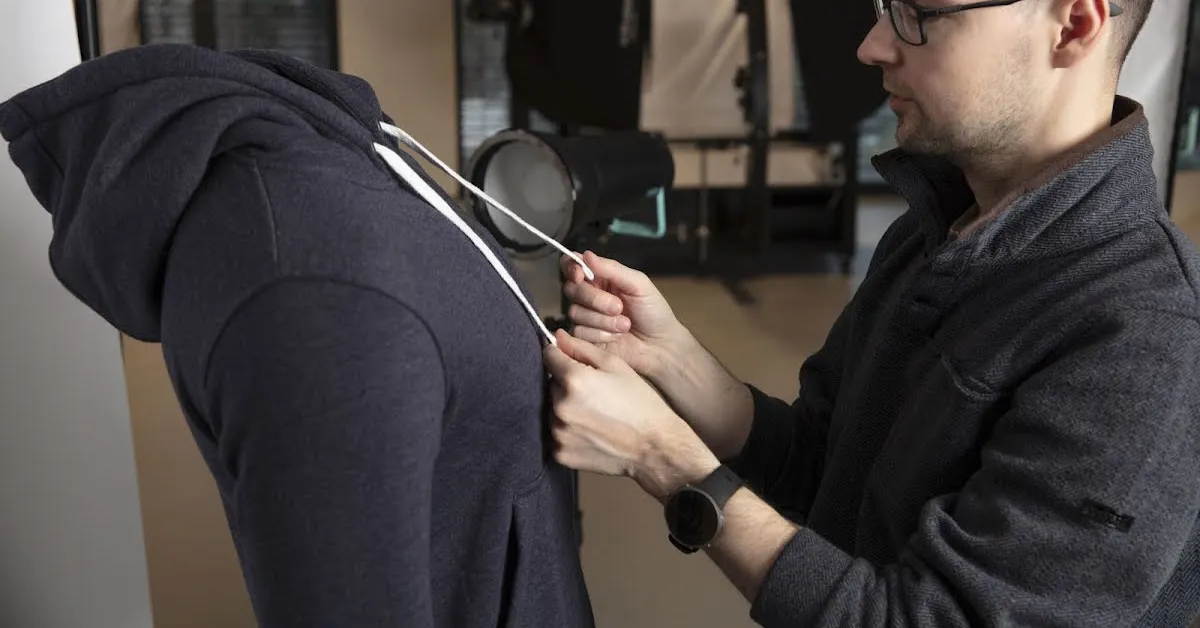
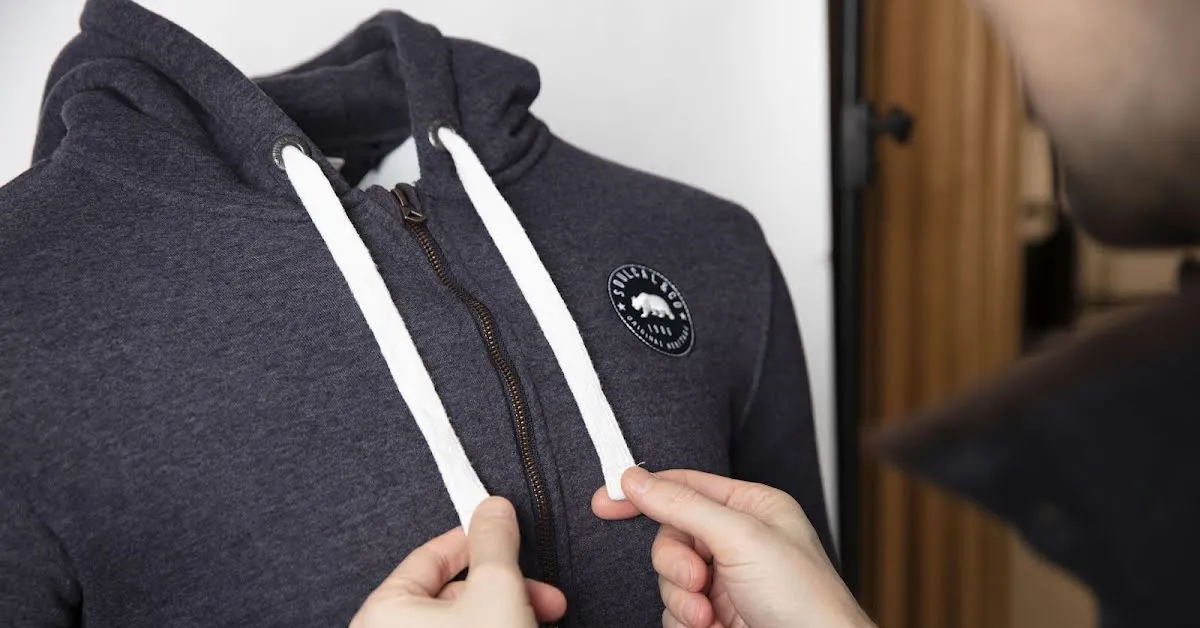
5 - Make the drawstrings loose and even
And just like that, we’re almost ready to photograph our hoodie on a ghost mannequin. All we need to do now is pull the drawstrings so that they’re nice, loose and even.
You don’t want to pull the hood too tight and scrunch it up, so first pull around the hood to make sure it’s completely open. From here, pull the strings so that they line up symmetrically and hang loosely down the front of the hoodie.
6 - Lights, Camera, Action
Finally, thanks to our suite of software for automation and control, it’s time for the easy part. Moving to the control station, the process from here takes no time and becomes routine on any torso.
- Capture given angles (using predefined positions).
- Separate the background on all images.
- Retouch the pole of the standing torso using PhotoRobot’s manual or automated Chromakey retouch feature to create a ghost mannequin effect.
- Set the lighting according to the product for consistent exposure, shadows, and contrast.
- Control the process to deliver ready-made images to the client or to publish directly online.
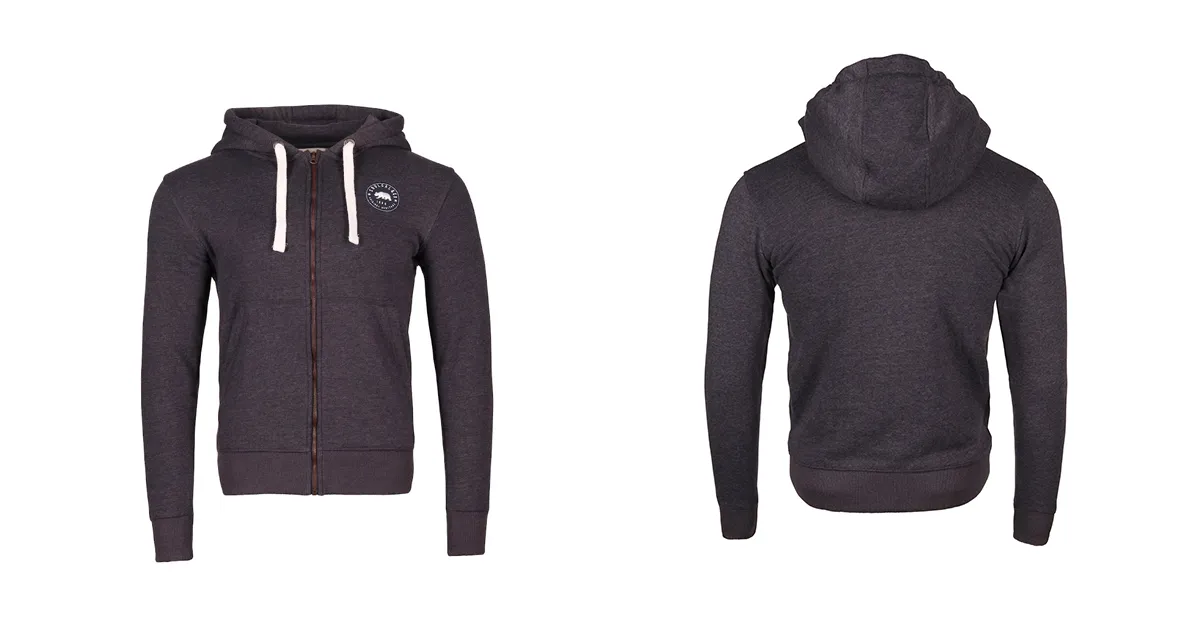
Judge the invisible mannequin effect for yourself
Discover more product photography techniques
Looking for more product photography techniques, tips, and tricks? Sign up for the Newsletter below. You can also follow us on LinkedIn, Facebook, and YouTube. We share the latest in product photography from all industries. Whether it’s how to photograph a zip-up hoodie, or product photography of any type or scale, we’re here to help!


