How to Photograph Coats with a Ghost Mannequin Effect
Achieve a true-to-life, 3D ghost mannequin effect when photographing coats with PhotoRobot fashion photography solutions.
Fashion Photography Guides: Coats and Ghost Mannequins
In this guide, we’ll demonstrate how to photograph coats with a ghost mannequin effect using PhotoRobot’s_Cube and automation software. See how to style your mannequin and coat, and what cameras, lighting, and photography equipment to use.
The video above shows how to use ghost mannequins with PhotoRobot hardware and software. These solutions make ghost mannequin photography several times faster and more consistent than if we were to do this manually.
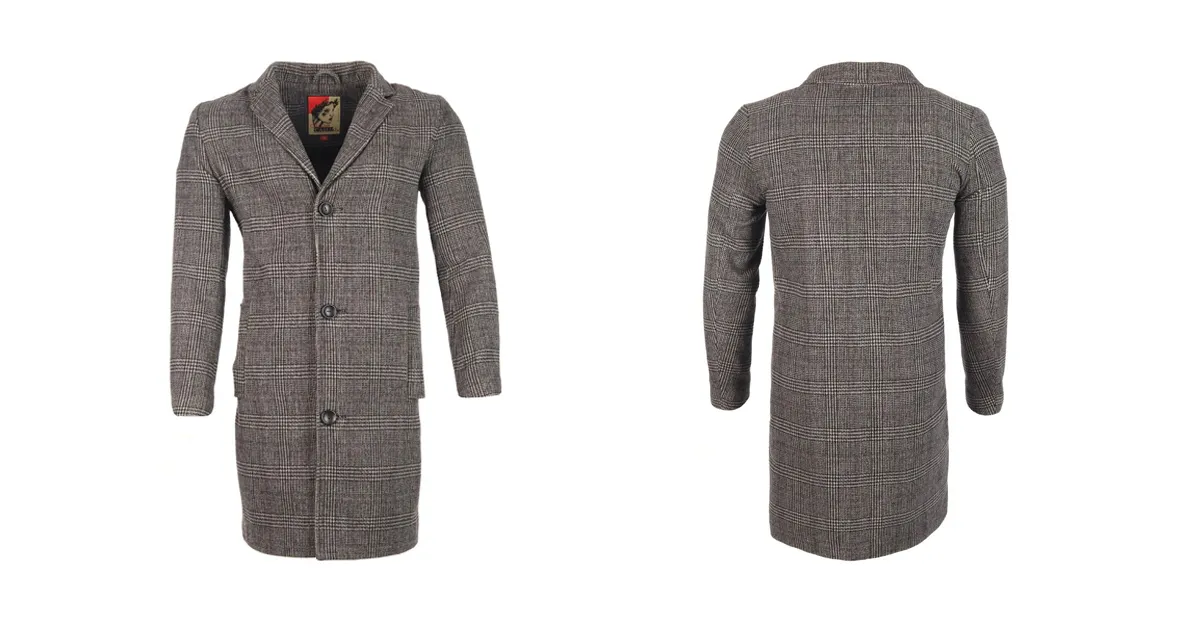
With the mens’ peacoat, the ghost mannequin makes the coat look as if an invisible person is wearing it. It also gives it a more structured and defined fit, and a realistic 3D effect in presentation. This is accomplished by removing pieces of the mannequin so they are not visible during photography.
Continue reading for more on how to photograph a coat with a ghost mannequin effect and streamlining workflow with PhotoRobot.
Photography equipment and editing software
Now, a traditional PhotoRobot setup for the ghost mannequin effect on coats revolves around the CUBE. This solution boasts a system for quick mannequin exchange, coupled with PhotoRobot automation software for streamlining post processing.
PhotoRobot’s ChromaKey function automatically removes mannequin poles from final images, combines photos, and achieves a flawless ghost mannequin effect every time.
Beyond these, you’ll also need the following.
- Camera - PhotoRobot supports DSLR and mirrorless Canon cameras, with high-end models recommended for professional product photography.
- Studio lighting - Our systems work with both strobe lighting or LED panel lights, using these to create the ideal lighting from all angles.
- Ghost mannequin - In this case, we use our quick-exchange mannequins. This provides us a way to prepare a separate torso off to the side while simultaneously taking photos of coats ready for photographing.
- A coat to be photographed - Here, we’ve decided to use a men’s peacoat. However, the process will be the same for similar apparel and fashion products.
How to Style Coats for the Effect
1 - Clothe your mannequin
The first step is dressing up your ghost mannequin in the coat. Here, you should button the coat completely up the front. If it’s a double-breasted coat, start with the inner buttons before moving onto the outer ones.
In this way, the coat will appear straight and symmetrical. Be sure the coat is taut on the ghost mannequin, and that it appears just as it would in-store.
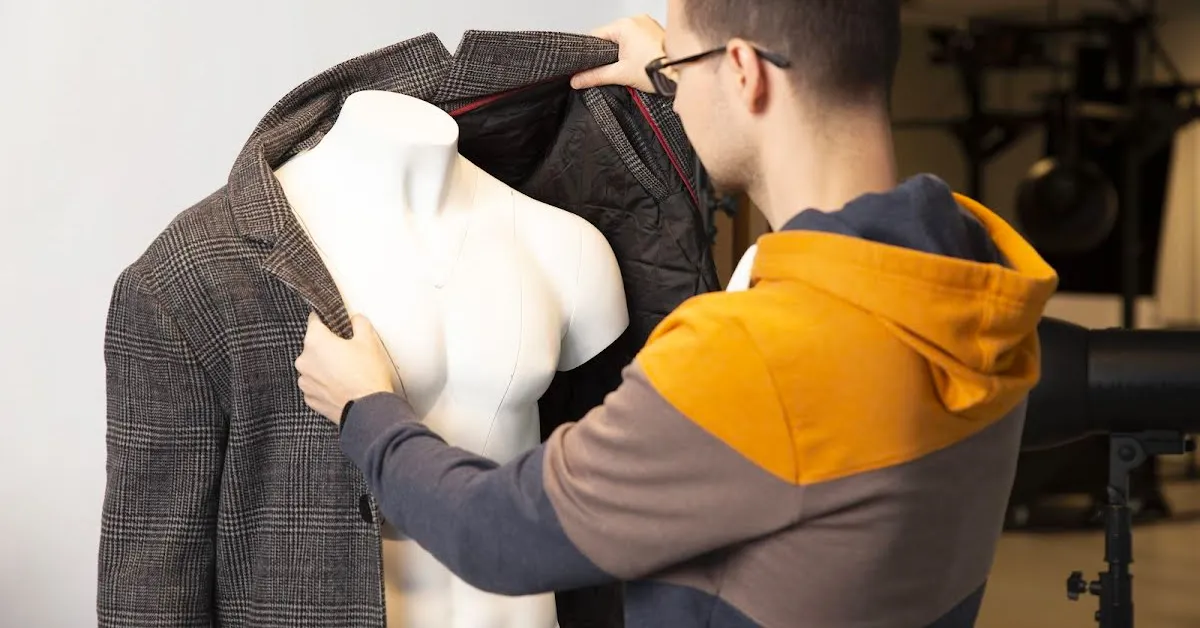
If you have PhotoRobot’s mannequins for quick-exchange, you can also begin preparing a separate mannequin for photography. These mannequins were designed to optimize workflow for higher volume photoshoots.
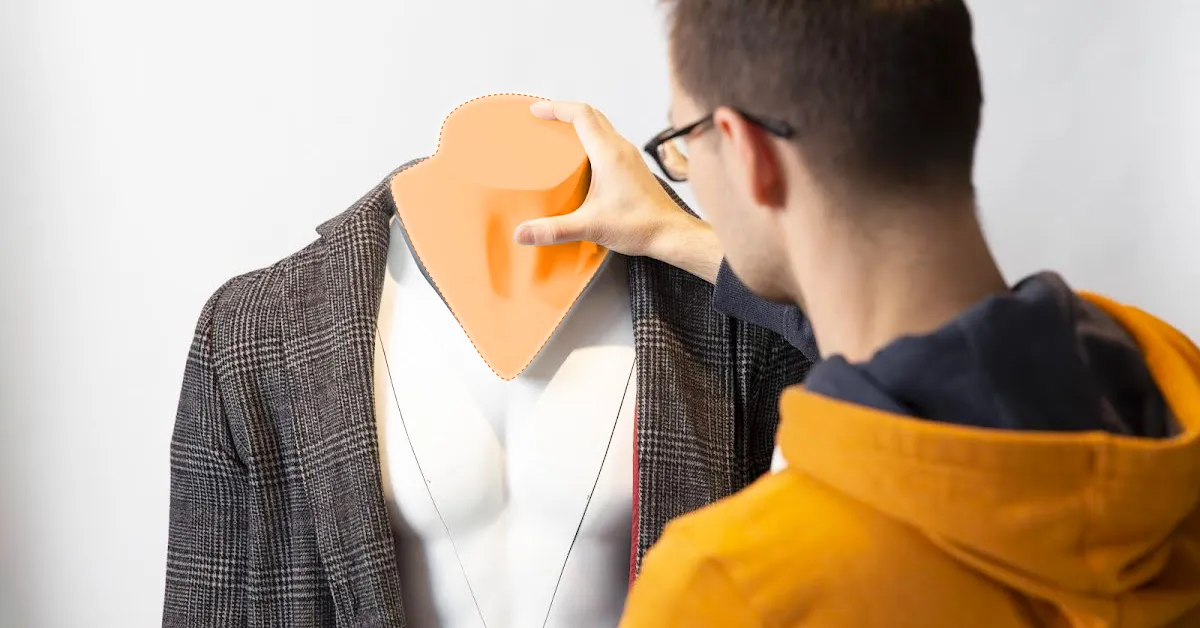
2 - Detach removable pieces
Next, you need to make an open space in the neck and upper chest area.
For a peacoat, such as the one in our video, we simply remove pieces of the mannequin from the neck and chest. This creates the visible insert we’re looking for to create our “invisible person” effect.
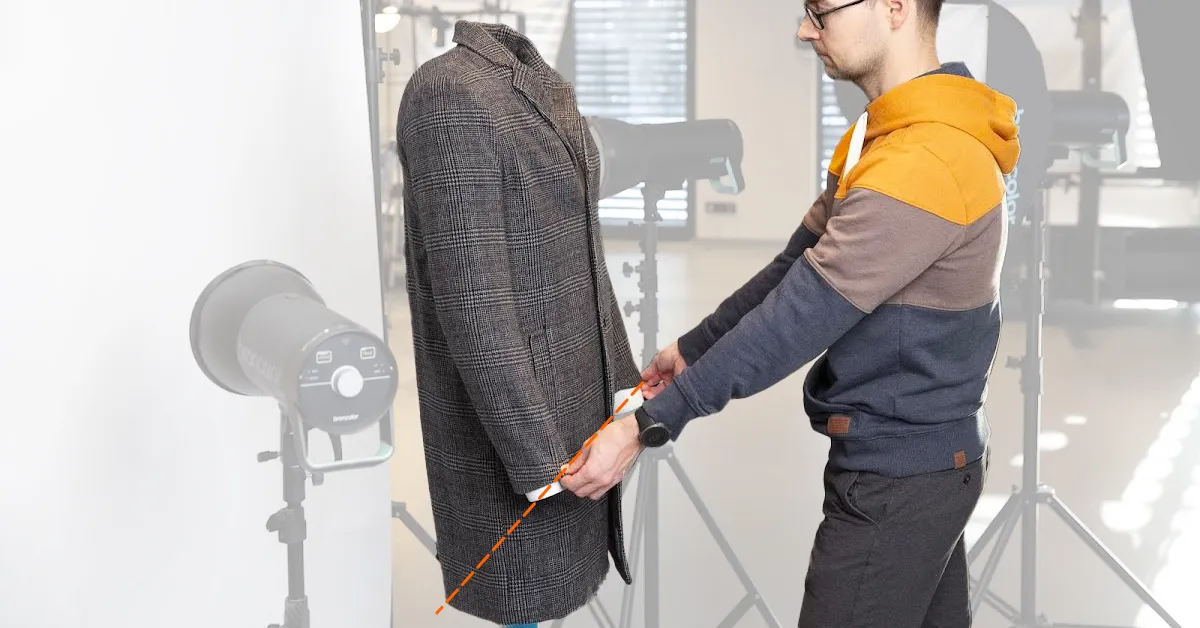
3 - Position mannequin arms and the hem of the coat
Then, you should position the mannequin’s arms so that they are level and in the same position. What you want is to ensure that any space between the arms and the body is symmetrical.
Also, pay attention to the bottom hem of the coat. Be sure to make it look straight on the mannequin.
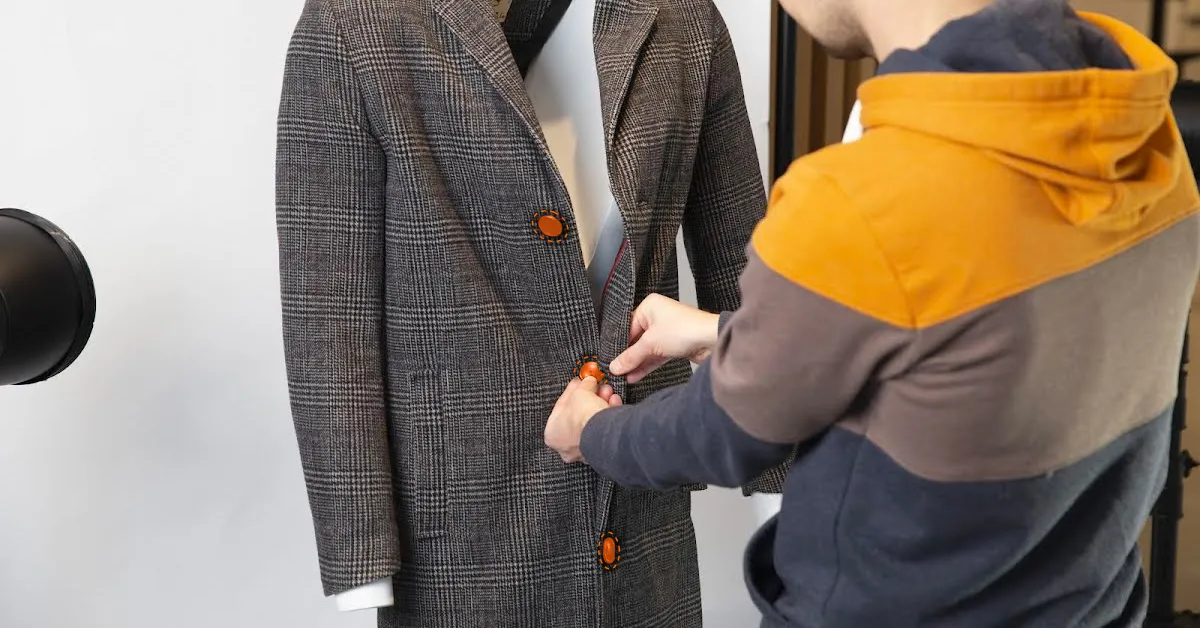
4 - Style the coat’s buttons for photography
In the next step, examine the coat’s buttons and style them so that all are flat and facing straight forward.
5 - Showcase distinguishing features
Now, this is where every coat is different, with varying distinguishing features. Here, you want to think about even the tiniest details that make the coat stand out.
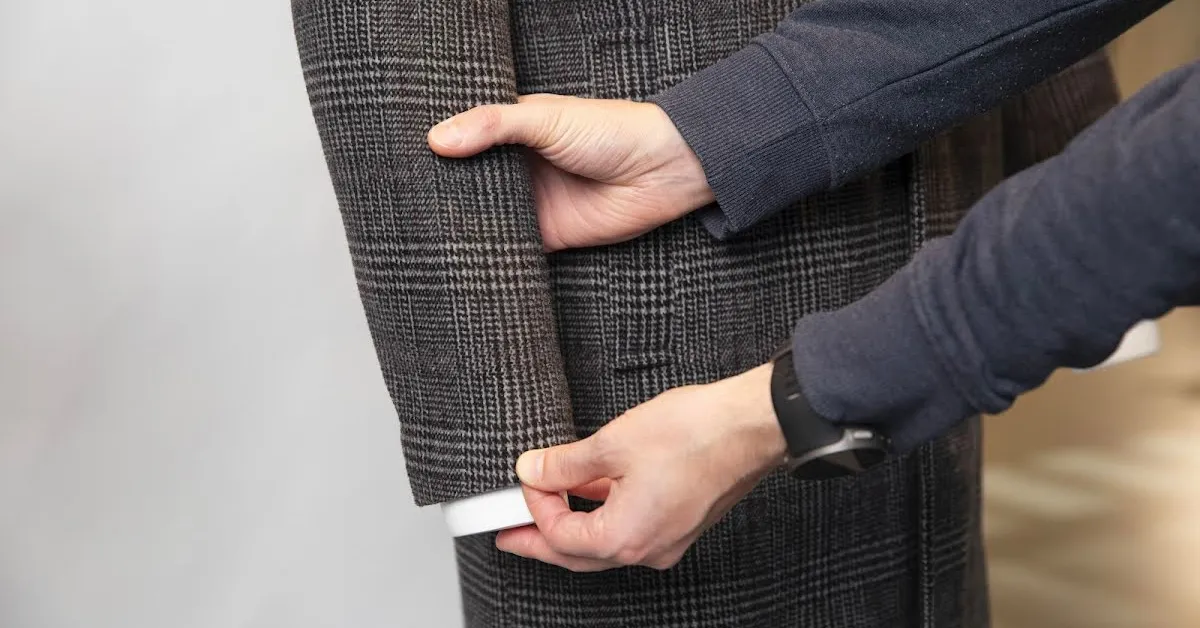
If the cuffs of the sleeves have buttons, prepare to showcase these and other details in your photography. You might turn the sleeves up slightly to reveal the buttons, again making sure they are flat and facing the right direction.
Also, be attentive to the inner-lining of your jacket. You want this to look as spotless and clean as possible, so that nothing distracts away from the garment.
Lights, Cameras, Action...
And that’s it. Now you’re ready to move to your PhotoRobot control station and create your ghost mannequin effect. The process is straightforward and becomes routine on any torso.
- Capture given angles (using predefined positions).
- Separate the background on all images.
- Retouch the pole of the standing torso using PhotoRobot’s manual or automated Chromakey retouch feature to create a ghost mannequin effect.
- Set the lighting according to the product.
- Control the process to deliver ready-made images to the client or to publish directly online.
The Results
Looking for more tips, tricks, and techniques?
This guide is part of an ongoing PhotoRobot series on product photography techniques, styling, and lighting setups. If you’d like to learn more, sign up for our Newsletter below. We share the latest blogs and tutorials, as well as videos and resources to keep you up-to-speed in the industry. We’re here to help you streamline your product photography workflows, no matter the product or the workload. Don’t hesitate to contact us today to learn more about how to photograph coats with a ghost mannequin effect, or to discover our solutions for yourself.


