9 Tips: How to Photograph Clothing on a Ghost Mannequin
Enrich your fashion product photography for eCommerce with these 9 tips on how to photograph clothing on a ghost mannequin.
How to Photograph Clothing on a Ghost Mannequin
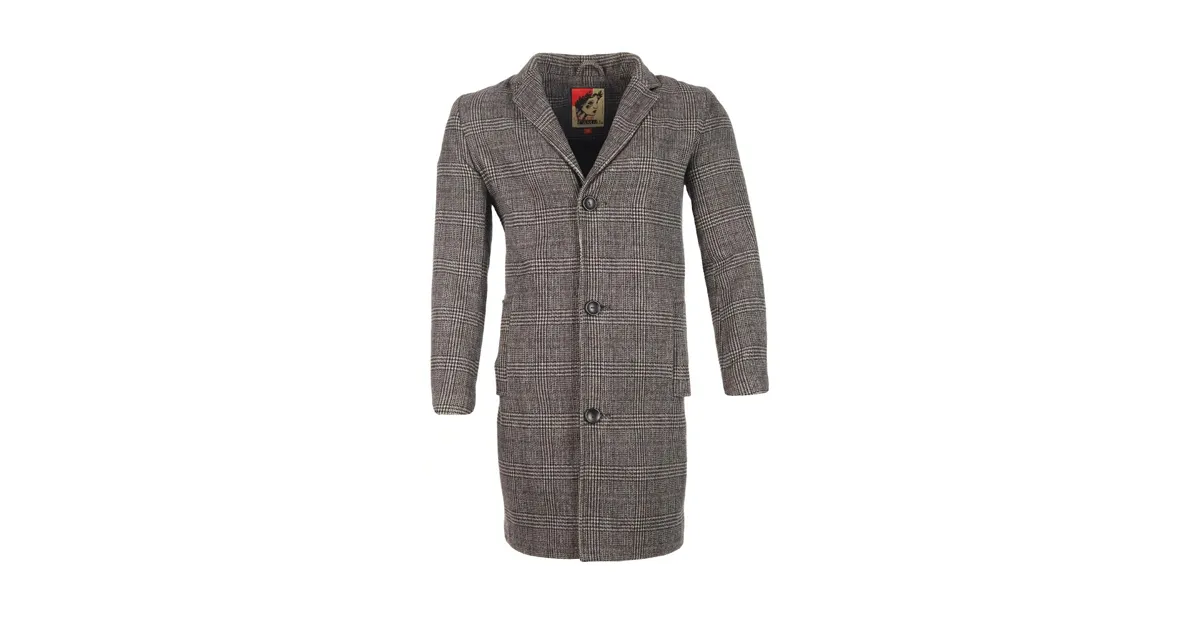
Photographing clothing on a ghost mannequin can make it appear there is an invisible model in product photos. This technique, the ghost mannequin effect (or “invisible mannequin effect”), revolves around special modular mannequins with removable pieces. Photographers style clothing on the mannequin, and then detach pieces to make the mannequin disappear for photography. Special post-processing is also necessary, although production times can be drastically reduced with the right mannequin and photography techniques.
Creating the ghost mannequin effect with PhotoRobot involves styling clothes on the mannequin, and finally deploying PhotoRobot’s Cube and automation software. All we need is a small studio workspace, a PhotoRobot compatible camera, our ghost mannequin, and clothes to photograph.
Join us in this fashion product photography guide for e-commerce to discover the process. We share 9 tips on how to photograph clothing on a ghost mannequin, including what lighting, cameras, and editing tricks to use.
1 - Select the best size mannequin for your clothes
Invisible ghost mannequins exist for nearly all builds, sizes and shapes. There are invisible mannequins for men, women, and children, with options for full body mannequins, or only ghost mannequin torsos and legs.
When choosing an invisible ghost mannequin, always base your decision on the clothes you need to photograph. The mannequin must be the correct size and shape to accurately present the cut and style of the apparel.
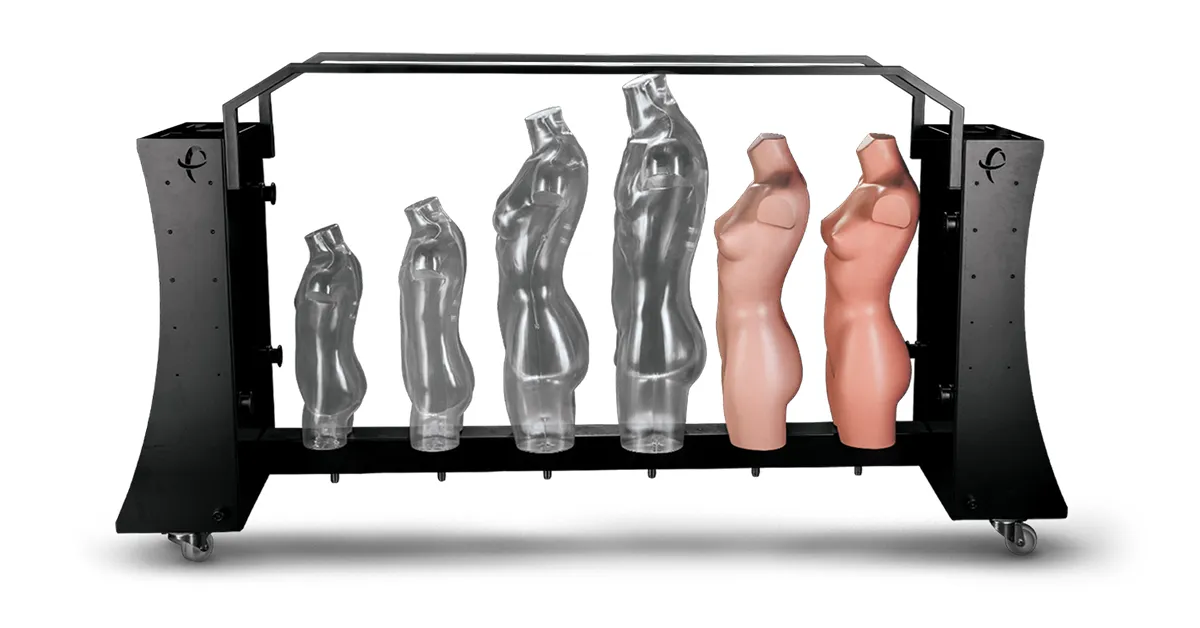
If the mannequin is too large, you risk stretching the garment’s fabric, or, worse, the clothes not fitting at all. The clothing should fit and flow naturally on the contours of the mannequin, with no unsightly creases or bunching.
- For more, see our guide on selecting the best ghost mannequin.
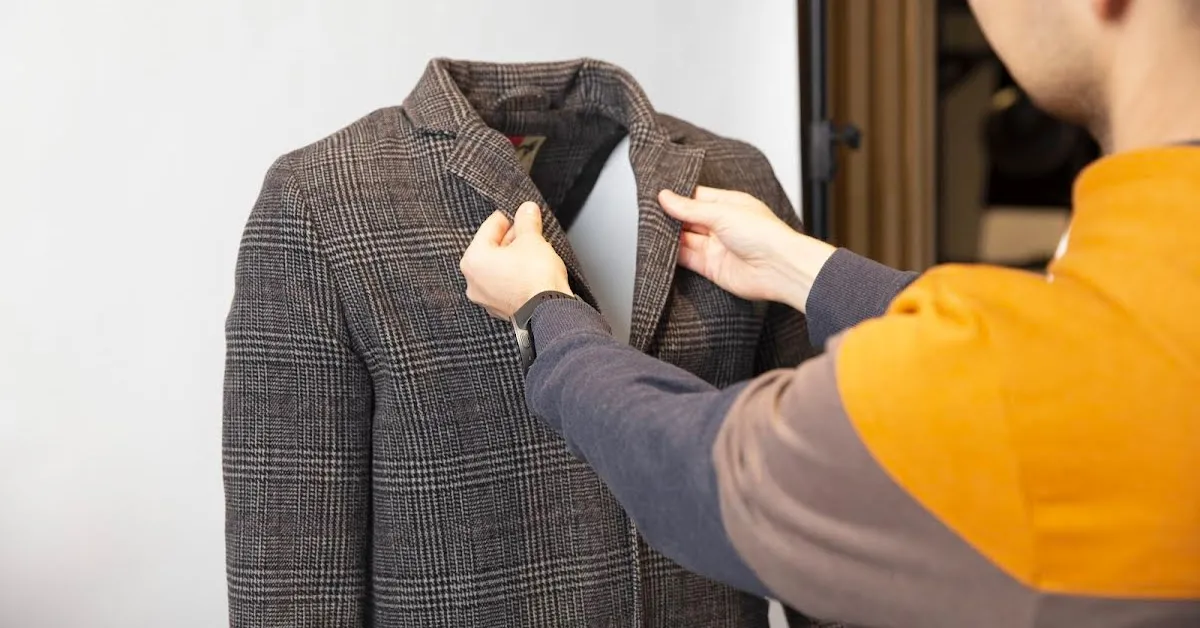
2 - Style for fit, symmetry, and balance
Next, ensure to style clothes on the mannequin to not only fit naturally but also to achieve symmetry and balance.
Start with the shoulders if it’s clothing on a torso, like when taking photos of a blazer or with a strap dress. The shoulders must be neat, even, and as close to mirror images of each other as possible. Also, pay attention to any hem lines, pockets, or design features that might require additional adjustment.
When photographing trousers or jeans, style the waistbands, legs, and crotch to fit evenly on the mannequin legs. Fasten up the zipper (or buttons), and shift the fabric until it’s straight and symmetrical.
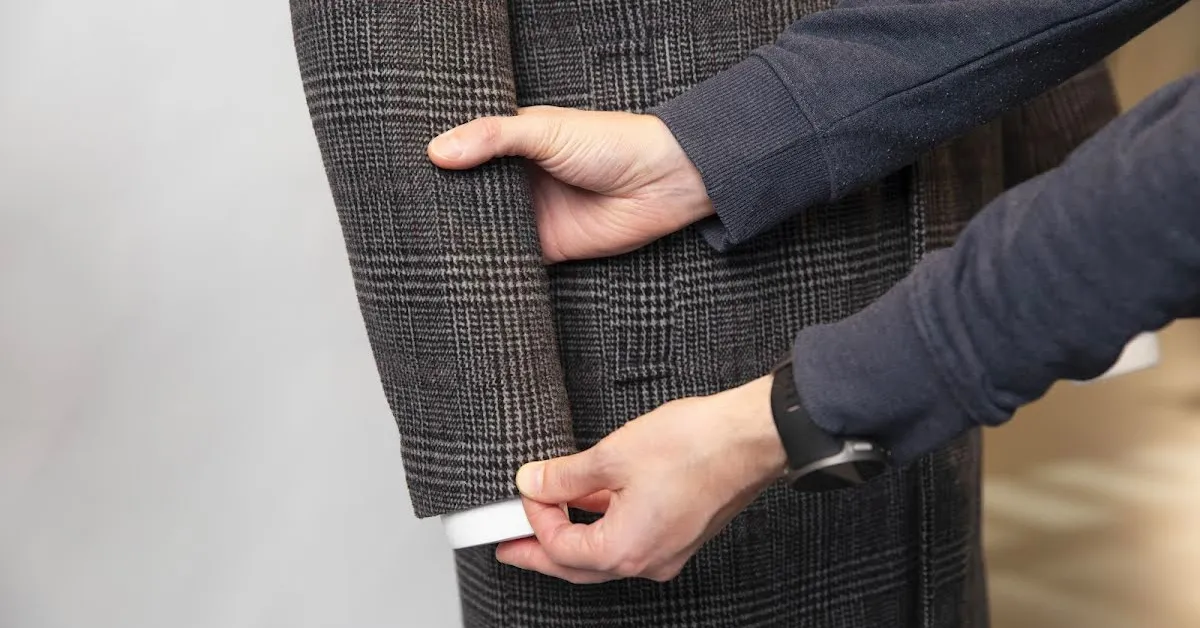
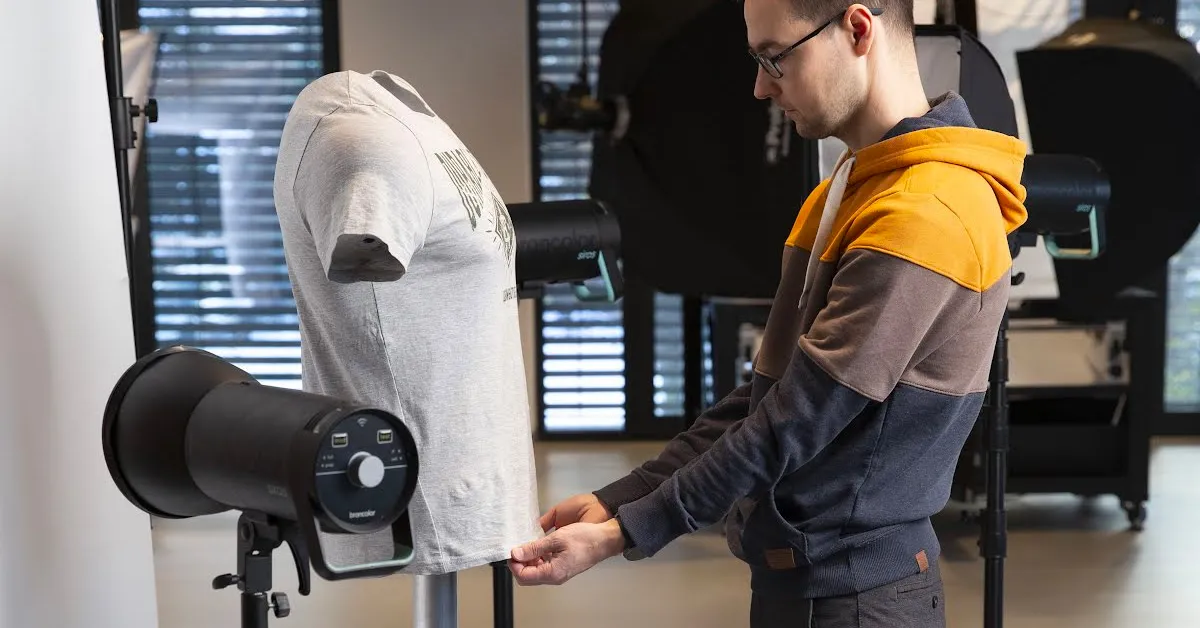
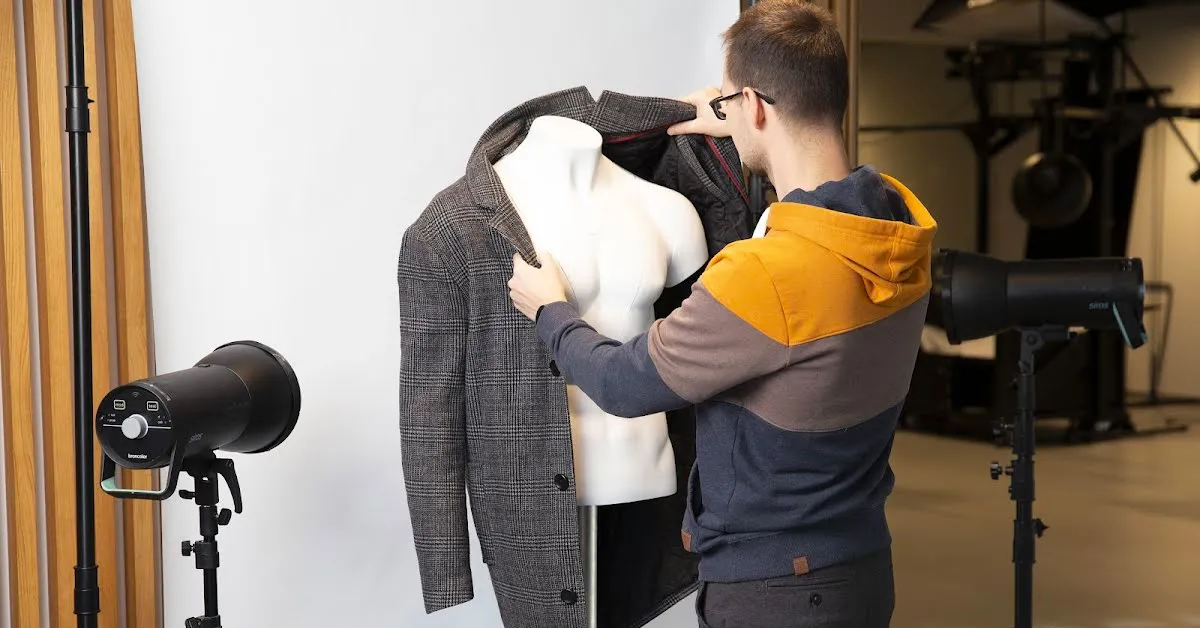
3 - Use styling clips and pins to hold the fabric
Another trick stylists deploy is using clips and pins to better fit clothes onto the mannequin. The secret here is to not pull the clothes too tight on either side, as this can stretch the material.
Attach clips vertically and aligned down the center of the side opposite from the one we’re photographing. This way the apparel gets a more form-fitting appearance, while also preventing any unnatural creases.
When photographing the other side of the apparel, simply follow the same process but on the reverse side. Ensure pins are also invisible by pinning them to the inside of the fabric.
4 - Keep other styling accessories nearby
We can use other styling essentials to give clothes more shape, hold fabric in place, and control light and shadow. These include accessories like crêpe paper, double-sided tape, light reflectors, and more.
Use crêpe paper to stuff areas like the inside of sleeves or hemlines on the legs of trousers. This rounds out flat places, while double-side tape is useful for holding cuffs, collars, and more in place.
Then, using a smooth, white reflective surface, like a whiteboard, we can experiment with the lighting on the apparel. Direct light into hard-to-reach places like the underarms or the space between sleeves and legs to create shape, emphasize the fabric, and showcase details.
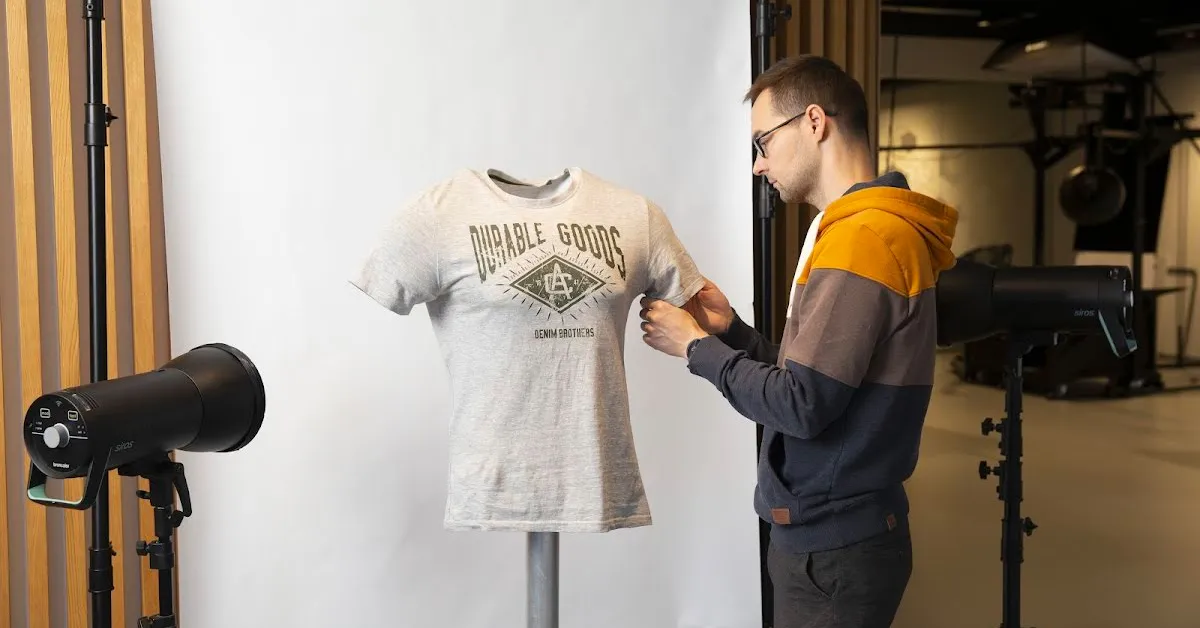
5 - Showcase the garment’s fine details
Consumers browsing your online fashion want to visualize themselves wearing the products. They also want to get from photos an idea of the quality of the fabric, the cut, and the style.
To help shoppers better visualize the product, style the clothes on the mannequin just as they would be worn. If there are appealing features such as the inner design, flip-up cuffs or collars, make sure to present them.
Overall, it’s important to emphasize the style of your clothing - whether casual, tight or loose fitting, classic or contemporary.
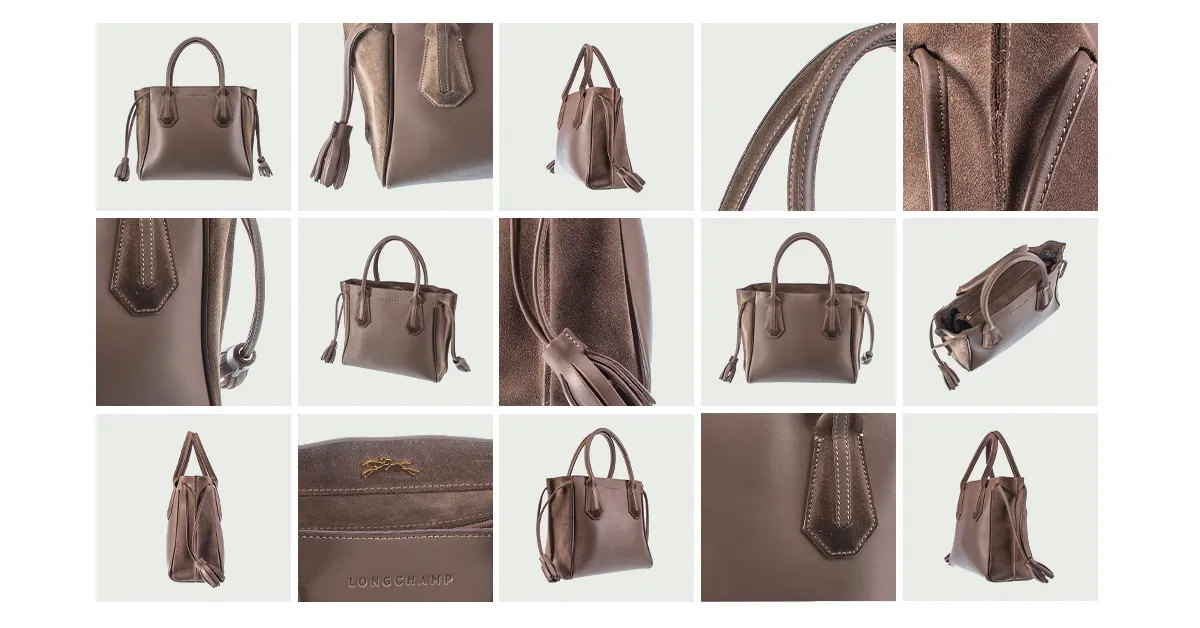
6 - Photograph the back, the sides, and for zoom
Also, it’s important to present clothing online from front-to-back, side-to-side, and up-close. If photographing a zip-up hoodie, for example, include side views of the arms, as well as the backside with the hood.
Then, be sure to show off any logos, branding, or design elements with up-close images. Consumers appreciate being able to zoom into a product’s fine details. It’s also important they are able to closely inspect the quality of the material.
Use PhotoRobot_Controls to set the Cube and mannequin’s rotation, define positions to photograph, adjust lighting, and to control the process. Here, we have full camera automation, with flashes running in parallel, as well as valuable editing tools.
7 - Take full advantage of PhotoRobot Control Software
Now, for the easy part - using PhotoRobot_Controls to automate the photoshoot, the editing, and file delivery. The software also allows us to create and save style guides as “presets”, which we can then use when photographing similar types of clothing.
The process takes minimal time, with little interruption to workflow, and then becomes routine on any mannequin.
- Take photos of given angles (using manual or predefined positions, or both).
- Separate the background on all images.
- Retouch the pole of the torso using manual or automated Chromakey retouch.
- Set the lighting to the product for consistent exposure, shadows, and contrast.
- Control the process to capture images and deliver ready-made images to the client or to publish directly online.

8 - Style multiple mannequins for a single session
Remember also to take full advantage of the_Cube and its system for quick mannequin exchange. This design element aims to streamline studio workflow and boost overall productivity.
Simply style other mannequins off to the side while photographing the first product in line. After photographing one product, unmount the first mannequin, and then move onto the next mannequin that’s styled and ready for photography.
9 - Strive for consistency in fashion product content
Finally, make sure to follow your brand’s style guide across the entire product showcase and anywhere your products appear online. Consistency in product imagery is crucial to building an image as a reputable seller, and ultimately in building buyer’s trust.
Aim to create a structured, thematic approach to how you showcase product visuals. Whether it’s on a product page or selling through various vendors, consistency will make your brand appear more professional overall.
Consider consistency across elements such as product lighting, styling, camera positioning, and product photography techniques. It’s important these complement the general theme of your brand, your webshop, product pages, and product visuals.
PhotoRobot | Solutions by photographers, for photographers
At PhotoRobot, we strive to ensure clients achieve smoother workflows and optimal productivity with all of their product photography. By photographers for photographers, our solutions cater to clients across many industries, from eCommerce to brick-and-mortar retail. Contact us to learn more, whether photographing clothes on a ghost mannequin or capturing products of all sizes.


