Fashion Photography of a Blazer on a Ghost Mannequin
In this tutorial, we show how to photograph a blazer on a ghost mannequin using PhotoRobot’s Cube and automation software.
How to Photograph a Classic Blazer on a Ghost Mannequin
This fashion photography tutorial demonstrates how to photograph a blazer on a ghost mannequin. Thanks to removable pieces, ghost mannequins allow you to photograph clothing as if an invisible model is wearing it.
To create the ghost mannequin effect with PhotoRobot systems, we deploy the_Cube, our mannequin, and PhotoRobot_Controls for editing and automation. The_Cube, with its design for quick mannequin exchange, ensures a smooth workflow when photographing multiple items.
Meanwhile, PhotoRobot software for automation and control of the photoshoot drastically reduces post production times and time-to-web. This is especially valuable when photographing more than one blazer or numerous pieces of apparel in a single day.
Want to see the photoshoot for yourself? This tutorial will guide you through the process. We’ll share how to photograph a blazer on a ghost mannequin, including what cameras, lighting, and equipment to use.
Studio Equipment and Editing Software
The very core of our setup for ghost mannequin photography on a blazer is PhotoRobot’s_Cube. This robot transforms into a rotating mannequin for fashion photography, and it has a system for quick mannequin exchange.
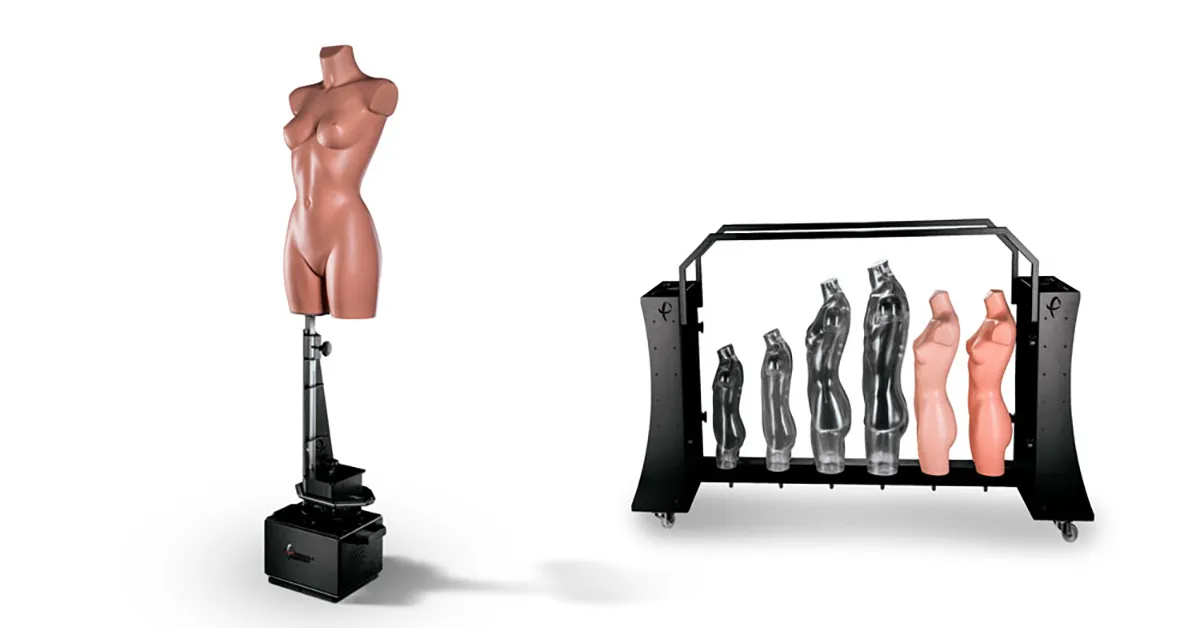
Then, with PhotoRobot_Controls, we can create and automate style guides, and we have a special function we call Chromakey. With these, you can automate mannequin pole removal from final images, and composite photos to create a ghost mannequin effect.
Additional equipment, cameras, and lighting
Other than our product photography robot, you also need the following equipment in the studio.
- Camera - For professional results, PhotoRobot supports DSLR and mirrorless Canon cameras, with high-end models always recommended.
- Studio lighting - For this, we combine strobe lighting and LED panels to reach the ideal exposure, shadows, and contrast from all angles.
- Ghost mannequin - Here, if you want you can use multiple mannequins, each of which can be quickly exchanged on and off of the_Cube. This gives you a way to both photograph and style mannequins simultaneously for higher volume photoshoots.
- A blazer - Today, we’re photographing a classic men’s blazer. For other types of blazers, the process will be the same, however.
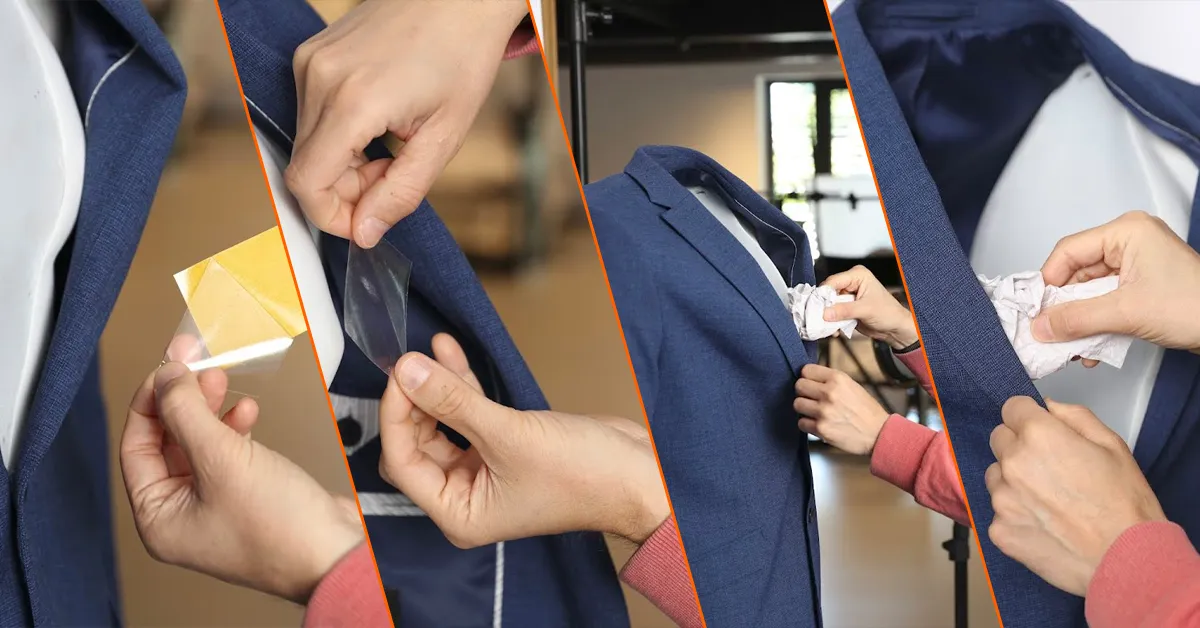
- Styling accessories and tools - We also have tools like pins and clips on hand for fitting the blazer onto the mannequin.
How to style a blazer for a ghost mannequin effect
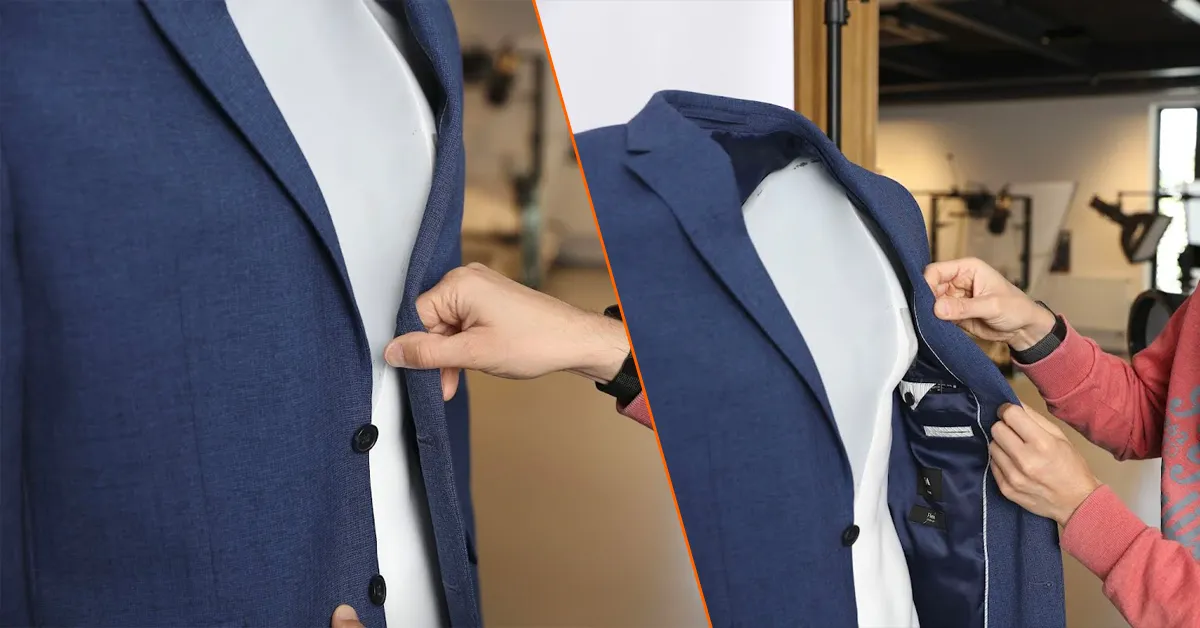
1 - Remove pieces to show the blazer’s inner lining
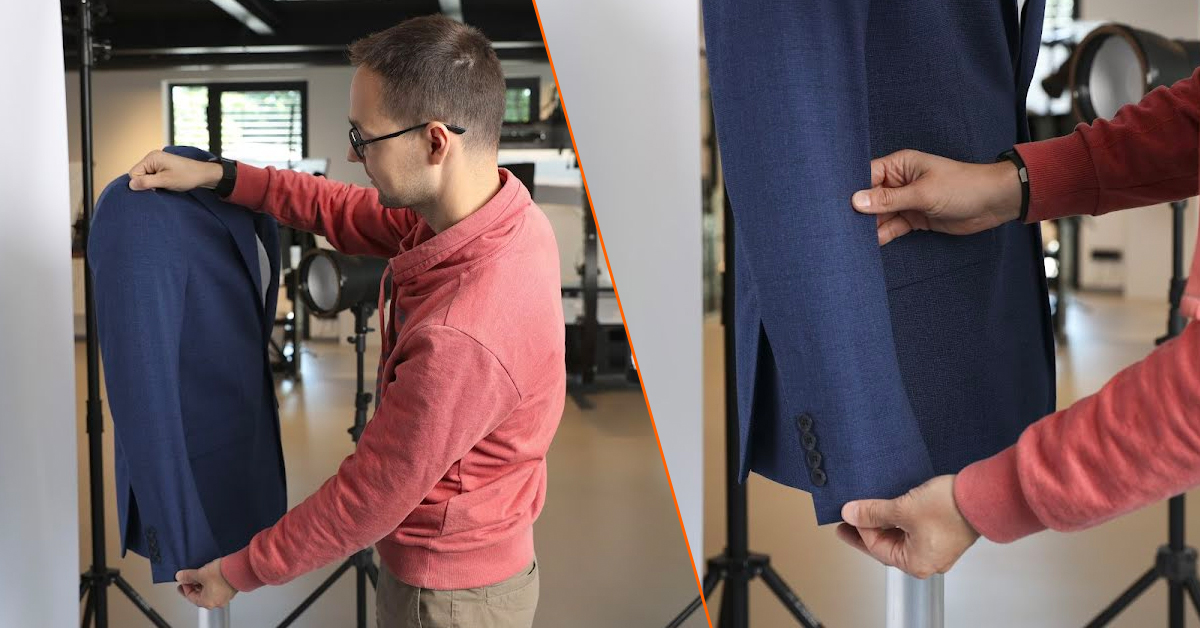
Firstly, we need to prepare to take photos of the front side of our blazer. To do this, it’s necessary to remove as much of the chest area as possible from the torso.
We need to show the inner lining of the blazer without the mannequin visible. Make sure you remove enough of the chest to compensate for the lower cut of the blazer’s lapel.
Then, move onto the bottom of the ghost mannequin. Here, remove parts until the inner lining at the bottom of the blazer is visible.
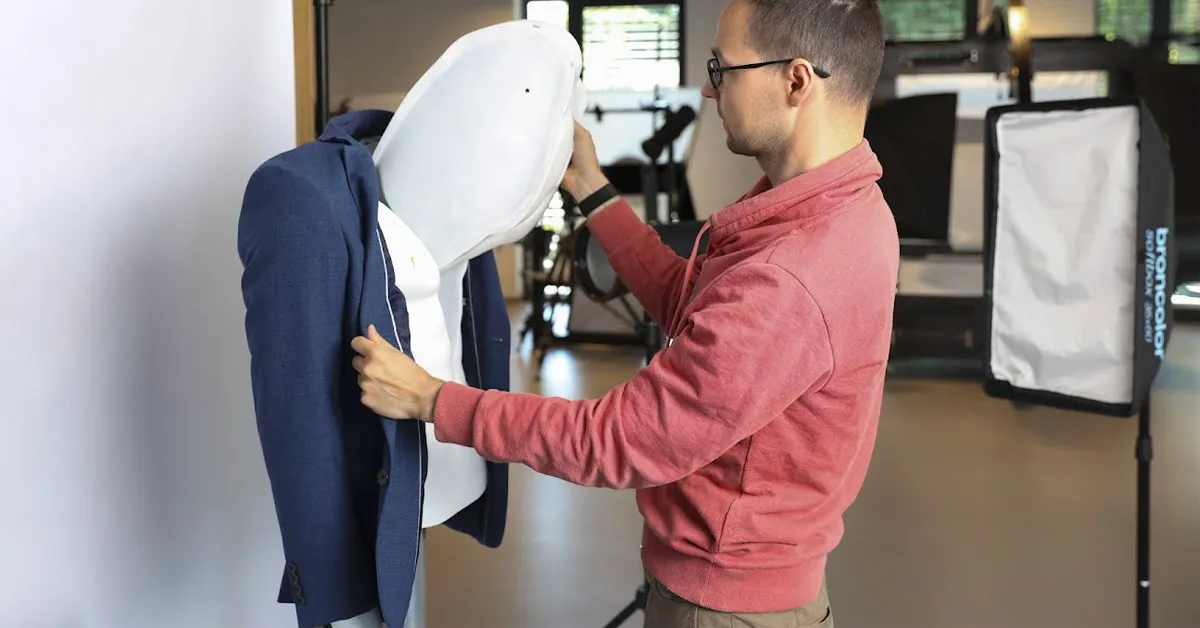
2 - Suit up your ghost mannequin
Next, it’s time to dress our mannequin for the photoshoot. Fit the mannequin’s arms into the sleeves and pull the blazer on.
Then, button up the blazer, just as you would dressing yourself. Again check there’s a clear view of the inner lining and the mannequin is invisible from your desired angle.
When satisfactory, we can then move onto styling the arms and sleeves of our mannequin.
3 - Line up the arms and shoulders
In this step, you need to align the mannequin arms and shoulders, ensuring each side is level.
Also, extend the arms out in a way that creates space between the torso and the arms. This gives the blazer a more “worn” rather than flat look.
4 - Arrange the sleeves and underarms
From here, style the sleeves and underarms so they are level and there are no visible creases. You also don’t want any of the blazer’s material to bunch up around the underarms. This is the area that will give the most depth to your shots and help to completely round out the apparel.
5 - Lights, Camera, Action!
And just like that, now you can photograph the blazer on the ghost mannequin. Move to the PhotoRobot control station, and begin the process.
Here, capturing your images takes no time, and the process becomes routine on any torso.
- Take photos of given angles (here using predefined positions).
- Separate the background on all images.
- Retouch the pole of the torso using manual or automated Chromakey retouch.
- Set the lighting to the product for consistent exposure, shadows, and contrast.
- Start the sequence to create and deliver ready-made images to the client or to publish directly online.
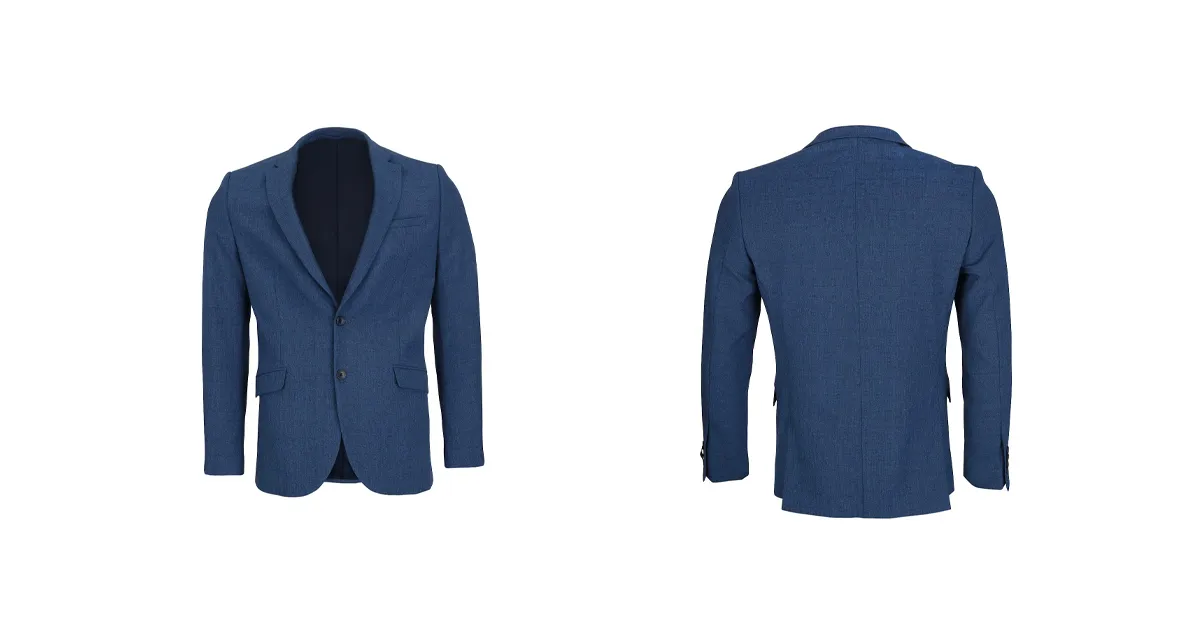
Judge the final product images for yourself
For more product photography tutorials, videos, and resources
If you found this fashion photography tutorial useful, make sure to follow our channels on the Web and YouTube. We share a wide range of product photography tutorials, blog posts, and videos showcasing the versatility of PhotoRobot. Master the ghost mannequin effect on blazers, dresses, suits and other apparel, and discover more PhotoRobot solutions for your brand.


