Fashion Photography of Denim Jeans on a Ghost Mannequin
Navigate this fashion product photography tutorial for instructions on how to photograph jeans on a ghost mannequin with PhotoRobot.
How to Photograph Denim Jeans on a Ghost Mannequin
This tutorial shows how to photograph a pair of jeans on a ghost mannequin. With removable pieces, these special mannequins allow you to photograph clothes as if an invisible person is wearing them. Some also call this a 3D “hollow man” or “invisible mannequin” effect.
Ghost mannequin photography is highly effective at presenting the style, cut, and fit of different types of jeans. It also looks much better online than traditional flat lay photography, which often leaves clothing looking flat and lifeless.
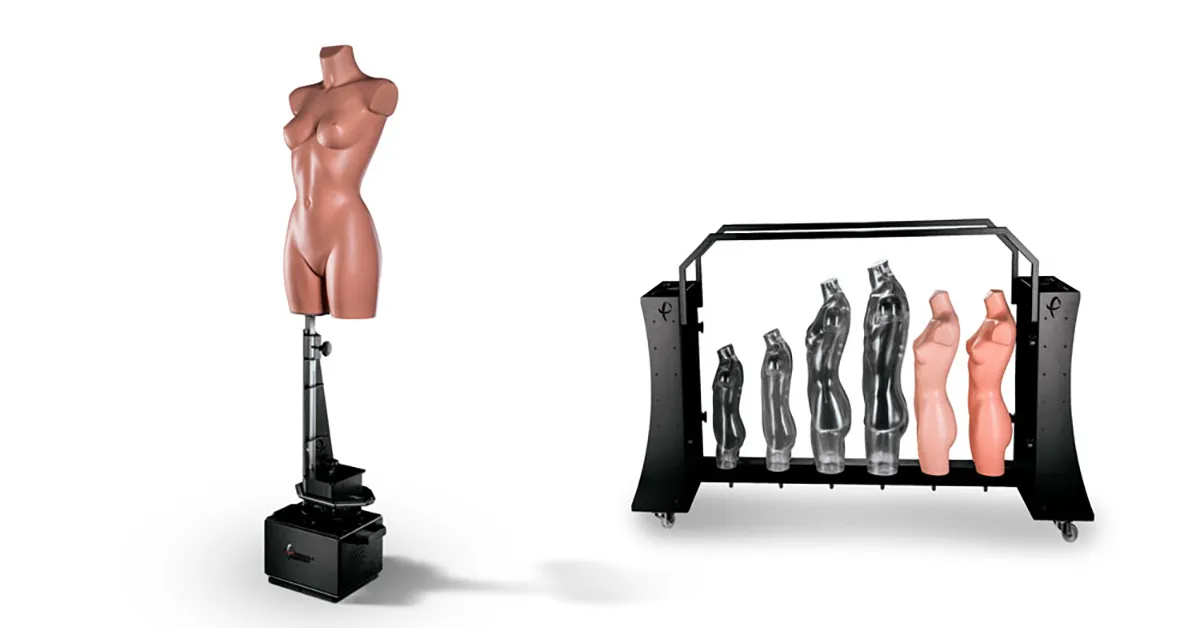
To create the ghost mannequin effect with PhotoRobot, we use the_Cube, a mannequin, and PhotoRobot_Controls for editing and automation. This setup, with its system for quick mannequin exchange, enables us to photograph a long line of apparel in a single session.
Why not see the photoshoot for yourself? Continue reading for a complete guide on the process. We share how to photograph jeans on a ghost mannequin, including what cameras, lighting, and equipment to use.
Necessary Equipment and PhotoRobot Editing Software
The star of our setup for ghost mannequin photography with PhotoRobot is the Cube. This robot can quickly transform into a rotating mannequin, and it includes a system for quick mannequin exchange. The design aims to streamline workflow, no matter the volume.
Install the Cube either to operate from the bottom of the workstation, or suspend the device above it. We can also fix the mannequin legs onto the Cube right-side-up or upside-down, depending on how we need to photograph the jeans.
Meanwhile, our photo editing software drastically reduces post production times and time-to-web. Create and automate style guides, and discover Chromakey for automatic pole removal, compositing photos, and creating the ghost mannequin effect.
Additional Photography Equipment
Also for this photoshoot, you need the following photography equipment in the studio.
- Camera - Both DSLR and mirrorless Canon cameras are supported by our systems, with high-end models always recommended for professional results.
- Studio lighting - For lighting, we combine strobe lighting and LED panels to achieve the ideal exposure, shadows, and contrast from all angles.
- Ghost mannequin legs - For jeans, we only need the legs of the mannequin. If you want, you can also use multiple mannequins, each of which can be quickly exchanged on and off of the_Cube. This way we can photograph and style mannequins simultaneously for higher volume photoshoots.
- A pair of denim jeans - Today, we’re photographing a staple fashion product, classic denim jeans. For other styles and types of trousers, the process will be the same.
- Styling accessories and tools - We also have pins and clips, double-sided tape, and tissue paper to style the jeans onto the mannequin.
How to Style Jeans on a Ghost Mannequin
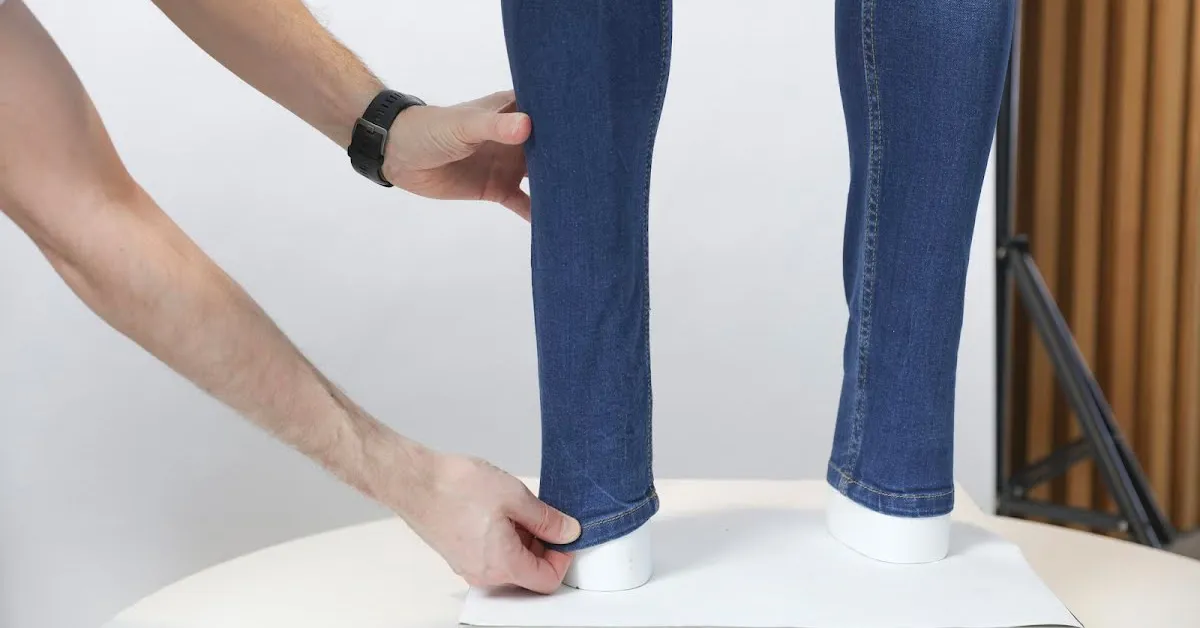
1 - Put the jeans onto the mannequin legs
First, with the_Cube set up, we’ll be working only with the legs of our mannequin. Dress the mannequin by pulling the jeans up over the waistline, ensuring the inner-lining is visible.This way the inside of the waistband shows in photos.
Here, we also need to style the waistband, legs, and crotch to neatly fit our mannequin. Fasten up the zipper or buttons, and shift the fabric until it looks straight and symmetrical.

2 - Use tissue paper and styling clips to style the jeans
Now, to start filling out the jeans as if an invisible model is wearing them, use styling clips and tissue paper. At first, we want the jeans to have a nice “rounded” look from the front view.
Use clips on the backside of the jeans to give them a tight fit on the mannequin. Tissue paper is then useful for filling out flat areas and hiding creases. Simply pad the inside of the jeans in areas where you need to fill out.
Later, after photographing the front of the jeans, you’ll do the same but you need to style the mannequin in reverse position.

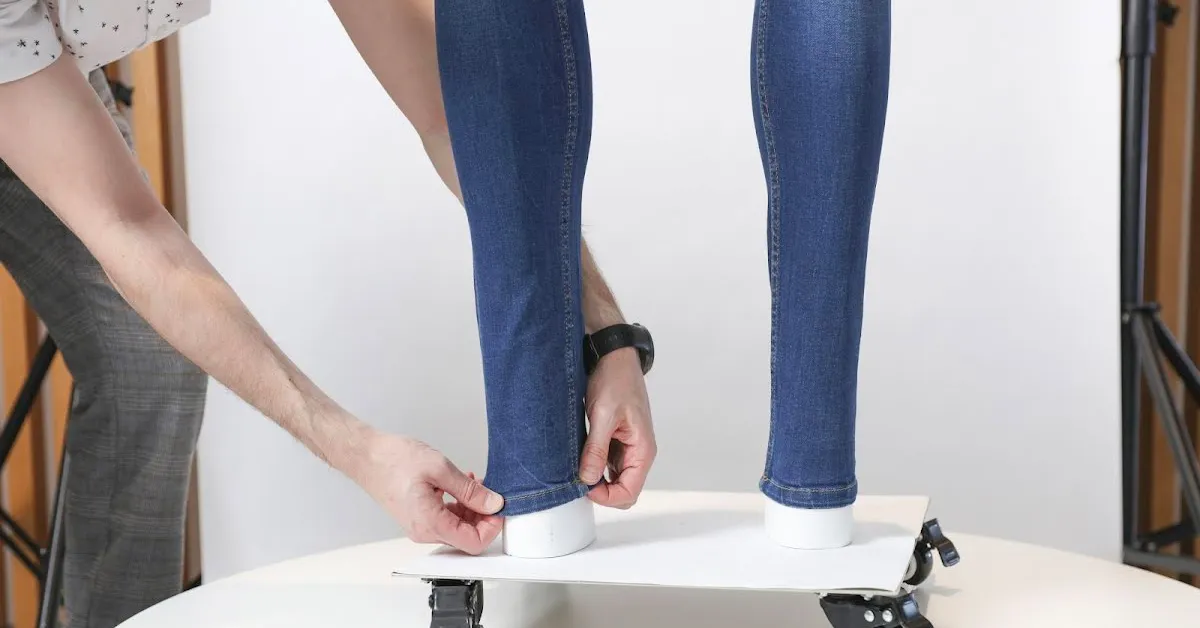
3 - Tape any parts of the denim you need to stay in place
Next, for areas of the jeans that don’t perfectly fit the mannequin, double-sided tape is the solution. Use the tape to fasten the waistline to the mannequin, ensuring there is no visible space between.
Also, check there are no awkward bends down the front of the legs. If there are, again use tape to create a more round and even look. Tape the legs to the mannequin in areas that show off the cut of the jeans - straight, slim, boot-fit, etc.
4 - Showcase features and the hems of the jeans
Moving on, the next step involves showcasing the details that make your jeans appealing and unique. Shoppers of your online fashion store want to visualize themselves wearing the jeans. They also need to be able to trust the quality of the fabric.
To help them better visualize the product, turn attention to emphasizing the style of the jeans. If they’re flare out jeans, use lighting over creases and the flare to add more effect.
You might even consider flipping up the hems of the jeans, giving them a more “in” and casual style. To do this, again use tape to stick the flipped-up hems to the legs, making sure both hems are even for the photoshoot.
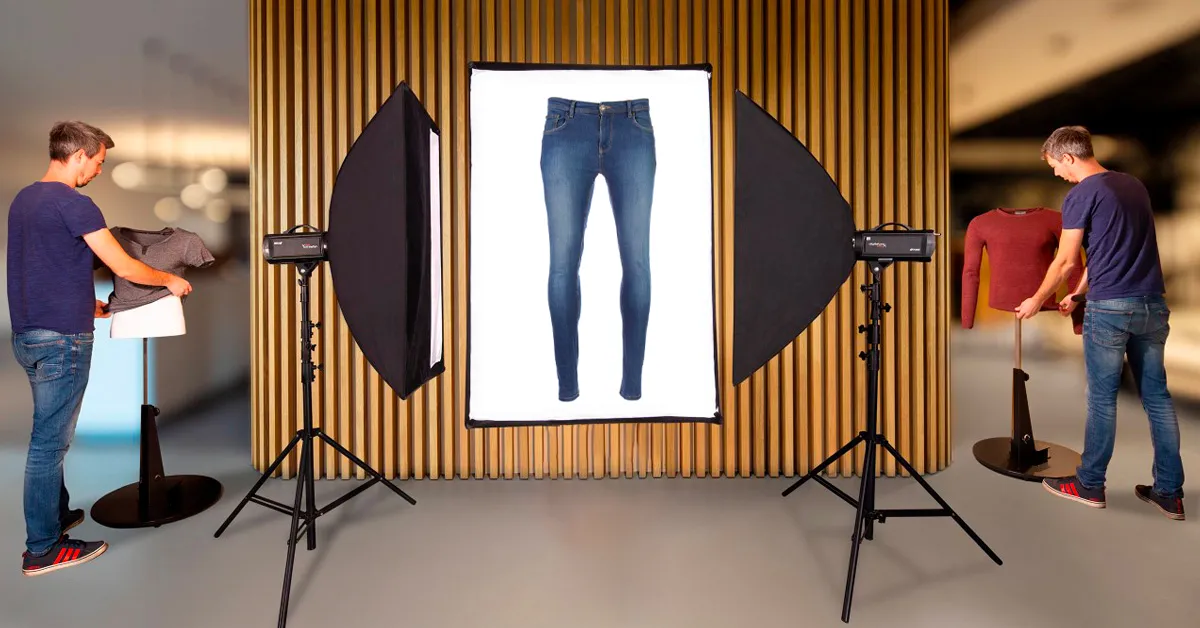
5 - Take photos of the frontside of the jeans
Now, we’re ready to photograph jeans with a ghost mannequin effect, starting first with the frontside of the apparel. This final step takes no time, and the process then becomes routine for the backside of the jeans.
- Take photos of given angles (here using predefined positions).
- Separate the background on all images.
- Retouch the pole of the torso using manual or automated Chromakey retouch.
- Set the lighting to the product for consistent exposure, shadows, and contrast.
- Control the process to capture images and deliver ready-made images to the client or to publish directly online.
6 - Repeat the process to photograph the backside
Finally, visitors of your webshop will want to also see the back of the jeans. Capturing the ghost mannequin effect here will be the same as on the front, but on the opposite side.
Use clips on the front rather than back, and again stuff areas with tissue paper and use tape to style the mannequin. Style neat and symmetrically as before, and use PhotoRobot_Controls to complete the process.

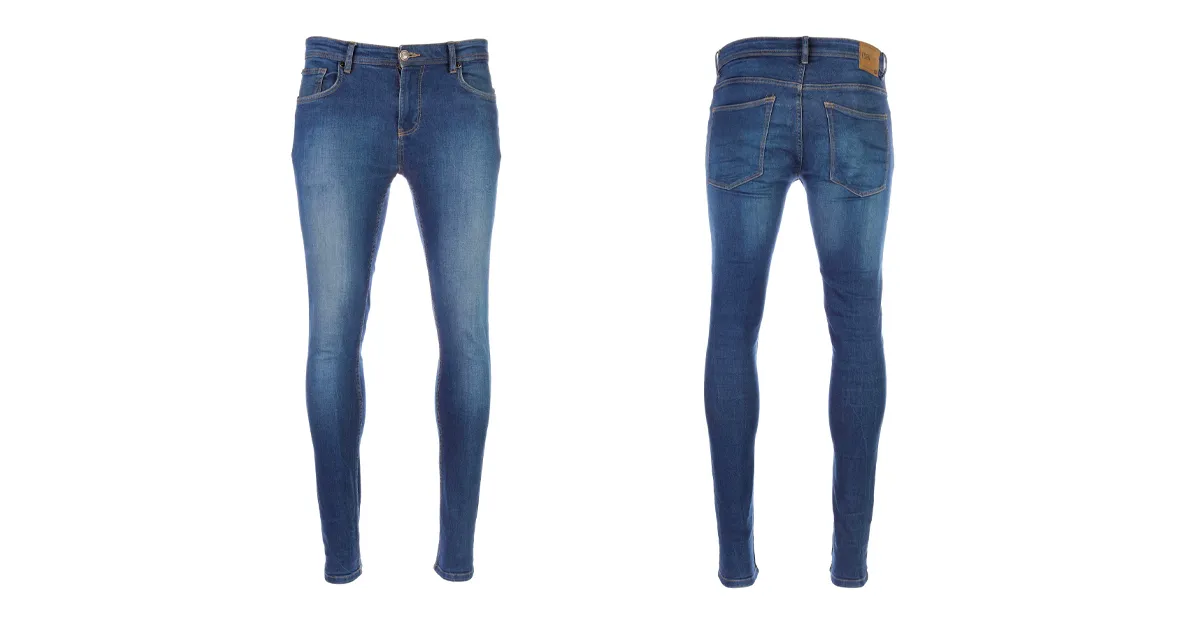
Our ghost mannequin effect denim jeans
For the latest product photography tutorials and resources
Don’t miss out and sign up for our Product Photography Newsletter below. Also follow us on Facebook, LinkedIn, and YouTube for the latest tutorials, blogs, and videos showcasing our photo studio solutions. Whether it’s how to photograph jeans on a ghost mannequin or photographing other apparel and products, PhotoRobot handles everything.


