PhotoRobot Support - Camera Configuration
In order for the camera to properly communicate with PhotoRobot Controls App, further referred to as CAPP, it is necessary to configure the camera accordingly.
Note: As PhotoRobot supports a variety of camera models, this manual describes only general settings.
Always ensure you are using a camera model from the PhotoRobot Compatible Camera List. These include recent DSLR and mirrorless Canon camera models. However, it is always advisable to contact PhotoRobot before purchasing a camera for your system.
Then, when starting camera configuration, close all other programs that connect to the camera, and follow the steps below.
General Camera Configuration
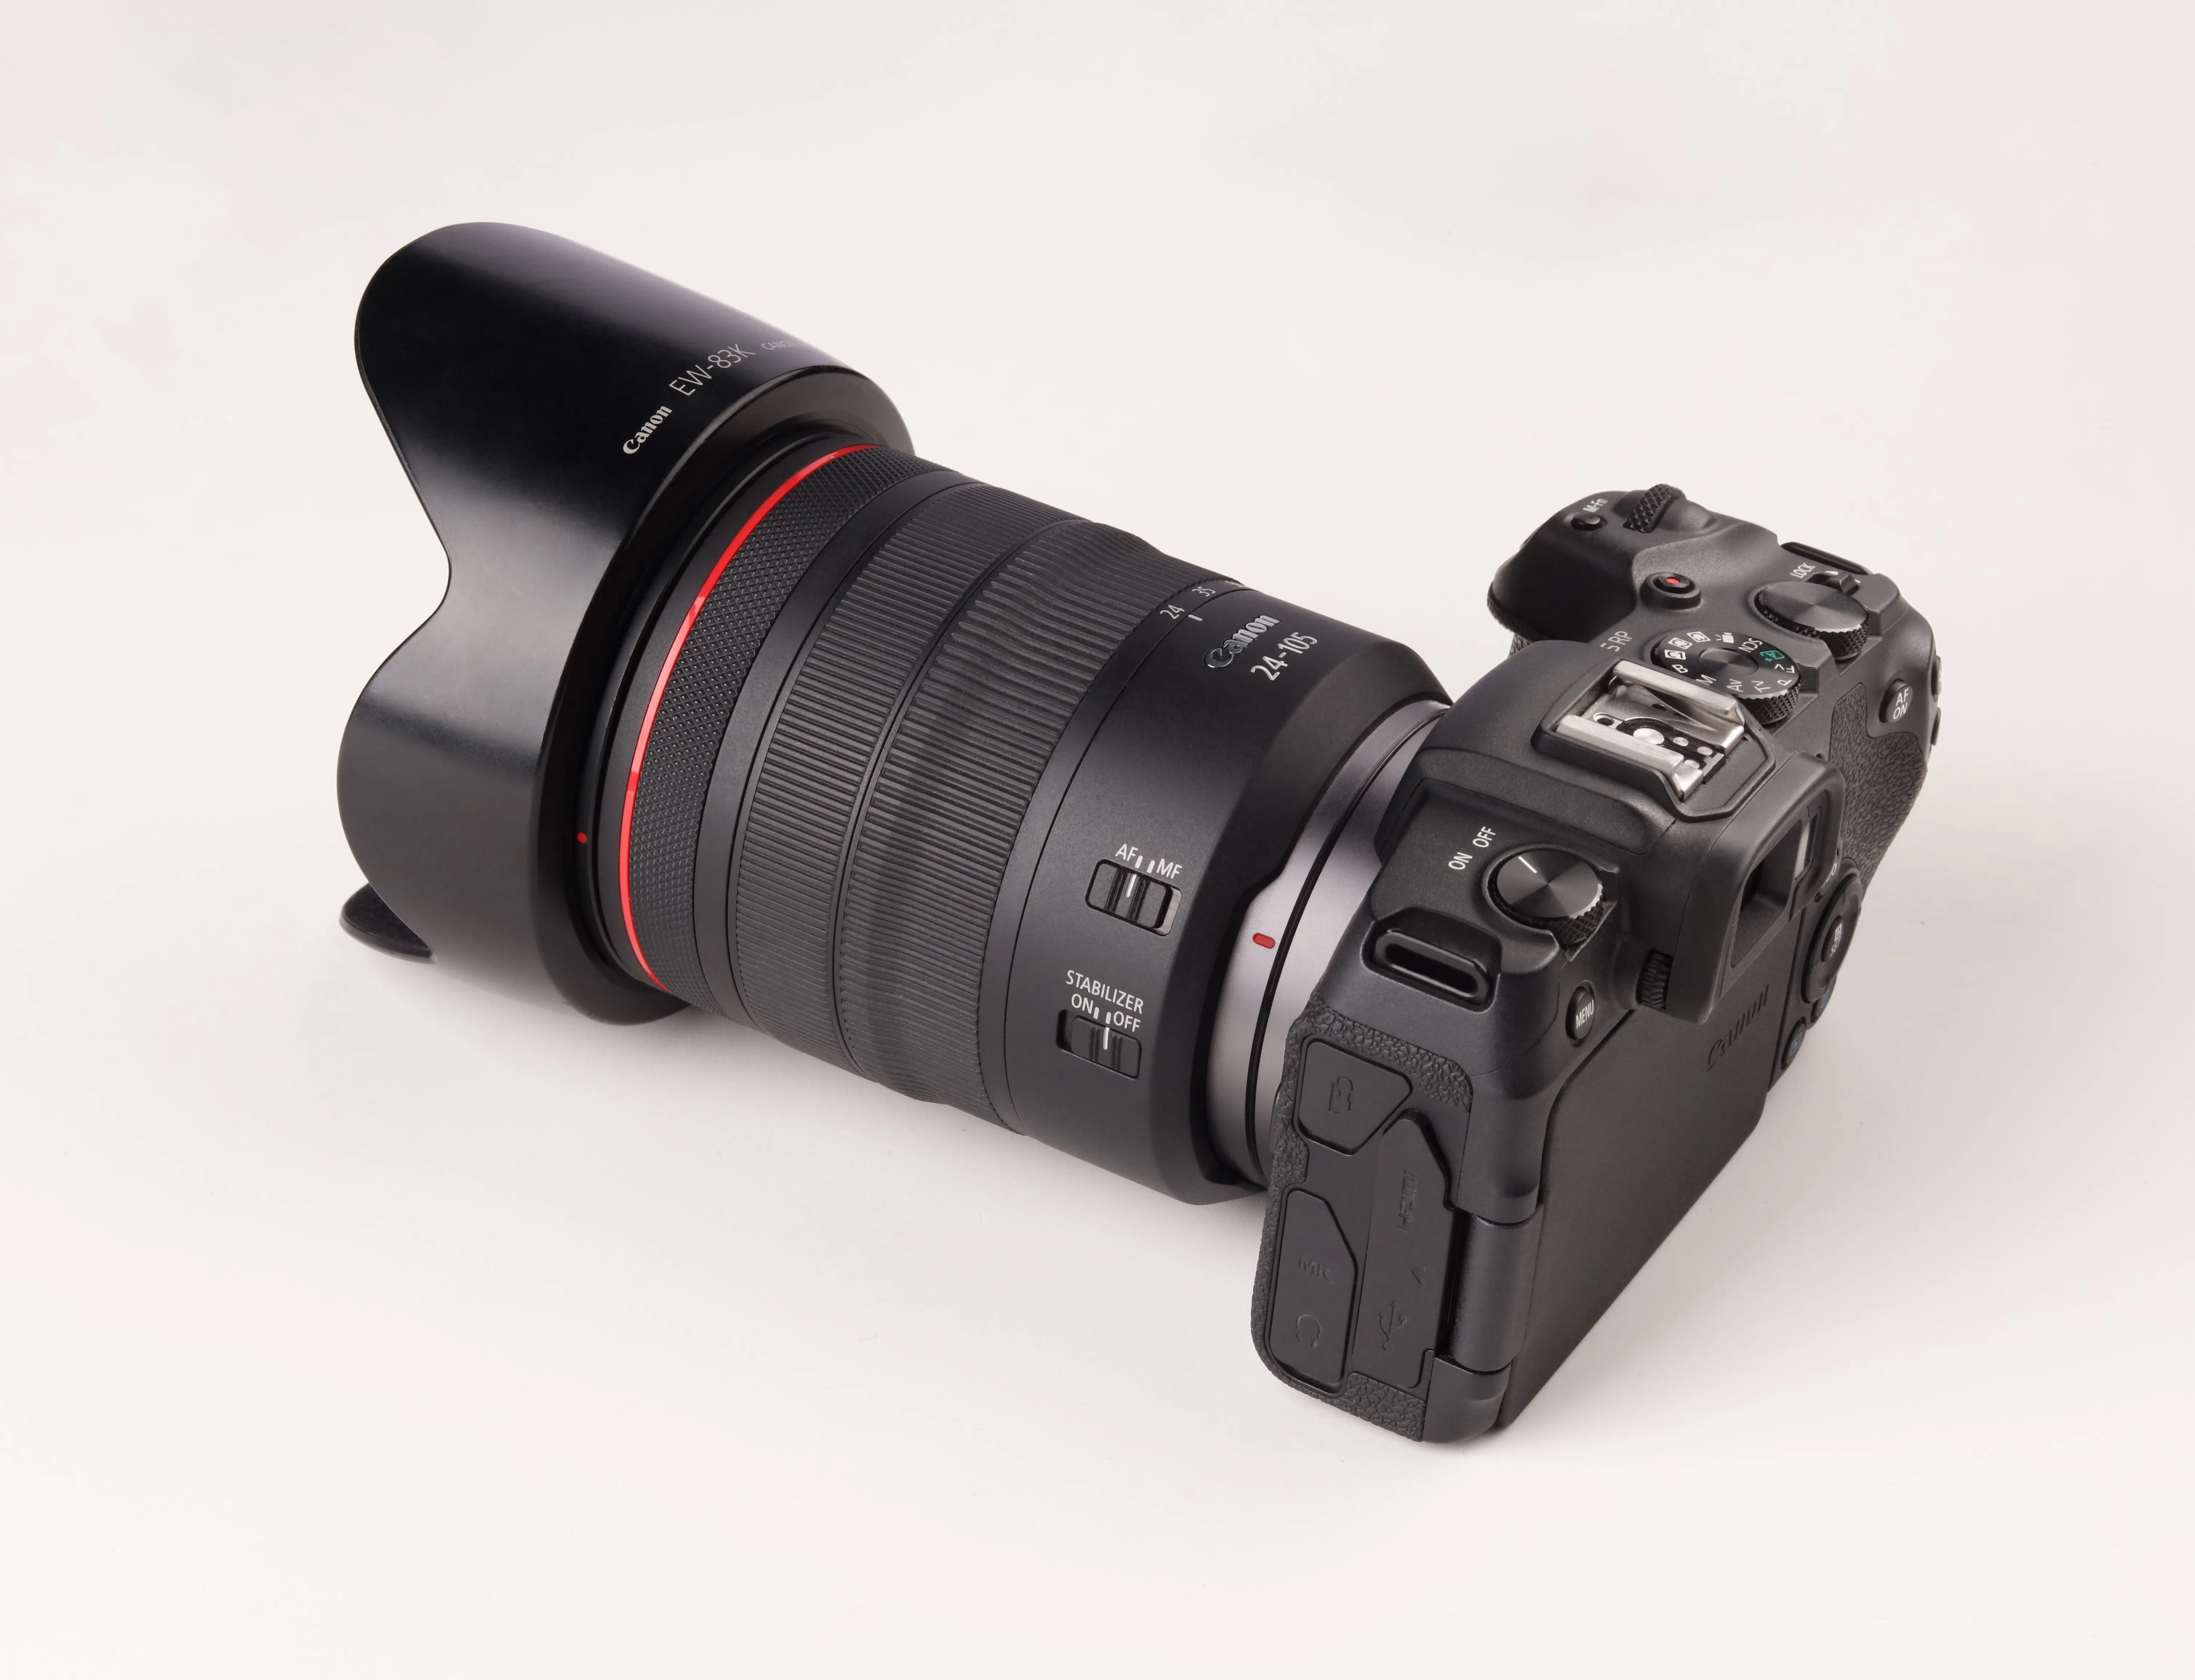
The following steps detail how to configure a Canon camera model to communicate with CAPP via USB. However, it also possible to connect a camera over WiFi to take photos by hand, and automatically add new frames (close-ups, detail shots) to the stills folder.
Connecting to the Computer
To add a camera to CAPP, first turn on the camera, and connect it via USB to the computer.
Requirements
1. Connect the camera directly to the USB port on the PC side.
2. Double-check the USB ports and USB cables are USB 3.0 compatible.
3. Use only USB cables that are shielded and meet the following parameters, depending on their length:
- For extension: Active USB extension cable (powered one) 5m or 10m
- For direct connection to the camera: up to 1m USB cable
Important: It is not recommended to connect cameras via a USB hub.
Power Supply
It is advisable to always power the camera via the adapter (the so-called ‘dummy battery’). This way, there is no constant worry about recharging the battery and replacing it during photoshoots.
The choice of power adapter also depends on the camera model. (Browse the Canon Store Power Adapters to find the right adapter for your device.)
Camera Settings
Next, before configuring camera settings, reset the camera. This helps to clear all camera settings and custom functions, even if the device is completely new.
Note: The X0D and X00D camera series only support some of the below parameters.
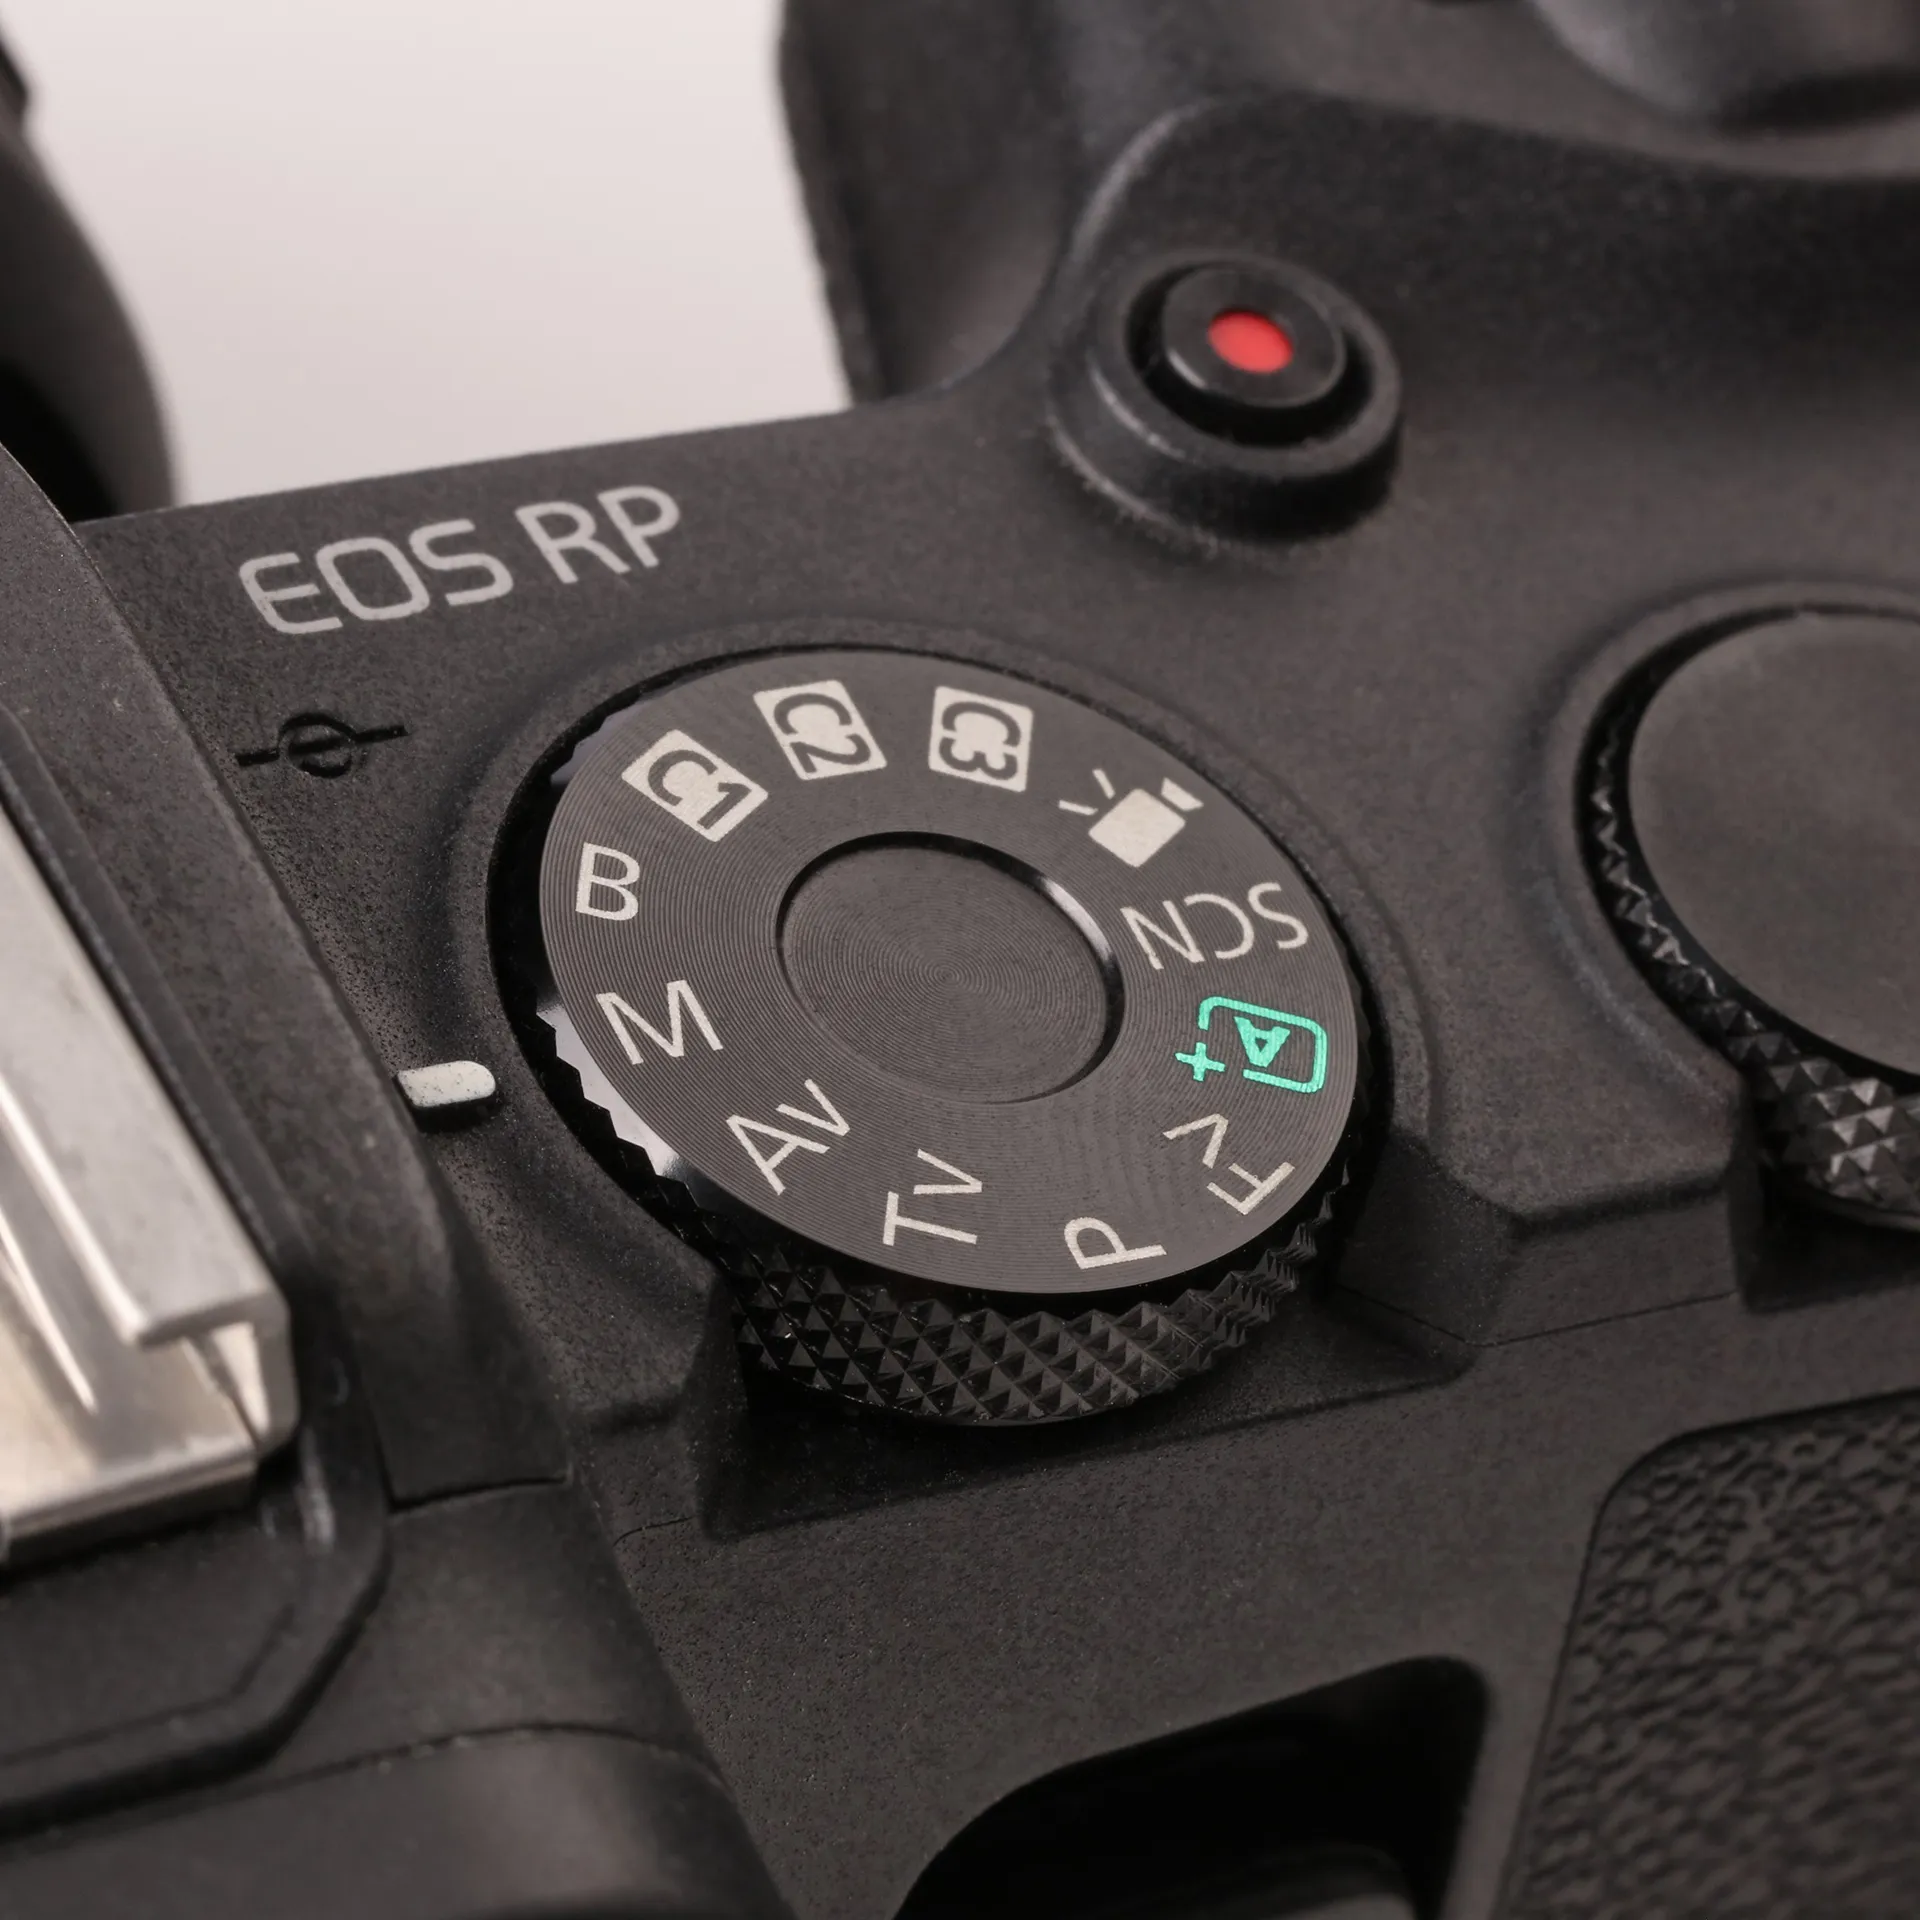
1. Set the upper dial to Manual mode.
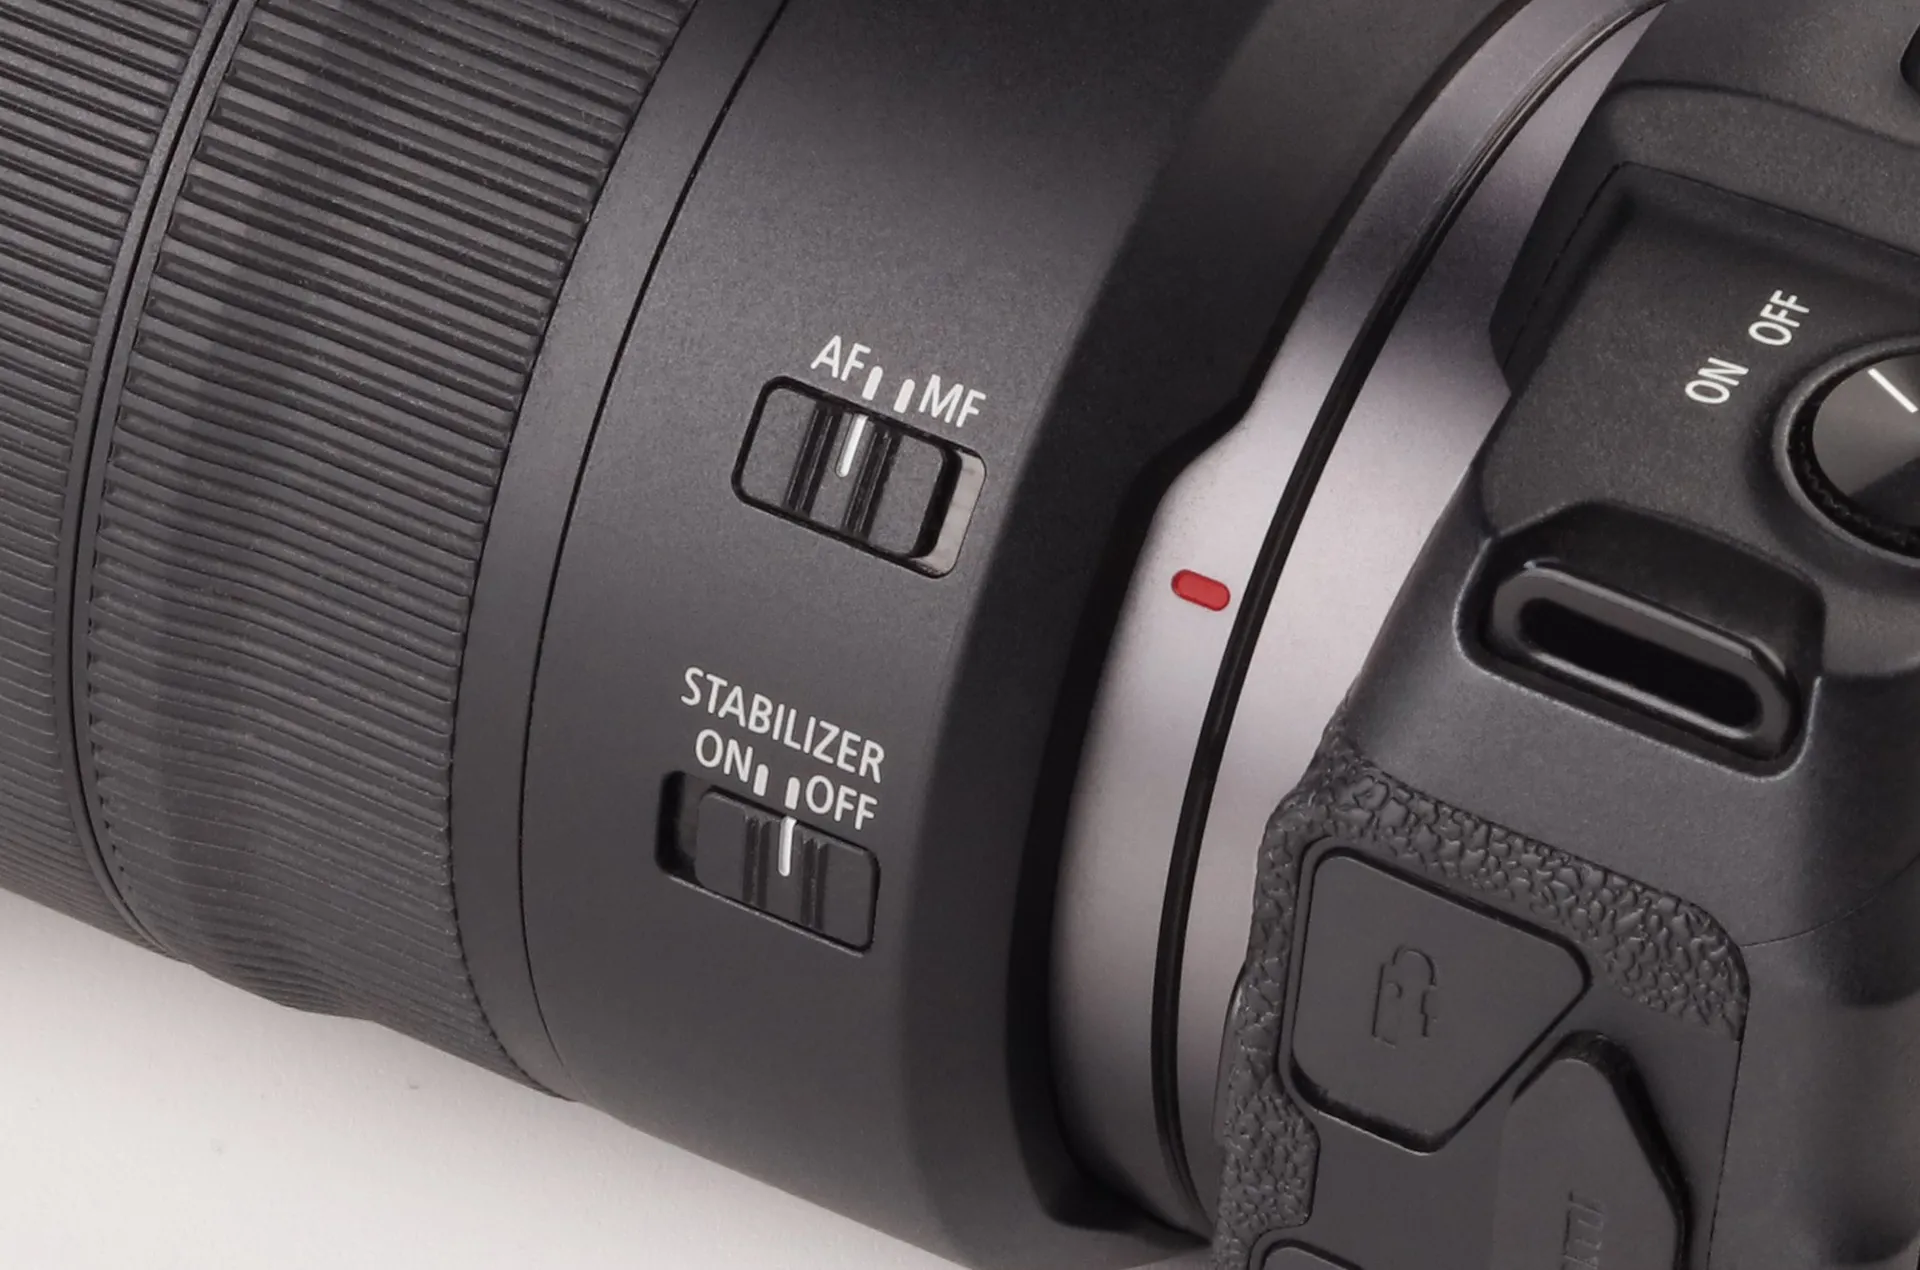
2. Set the camera lens to Autofocus mode. Note: Some Canon lenses have a Focus / Control switch. In this case, select the value Control. Then, turn the stabilizer to OFF on the lens.
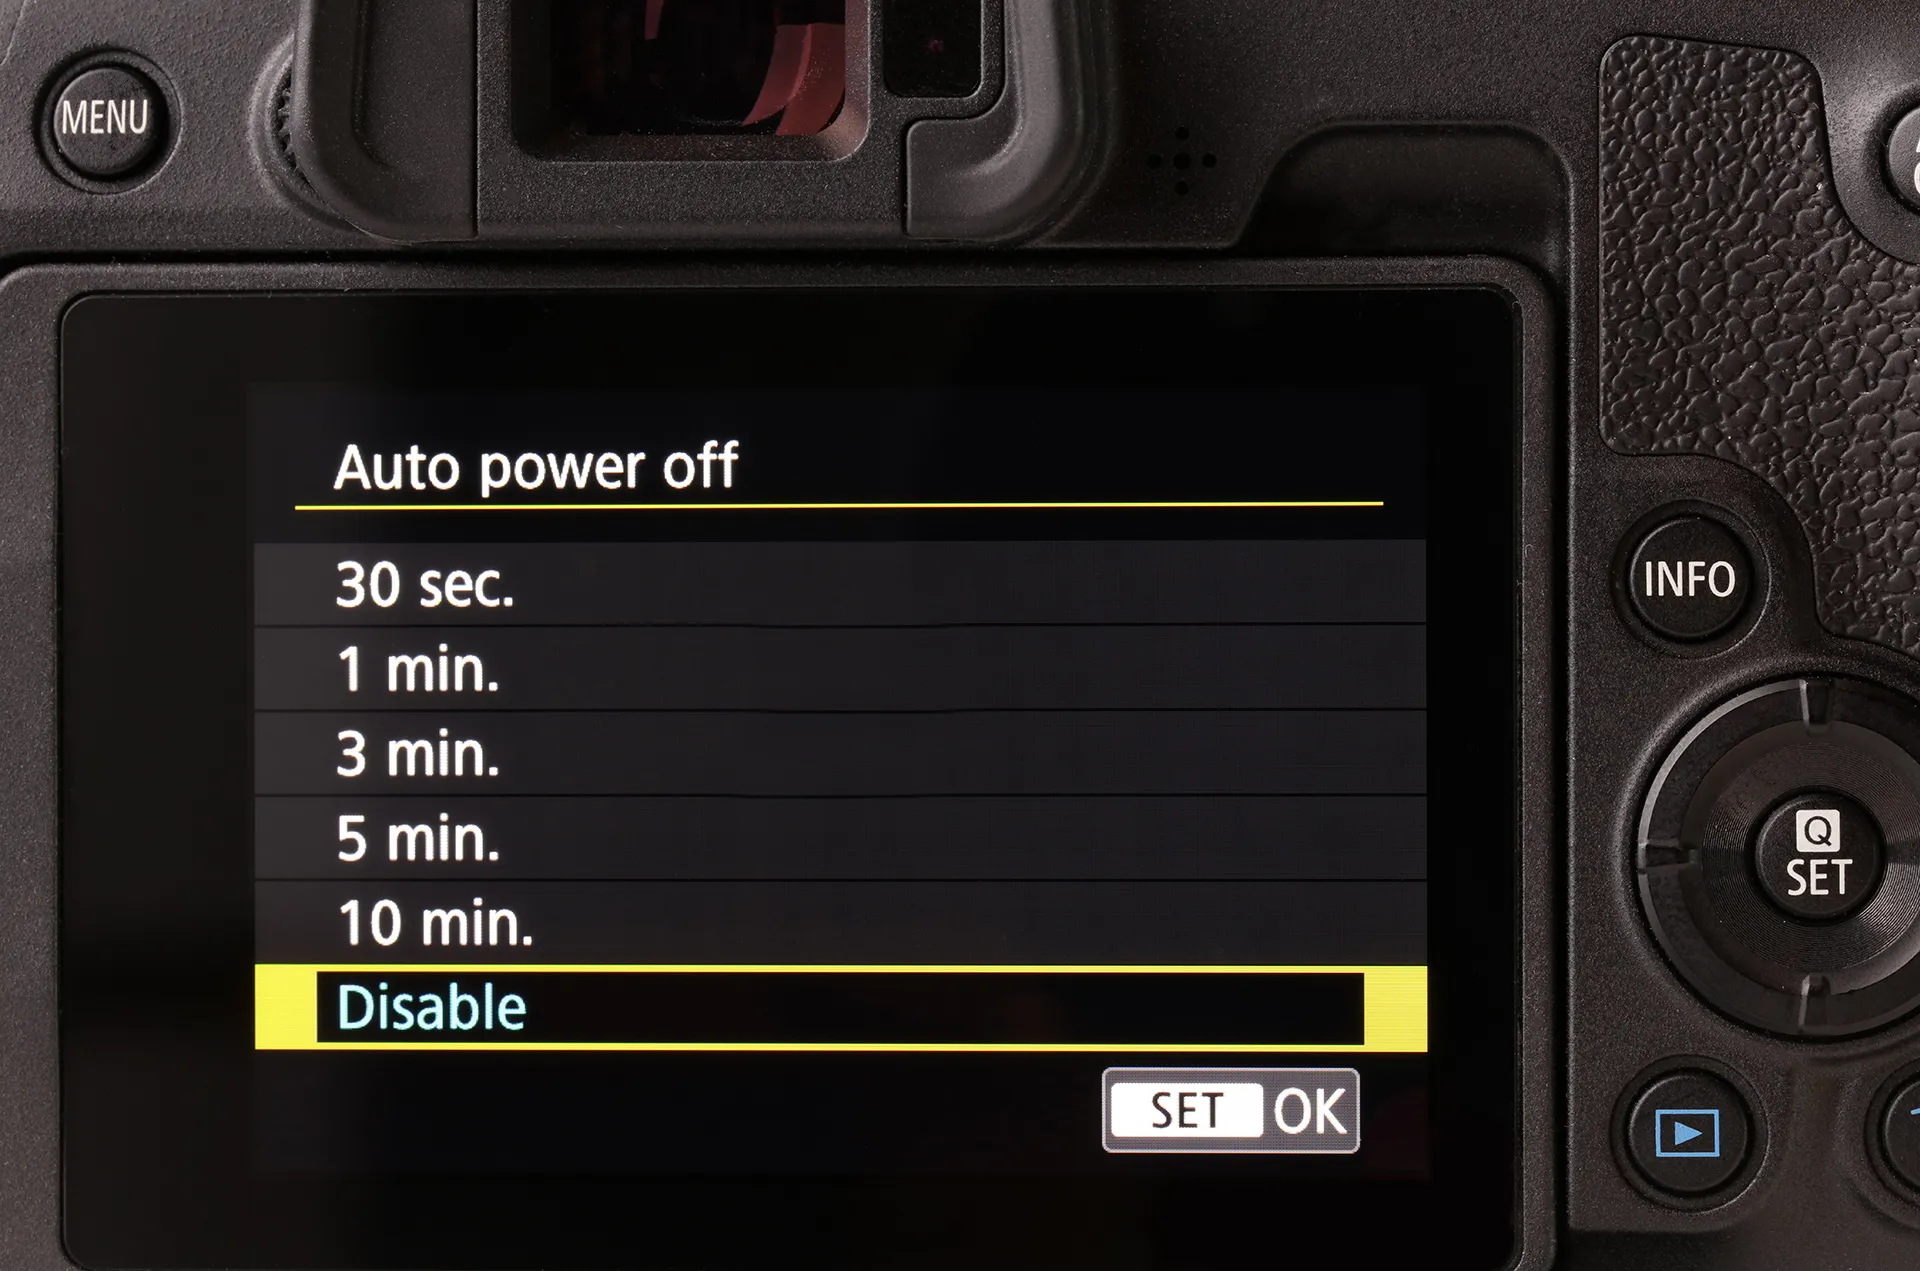
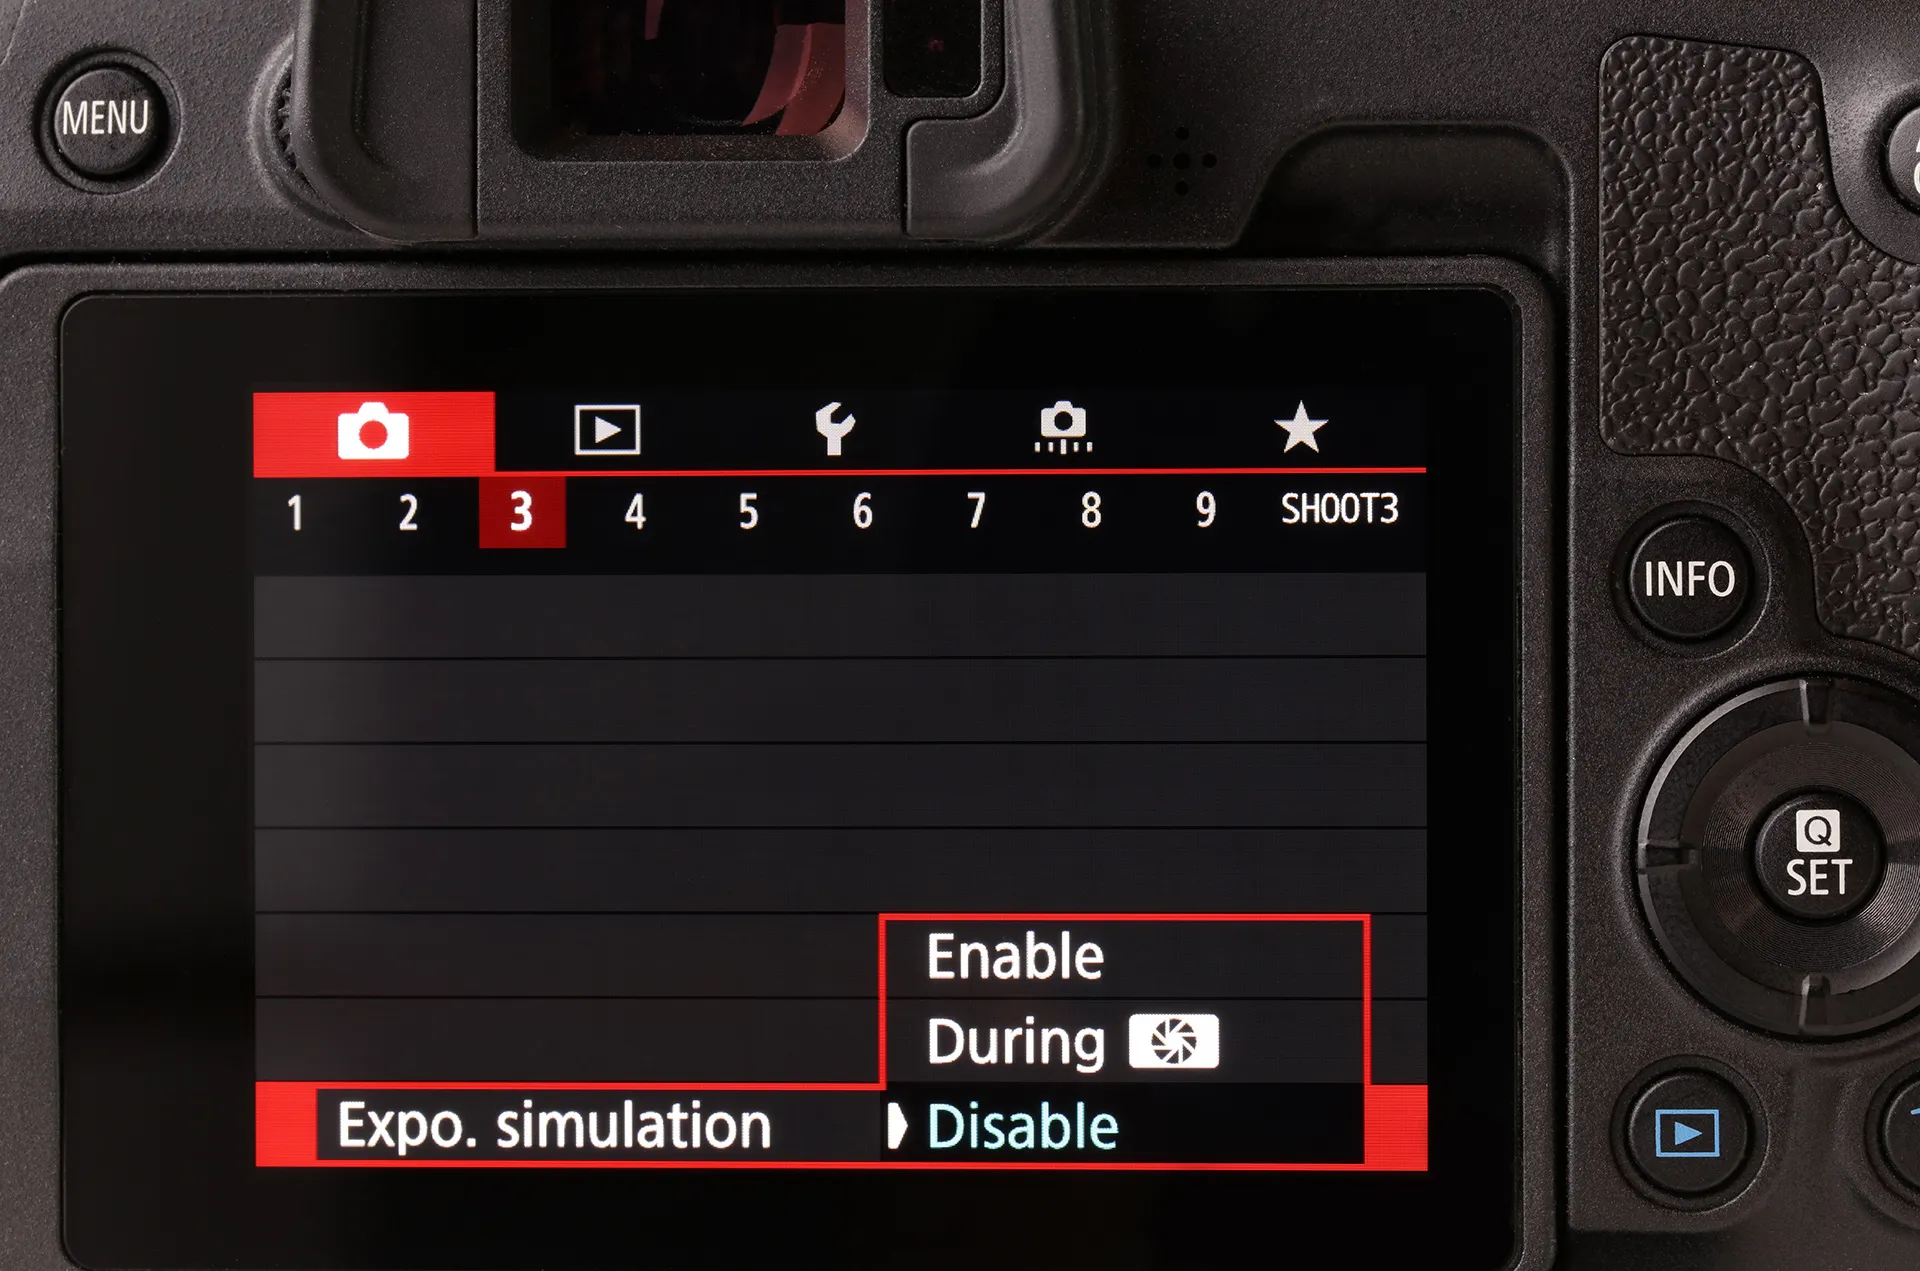
3. Set Auto power off to Disable.
4. Set Live view exposure simulation to Disable. Note: This function is not generally available, as only some supported cameras have it.
5. Set Custom controls to Shutter button half-press, and Metering and AF start.
Flash Settings
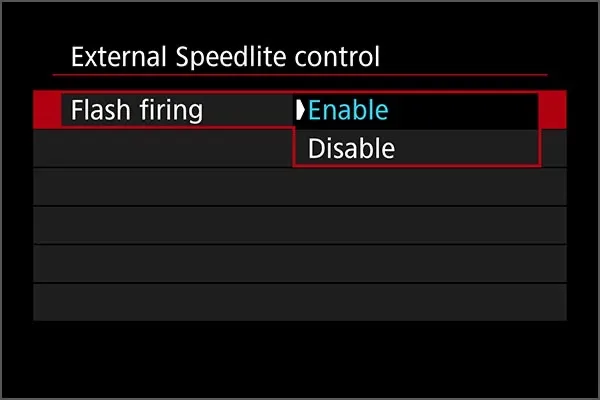
Some settings might prevent the camera from firing the flash when using either studio lights or a Speedlite. If the flash is not firing, check the following settings to ensure the proper triggering of the flash.
1. Enable Flash firing in External Speedlite control.
2. If using a DSLR with live view, check that live view is not preventing the flash from triggering. When set to Live View, some cameras may not fire a flash. However, if using Canon Speedlite or another dedicated flash, it might work. (Note: If using a camera tethered to EOS Utility and in Live View, EOS Utility also stops the flash from firing.)
3. For EOS-R series camera models, ensure you are not using Electronic Shutter mode. With the exception of EOS R3 models, Electronic shutter mode will prevent the flash from firing.

4. Turn off Silent shutter function if on. On some cameras, the silent shutter function enables the electronic shutter mode, preventing the firing of the flash.

Filming Video
Shooting video is the only case in which you must use a memory card in the camera.
Please leave the camera in Manual mode for this (see “General Camera Settings”, Step 1). The camera will then be switched to the correct mode automatically from PhotoRobot Controls software. To learn more about creating video in PhotoRobot Controls App, see the PhotoRobot How to Create Video User Manual.


EOS Rebel Series


EOS DSLR Series


EOS M Mirrorless Series


PowerShot Series


Close-Up / Handheld

The Canon EOS Rebel Series offers beginner-friendly DSLR cameras with solid image quality, intuitive controls, and versatile features. Ideal for photography enthusiasts, these cameras provide reliable autofocus, vari-angle touchscreens, and Full HD or 4K video recording.
Connection
Resolution (MP)
Resolution
The Canon EOS DSLR Series delivers high-quality images, fast autofocus, and versatility, making it ideal for both photography and video production.
Connection
Resolution (MP)
Resolution
The Canon EOS M Mirrorless Series combines compact design with DSLR-like performance. Featuring interchangeable lenses, fast autofocus, and high-quality image sensors, these cameras are great for travelers and content creators seeking portability without sacrificing image quality.
Connection
Resolution (MP)
Resolution
The Canon PowerShot Series offers compact, user-friendly cameras for casual shooters and enthusiasts. With models ranging from simple point-and-shoots to advanced zoom cameras, they provide convenience, solid image quality, and features like image stabilization and 4K video.
Connection
Resolution (MP)
Resolution
The Canon Close-Up & Handheld Cameras are designed for detailed, up-close photography and video. Compact and easy to use, they offer precision focus, high-resolution imaging, and versatile macro capabilities—perfect for vlogging, product photography, and creative close-ups.


