Setting up a PhotoRobot Workspace
The following user manual describes the steps to setting up a Workspace in PhotoRobot Controls App (further just “CAPP”). A workspace is a list of hardware that will be used for a specific photoshoot. It can include various PhotoRobot modules, cameras, lights, and other accessories.
Note: If you have not already installed and familiarized yourself with CAPP, refer to PhotoRobot Getting Started for an overview of the software, its configuration and its use. The information in this user manual aims to support customers who have already attained a general understanding of the software.
Also, for demo purposes, note that it is possible to work with a predefined Sample Workspace, which is configured to use virtual hardware. A sample workspace enables users to experiment with various features in CAPP by selecting virtual robots and cameras.
To create a workspace, go to Workspaces in CAPP, and then tap the create (+) button.
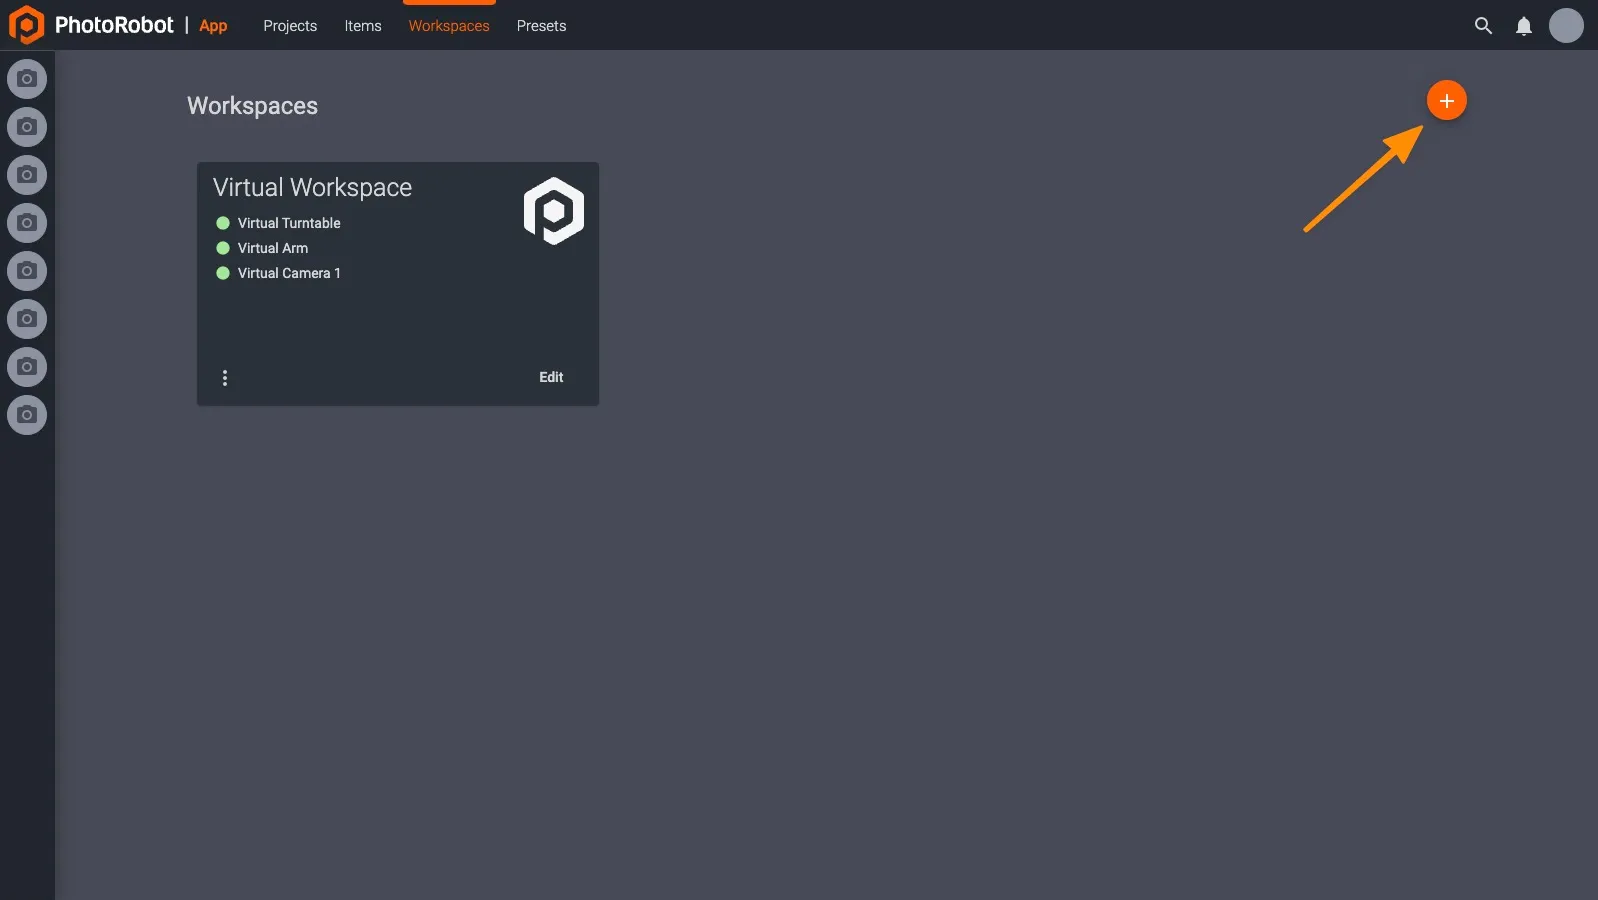
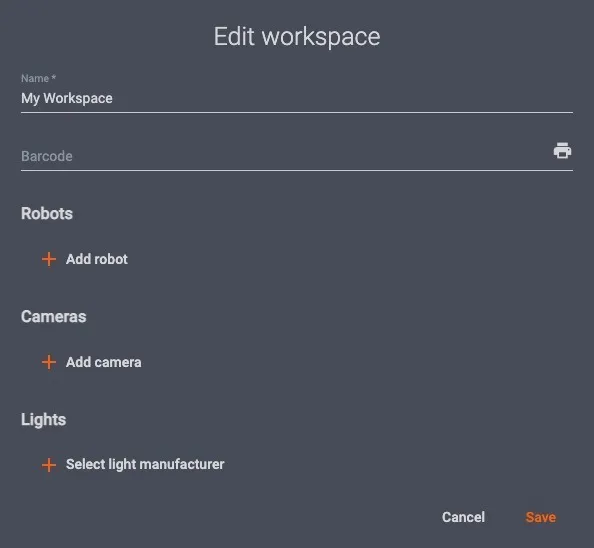
Pressing the create button will open the Edit workspace menu where it is possible to Add robot, Add camera, and Select light manufacturer.
Be aware that after connecting a piece of hardware (or camera) to a workspace, you can immediately see whether it is online (recognized by CAPP). To do this, check the color of the dot to the left of the name of the given piece of equipment. If the device is recognized, there will be a green dot.
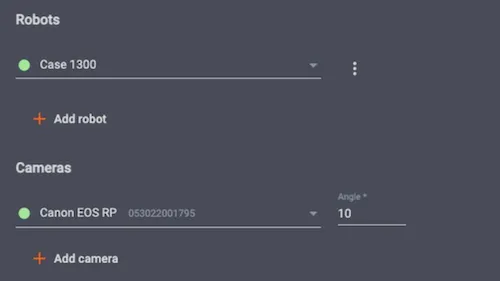
Alternatively, a gray dot signals that the hardware was not recognized, or it is not turned on. If there is a red dot, there is an error, such as the user not switching the camera into manual mode. To identify the cause of the error, hover the mouse over the red dot to display a tooltip with a description of the error occurring.
For common issues and their solutions, please refer to the Troubleshooting PhotoRobot Manual.
Add Robot
In the next step, ensure all robots for the photoshoot are turned on and connected to the same local area network as your computer. Then press Add robot.
- Press Add robot to see a list of available robots.
- Select the robots you will use from the list.
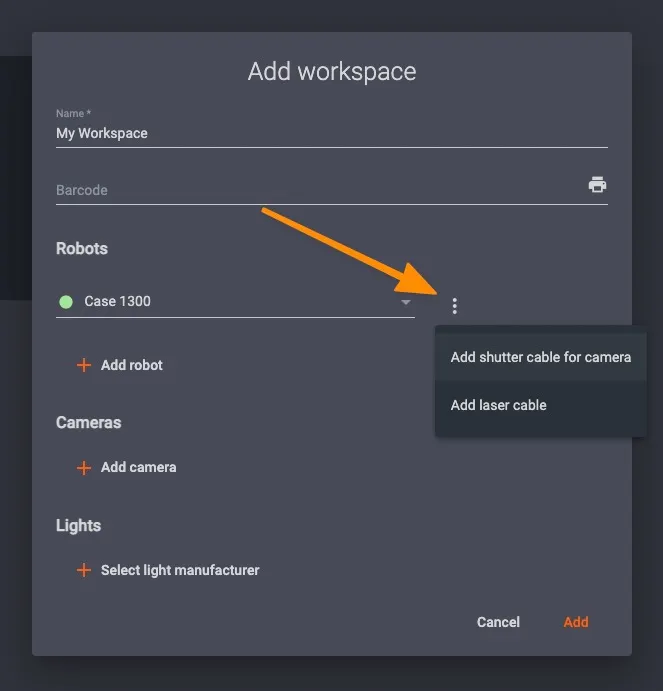
Configure Fast-Shot
To activate Fast-shot mode, connect any robots with a camera via a shutter cable.
- Click the Three vertical dots to the right of the robot to open the camera menu.
- Select Add shutter cable for camera.
- Choose Output slot (1 or 2). Select which output slot based on the physical wiring of your shutter cable. For cables from PhotoRobot, use slot 2.
( ! ) - For other manufacturers, it might be necessary to use slot 1.

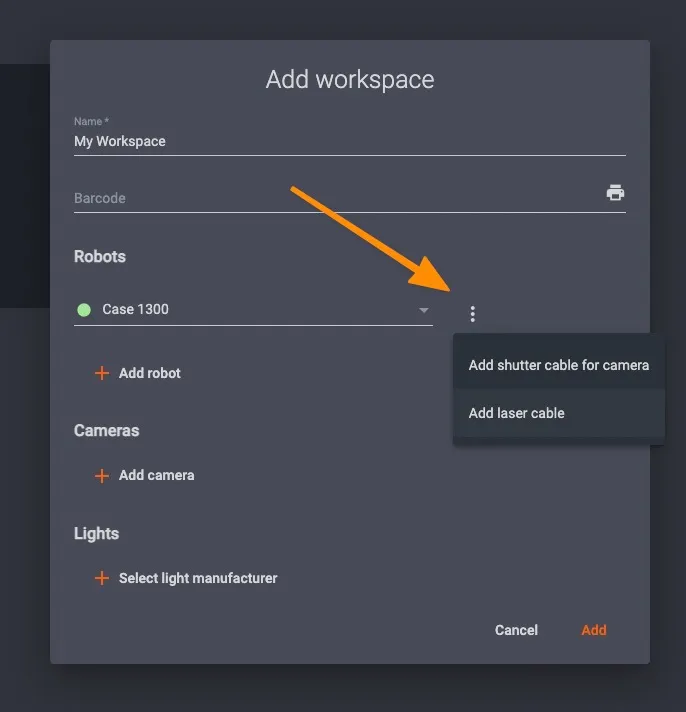
Configure Lasers
Depending on the hardware in use, there are several options to configure lasers:
For Built-in Lasers
Both the Case 850 and the 1300 have laser systems designed into the robot with zero configuration required.
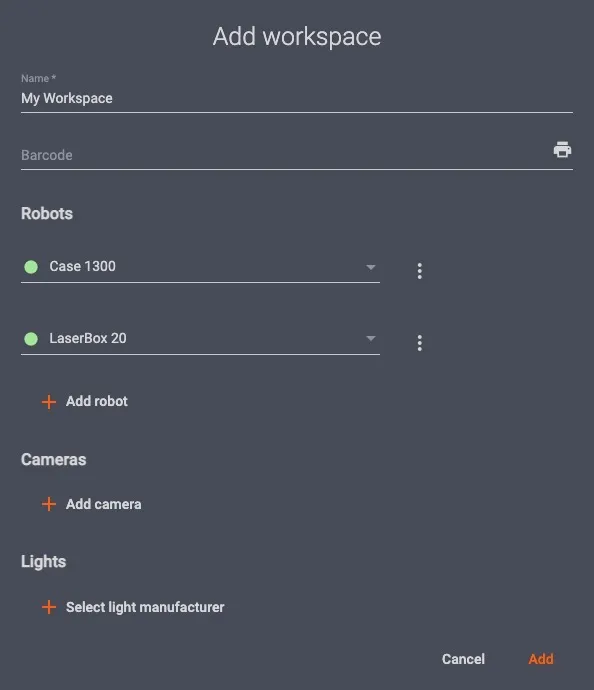
20-Port LaserBox
The 20-port LaserBox is a standalone device which enables control over multiple lasers via network connection. To configure the LaserBox, ensure first that it’s turned on, and then add it as another robot to the workspace:
4-Port LaserBox
If you have a 4-port LaserBox connected to your robot, select Add laser cable in the 3-dot menu items to the right of the robot’s ID:
Add Cameras
To add a camera, first ensure the device is turned on and connected via USB to the computer. If you are not using a robot with swing capability (e.g. the Robotic Arm or the Frame), you will also need to set the angle at which the camera will target the table.
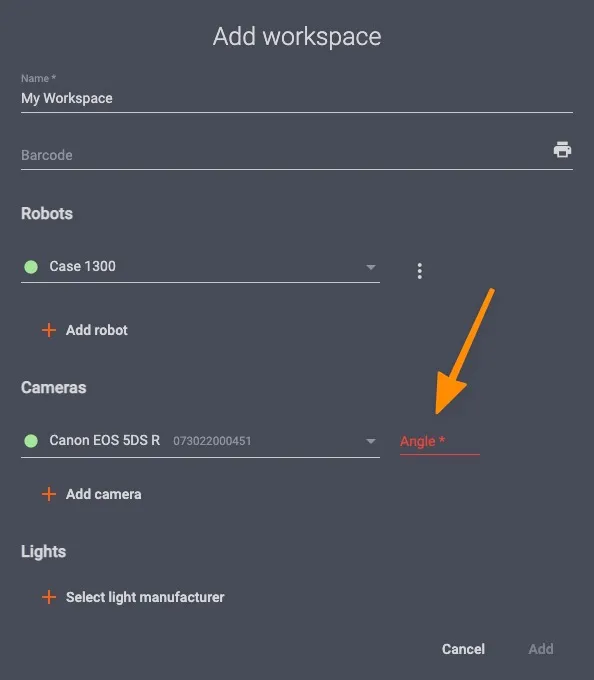
( ! ) - Setting the angle for robots without swing capability is necessary for certain features such as auto-centering to operate.
( * ) - See the complete list of PhotoRobot compatible cameras.
Configure Lights
Light systems compatible with PhotoRobot include two types of lights: strobe lights from FOMEI and Broncolor, or any LED lights with DMX support. To configure a lighting setup in the workspace menu, go to Lights and add compatible lights in Select light manufacturer.
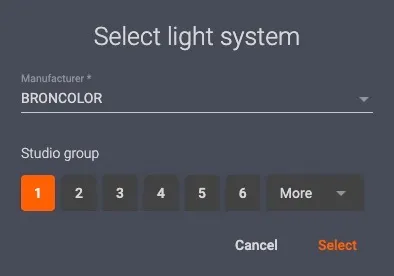
Strobe Lights - Broncolor
To set up Broncolor lights, select first BRONCOLOR, and then choose from the Studio group of lights you want control over:
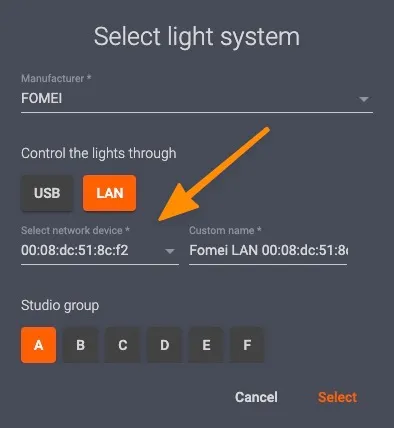
Strobe Lights - FOMEI
For lights by FOMEI, users have two control options:
FOMEI LAN Transceiver (preferred method)
For control over lights via FOMEI LAN Transceiver, ensure first that it is online and connected to your network.
Next, select LAN. Then, below LAN in the dropdown menu, select Fomei LAN Transceiver.
FOMEI USB Dongle (Legacy)
It is also possible to control lights with FOMEI’s WiFi dongle connected directly to your computer via USB.
( ! ) Be aware that this method is no longer recommended. This is due to the fact it requires additional drivers to be installed on your computer. FOMEI also no longer supports newer MacOS systems.
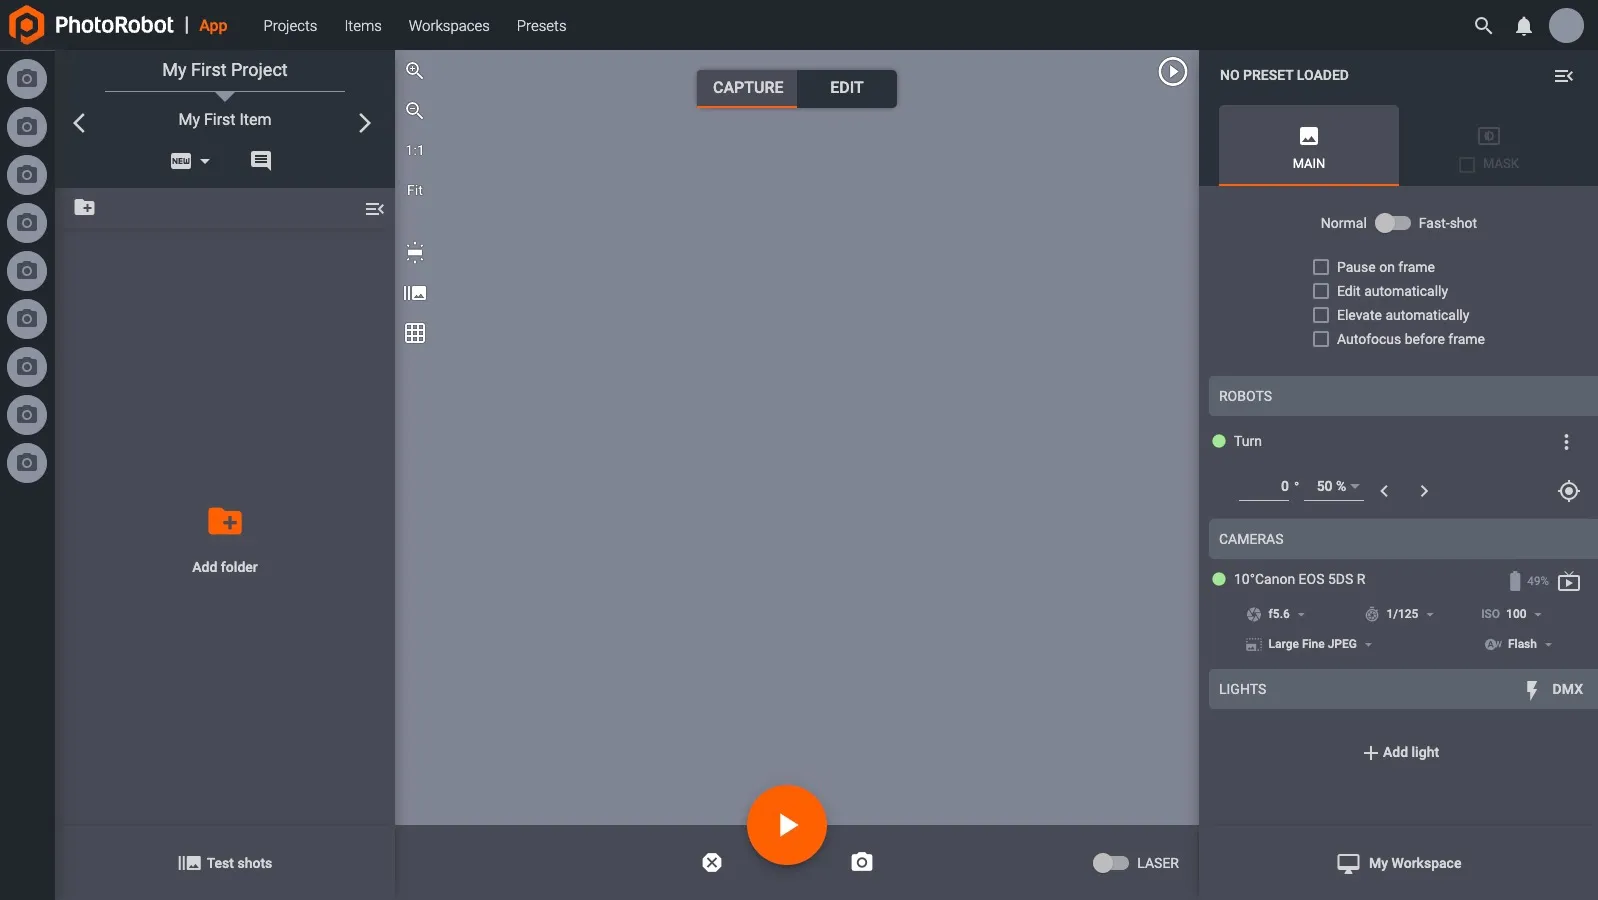
LED Lights - DMX
To control any LED lights compatible with DMX protocol, connect the lights via an RJ45 or USB cable to the robot.
You can then select Light manufacturer DMX.
Later, you will create an individual light at the Capture screen:
For each light, you can configure two channels:
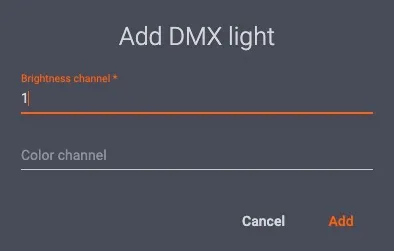
- The Brightness channel enables control over the selected light’s level of brightness.
- The Color channel is supported by some lights and enables adjustment of color levels.


EOS Rebel Series


EOS DSLR Series


EOS M Mirrorless Series


PowerShot Series


Close-Up / Handheld

The Canon EOS Rebel Series offers beginner-friendly DSLR cameras with solid image quality, intuitive controls, and versatile features. Ideal for photography enthusiasts, these cameras provide reliable autofocus, vari-angle touchscreens, and Full HD or 4K video recording.
Connection
Resolution (MP)
Resolution
The Canon EOS DSLR Series delivers high-quality images, fast autofocus, and versatility, making it ideal for both photography and video production.
Connection
Resolution (MP)
Resolution
The Canon EOS M Mirrorless Series combines compact design with DSLR-like performance. Featuring interchangeable lenses, fast autofocus, and high-quality image sensors, these cameras are great for travelers and content creators seeking portability without sacrificing image quality.
Connection
Resolution (MP)
Resolution
The Canon PowerShot Series offers compact, user-friendly cameras for casual shooters and enthusiasts. With models ranging from simple point-and-shoots to advanced zoom cameras, they provide convenience, solid image quality, and features like image stabilization and 4K video.
Connection
Resolution (MP)
Resolution
The Canon Close-Up & Handheld Cameras are designed for detailed, up-close photography and video. Compact and easy to use, they offer precision focus, high-resolution imaging, and versatile macro capabilities—perfect for vlogging, product photography, and creative close-ups.


