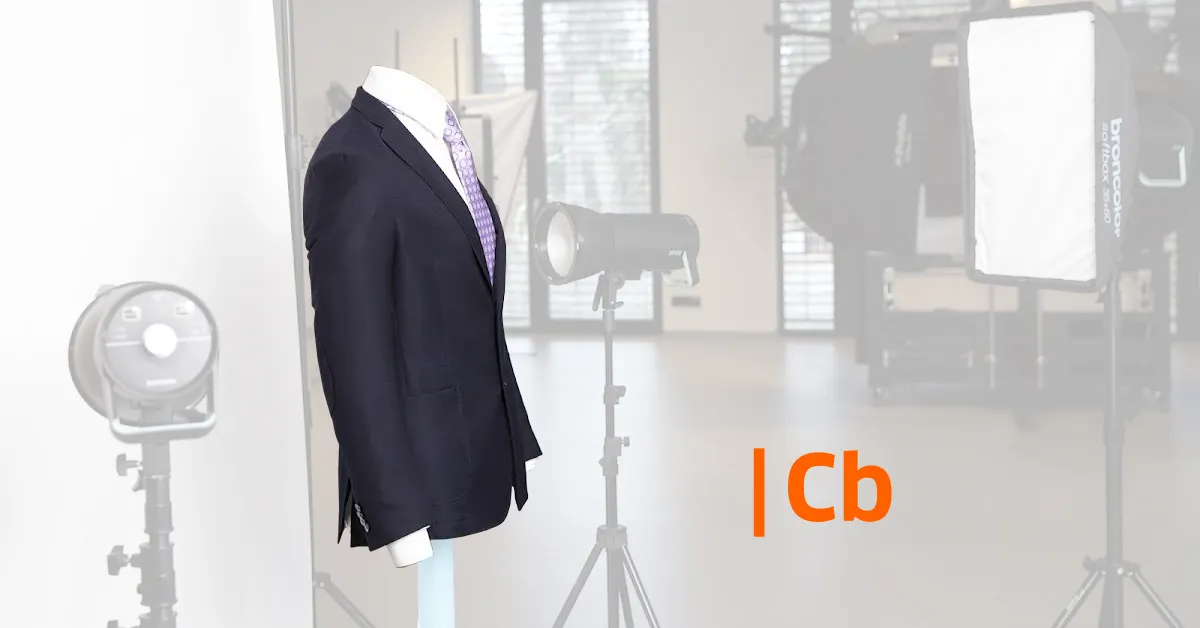
How to Photograph a Suit and Tie with a Ghost Mannequin
This guide demonstrates how to photograph a suit and tie with a ghost mannequin effect using PhotoRobot’s Cube and automation software.
How to Photograph Suits and Ties on a Ghost Mannequin
As part of our ongoing fashion photography tutorials, this guide will show how to photograph a suit and tie with a ghost mannequin effect. Using a ghost mannequin, you can make apparel look as if an invisible person is wearing it, also known as a “hollow man” effect.
To achieve this effect, we take multiple photos of a suit and tie on a mannequin. We then combine the images to remove the mannequin in post processing. This gives clothing a more true-to-life, full-bodied and 3D appearance than flat lay photography. It also ensures apparel isn’t flat or out of proportion in product photos.
For the complete step-by-step guide, continue reading. This tutorial demonstrates how to photograph a suit and tie with a ghost mannequin effect using PhotoRobot’s_Cube and product photography software.
Photography Equipment and Editing Software
When aiming to achieve a ghost mannequin effect on a suit and tie, PhotoRobot’s standard setup features the_Cube. This solution boasts a system for quick mannequin exchange to streamline workflows, while PhotoRobot software automates post processing.
Among the many editing tools in our software is ChromaKey, a function which automatically removes mannequin poles in final images. It then combines “composite” photos to achieve the “invisible person” effect in less time than it takes to style your mannequin.
Then, beyond these tools, you also need the following.
- Camera - PhotoRobot is compatible with DSLR and mirrorless Canon cameras, and we recommend high-end models for professional product photography.
- Studio lighting - Our systems work with both strobe lighting or LED panel lights, using these to create the ideal lighting from all angles.
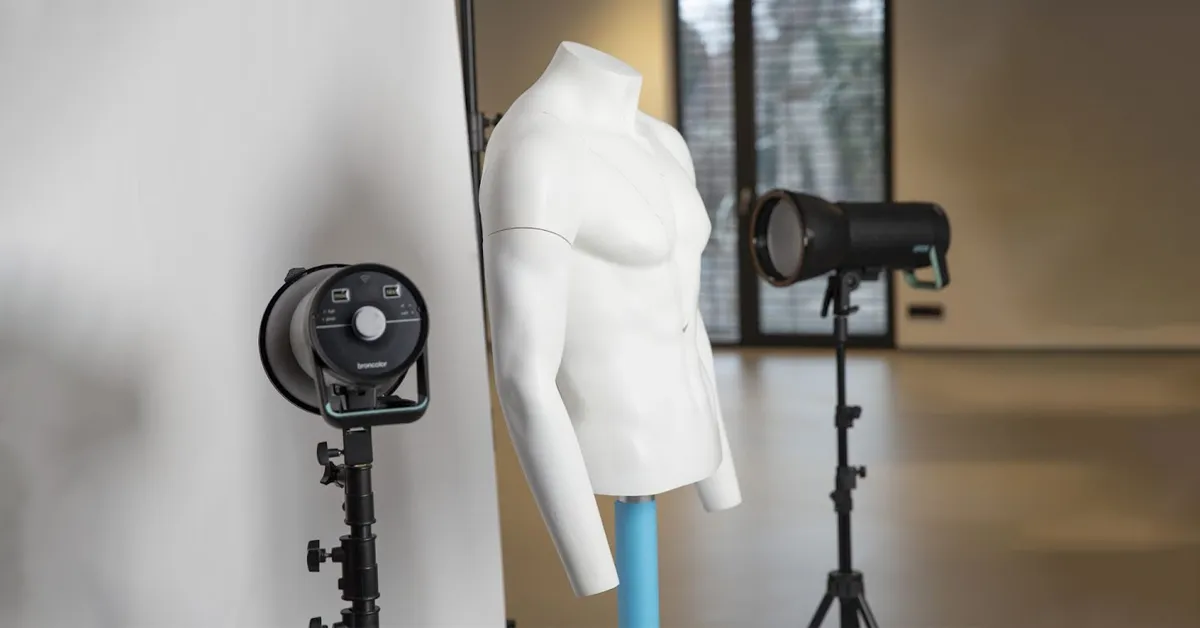
- Ghost mannequin - In this case, we use our quick-exchange mannequins. This provides us a way to prepare a separate torso off to the side while simultaneously photographing.
- A blazer, shirt, and tie combo - Today, we’re photographing a blazer with a shirt and tie.
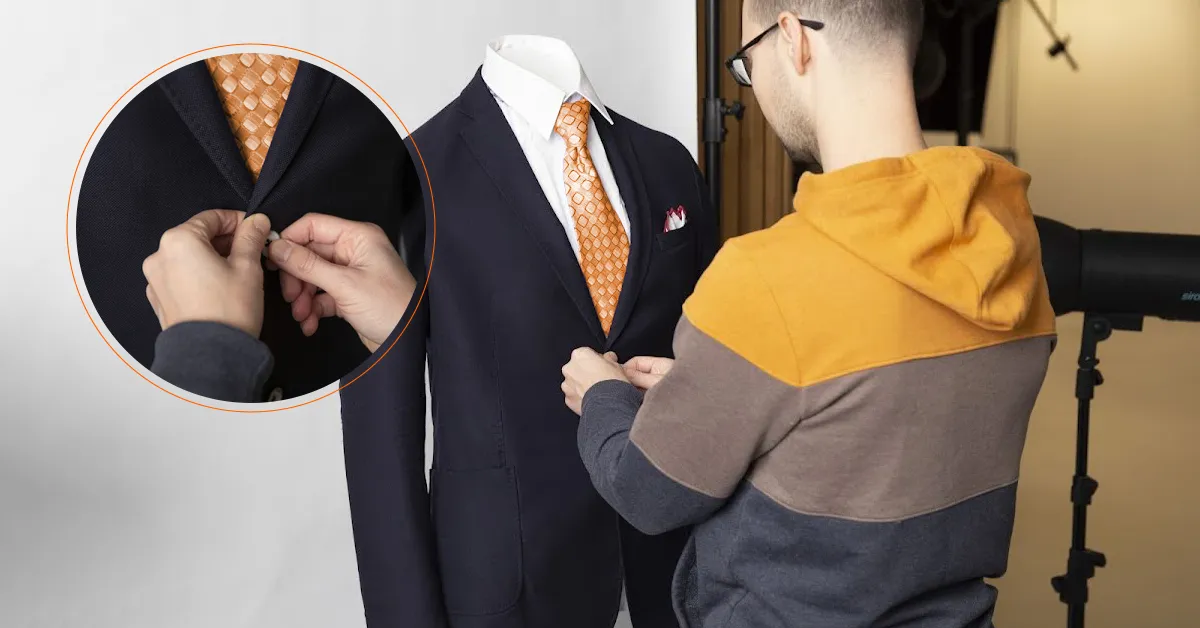
- Styling accessories - By using clips and pins, we ensure there are no unsightly creases and that the blazer fits the mannequin perfectly.
How to style your suit and tie for the effect
1 - Keep the neck, arm, and chest pieces attached
First, when photographing a suit and tie combo, we keep the neck, arm, and chest pieces on the mannequin. The neck piece is necessary to support the tie in this photoshoot.
Next, we remove the middle part of the waist to give us a view of the inner lining.
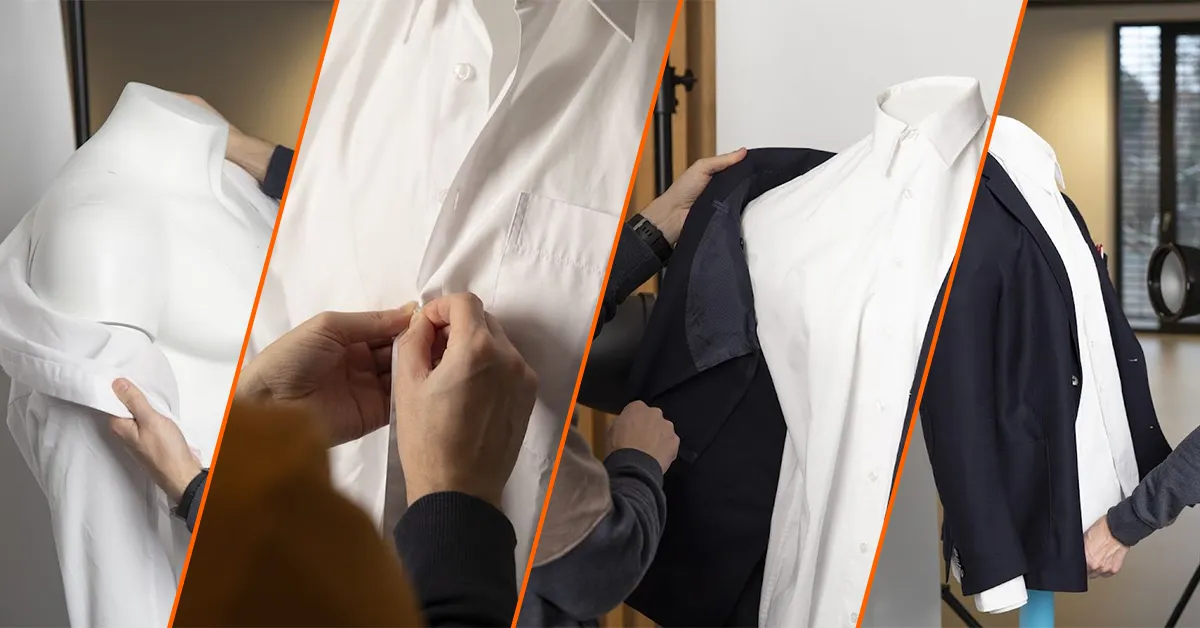
2 - Dress your mannequin for success
In the next step, we want to dress our mannequin for success. Start first with putting on the shirt, and then move onto the blazer.
Here, you can button the shirt up, but wait for later to button up the blazer. Get the shoulders straight and neat, and then pull the shirt tight to smooth out any creases on the garments.
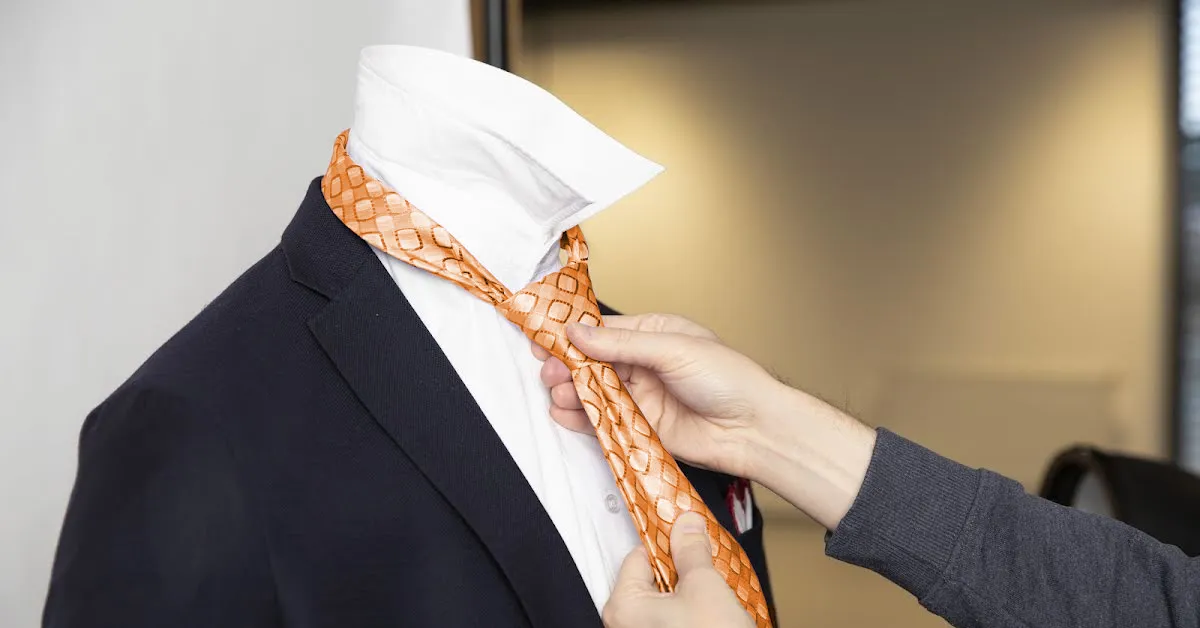
3 - Knot and put the tie on your mannequin
Now, with our shirt and blazer fitted and wrinkle-free on the mannequin, we add the tie to the mannequin. Both shoulders look nice, straight, and symmetrical, so now we put the shirt collar up and put the tie on.
We always make sure to pre-knot our ties before the photoshoot with a loose, simple knot like the four-in-hand or half-windsor.
4 - Button all buttons and straighten shirttails
Moving on, with our tie straight, we button up the front of the blazer, and tuck in the shirttails. Here, we want the suit and tie combo exactly how we want to photograph it on the ghost mannequin.
The outfit should now be getting that “hollow man” effect. Now, ensure the clothes neatly fit your mannequin. For this, you can also use styling pins and clips here to style the suit and tie.
5 - Lights, Camera, Action
And just like that, we’re ready to move to our control station and create the ghost mannequin effect. Here, the process takes no time and becomes routine on any torso.
- Capture given angles (using predefined positions).
- Separate the background on all images.
- Retouch the pole of the standing torso using PhotoRobot’s manual or automated Chromakey retouch feature to create a ghost mannequin effect.
- Set the lighting according to the product, ensuring consistent exposure, shadows, and contrast.
- Control the process to deliver ready-made images to the client or to publish directly online.
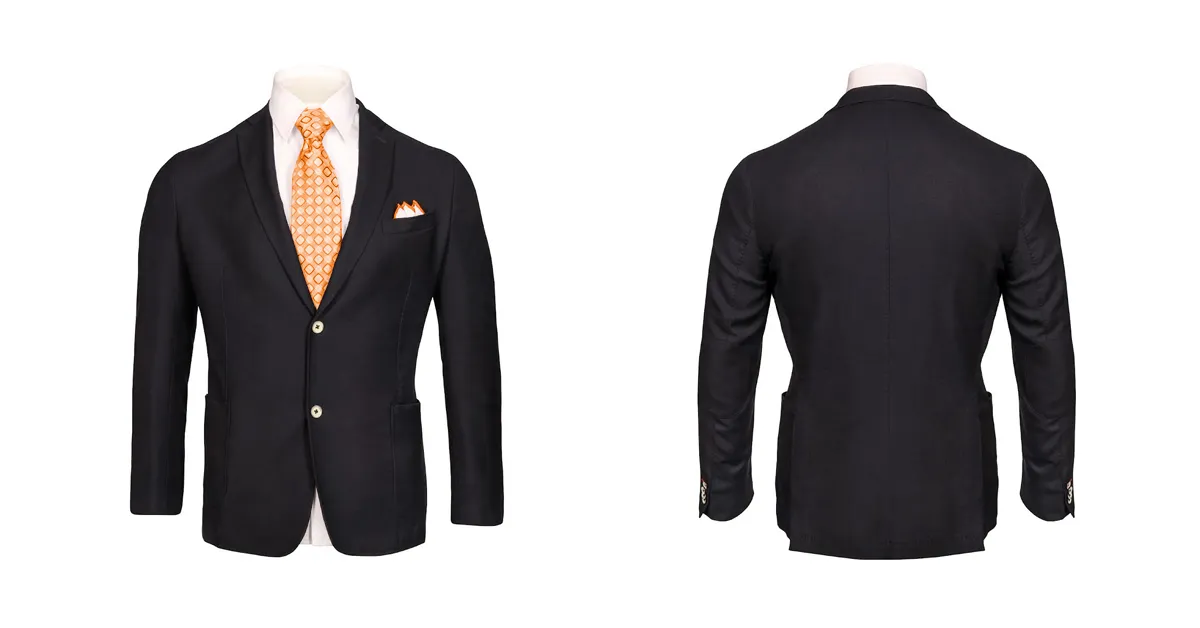
The resulting ghost mannequin effect
For Additional Product Photography Resources and Tutorials
Did you find this tutorial useful? Be sure to follow us on Facebook, LinkedIn, and YouTube. You can also sign up for our Photography Newsletter below. We regularly share blogs, tutorials, and videos to keep you up-to-speed on everything happening in the industry. Follow PhotoRobot today for more resources, from how to photograph suits and ties to product photography of any type or scale.


