How to Film Models on the Virtual Catwalk
Get tips and strategies on how to film models on the Virtual Catwalk in this eCommerce fashion product photography tutorial.
Guide to the Virtual Catwalk and How to Film Models
In this tutorial, we’ll share how to film models on the Virtual_Catwalk. The Catwalk is PhotoRobot’s solution for in-house photography and filming of live models. It allows us to transform any small space available into a professional photo studio for apparel photography and online fashion shows.
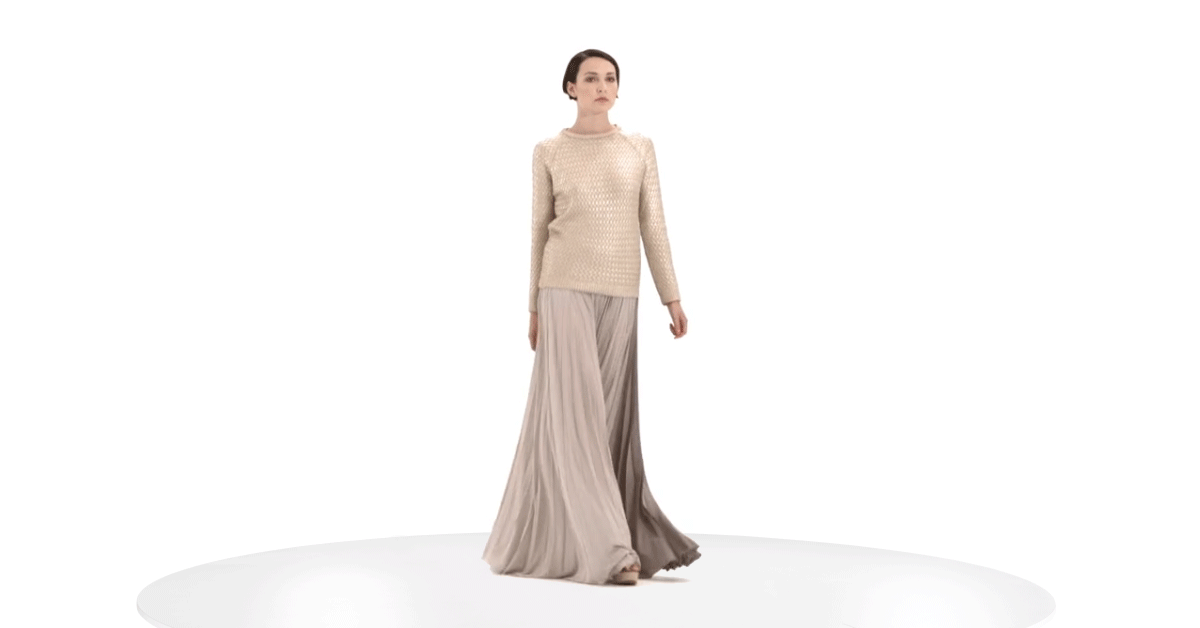
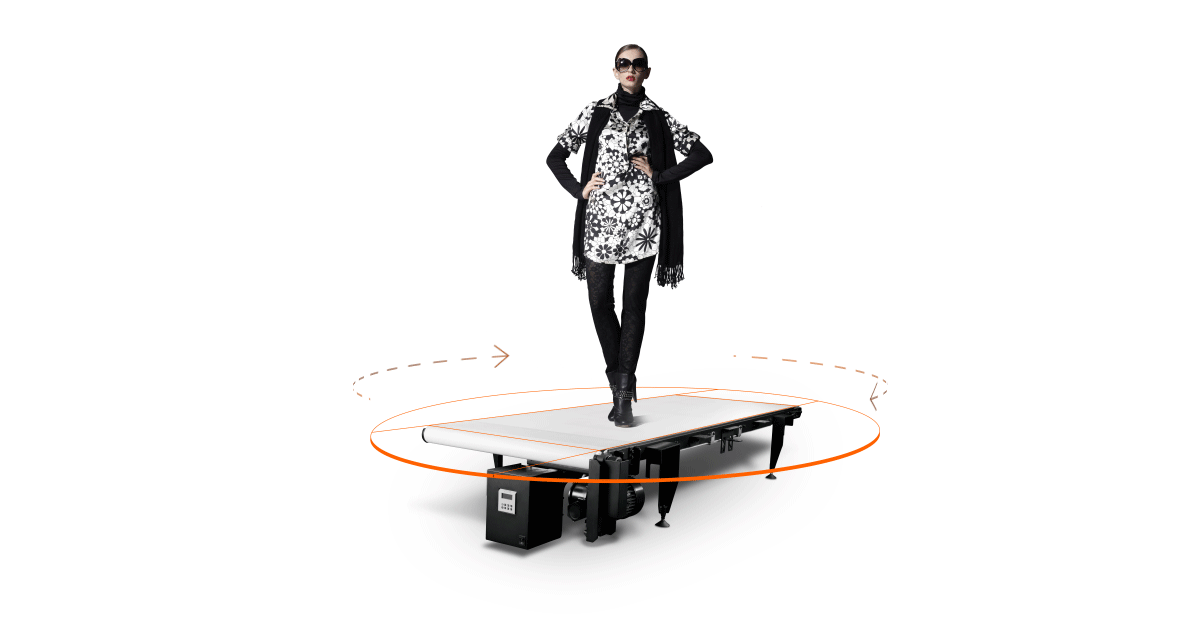
The Catwalk’s design consists of a moving belt on a rotating platform, much like a treadmill that also spins 360-degrees. Both the belt and the platform rotate simultaneously, with adjustable speed so that models can safely walk on the machine. Cameras remain trained in place around the rotating platform for creating a flying camera effect.
Together with PhotoRobot Control Software, users can control the entire workspace including robots, cameras, lighting and more. The software also enables workflow management and automation in image post-processing. All we need is standard studio lighting, while our combination of hardware and software handles the rest.
Read on to learn how to use the Virtual Catwalk with live models. This tutorial shares the process, including more on our solution, and how to film models in the studio.
Model Photography
When photographing models in fashion photography and eCommerce, it’s more than simple photography. Not only are we working with live subjects, there are many extra-photographic conditions to consider. There are lighting, camera settings and exposition, as well as unsuspecting surprises that are always bound to pop up. All in all, there are many moving parts, from the equipment to support teams and the interpersonal and technical aspects.
1 - How to Prepare for the Photography Session
Let’s begin with preparing the photography session. If we want to save time for any photoshoot, preparation is always key. This is even more true when doing photography sessions with models. Clear goals and timelines are necessary to prevent any misunderstandings (and limit wasted time to a minimum.)
Imagine we already have the product in mind; all we need now is to organize the photoshoot. At this point, we have a number of questions we still need to answer.
- What kind of photos do we want to show? (Is the goal to create still images, 360 spins, or product videos? Are we photographing for the web, print, or both?)
- Which photos and angles will be most important for marketing or PR purposes? (Here, the brand style guide will often dictate what types of photos we need. Don’t have a style guide yet? See our tutorial on creating a style guide to get started.)
- If filming a video, can we create a storyboard? (Both support teams and the models benefit from sketches of consequent shots and prepared notes showing the approach and content. Notes might include camera distance or movement, focal points, etc.)
- Finally, what unexpected surprises can occur during the photo session? (Will there be any need for additional props, or a stand-in model in case one falls ill?)
Answering these questions will help when forming a detailed plan that covers all goals of the session. Map the process out step-by-step, taking into account any possible pitfalls or needs you might encounter along the way.

2 - Photography Equipment & the Catwalk
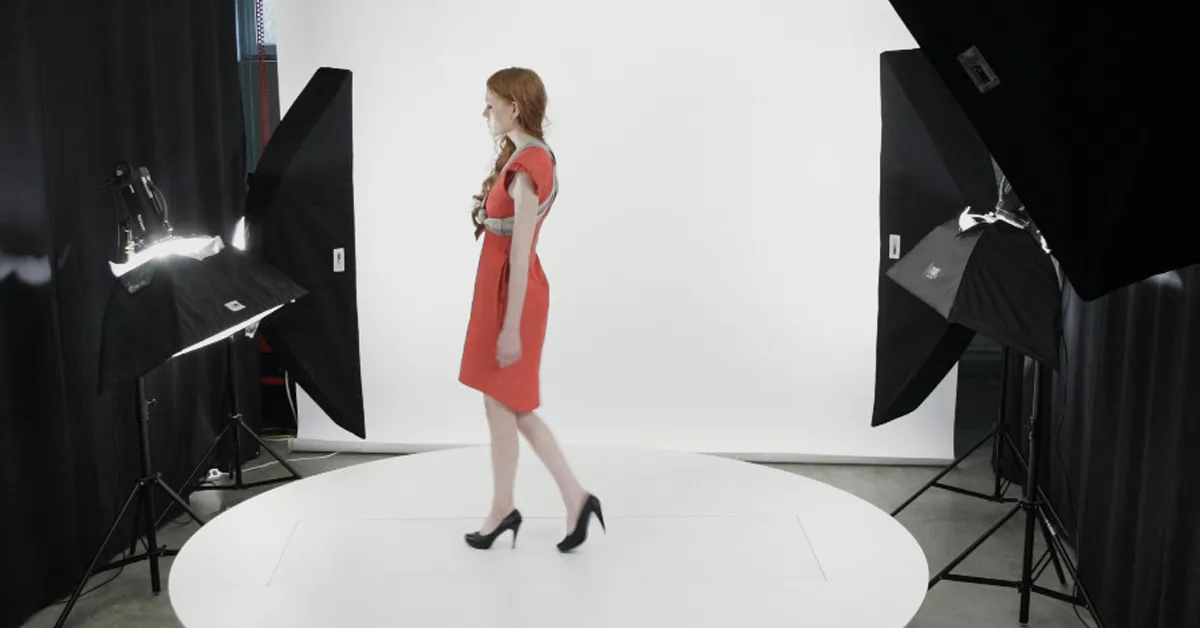
When working with the Virtual Catwalk, PhotoRobot software supports the latest DSLR and mirrorless Canon camera. In the studio, the setup revolves around the Catwalk, and only standard studio lighting is necessary. The Catwalk is easy to transport and install on location, or can become a fixed installation in the studio.
Its design provides a steady platform which models can easily and safely step onto and begin walking. Operators can control both belt speed and turntable rotation to suit the model perfectly. Meanwhile, we can remotely control cameras and operate camera elevation & swing to capture photos or video.
Save settings from the session at any time to use again and again as a “scenario” for recording. Scenarios save parameters such as the rotation and the belt speed, and any adjustments for the model when starting and stopping. They can also save settings for acceleration as well as reversals in direction and much more.
3 - How to Work with Live Models
Now, working with live models has the potential to provide more challenges than working with the most difficult lighting. Not only does it involve lots of human interaction, there is too much space for unforeseen pitfalls. The model might be in a bad mood, or even worse, unable to work due to illness. Thankfully, there are a number of approaches to make your model photography easier - both on the model and the photographer.
- Pay close attention to the details. (Notice an irregularity on the model? Perhaps a dangling label, a blemish or wrinkle? Tend to it immediately, as soon as you see it. The less shots you have to repeat the better, and also the more honest relationship you build with models.)
- Build a relationship with the model and create the atmosphere. (It’s always important for photographers and teams to build a rapport with the model. Little things like a warm greeting, a nice introduction, or a tour of the studio can go a long way. Be friendly, be precise, and be professional to create a positive atmosphere.)
- Never forget: models, just like photographers, get hungry! (Don’t skip meals. Especially if it’s a longer session, be sure to ask models what kind of food they prefer and when they’d like to eat. Avoid low-quality meals like fast food, and also keep plenty of snacks and refreshments on hand. Water, tea, or coffee can not only serve as a welcome break, they keep everybody fresh during the session.)
- Build strong communication. (And this might be the most difficult part of the photographer’s job. Always try to communicate clearly, offering instructions that are as detailed as they are easy-to-follow. Beware of technical language that might confuse the model, and always be prepared to show or demonstrate what you expect.)

4 - Session Support and Preparation
Next, anybody who has worked in model photography knows there are countless seemingly trivial support questions to answer. This is where a well-versed, creative support team goes a long way to helping the photographer realize their vision.
Support teams can arrange assistance for models (hairdressers, make-up artists), and help with technical details of the scene. There is communication to coordinate between production managers and their assistants, including scene and product stylists. Everything from the physical details of the scene to photographing the products and models requires a coordinated effort. The better this coordination is managed, the smoother and more efficient the session will be.
Also, support teams may be responsible for prepping products for each session. However, if the workload and scale of the session is minimal, this responsibility can fall onto the photographer. In this case, there are a few tips to keep in mind about product preparation.

5 - Product Preparation
First and foremost, all products we want to photograph must look pristine, new, and attractive. This calls for polishing jewelry and buttons, ironing garments, and dusting glossy surfaces. Then, it’s important to be mindful of a number of other tricks to ensure products look their best.
- Beware of fingerprints. (Use compressed air or white linen gloves to remove blemishes.)
- Eliminate creases and spots. (Take advantage of lint rollers, mannequins, or hangers to prep clothing for photography.)
- Hide excess fabric with styling clips and pins. (Especially when working with mannequins, clips and pins can give clothing a neat, more fitted look.)
- Prep the model just as you would the product. (Be sure the model is groomed well enough to stay attractive or neutral without drawing attention away from the product.)
- Consider hiring a stylist. (Having a stylist on the team can take a lot of load off, dealing with both product and model preparation.)
6 - How to Operate the Virtual Catwalk
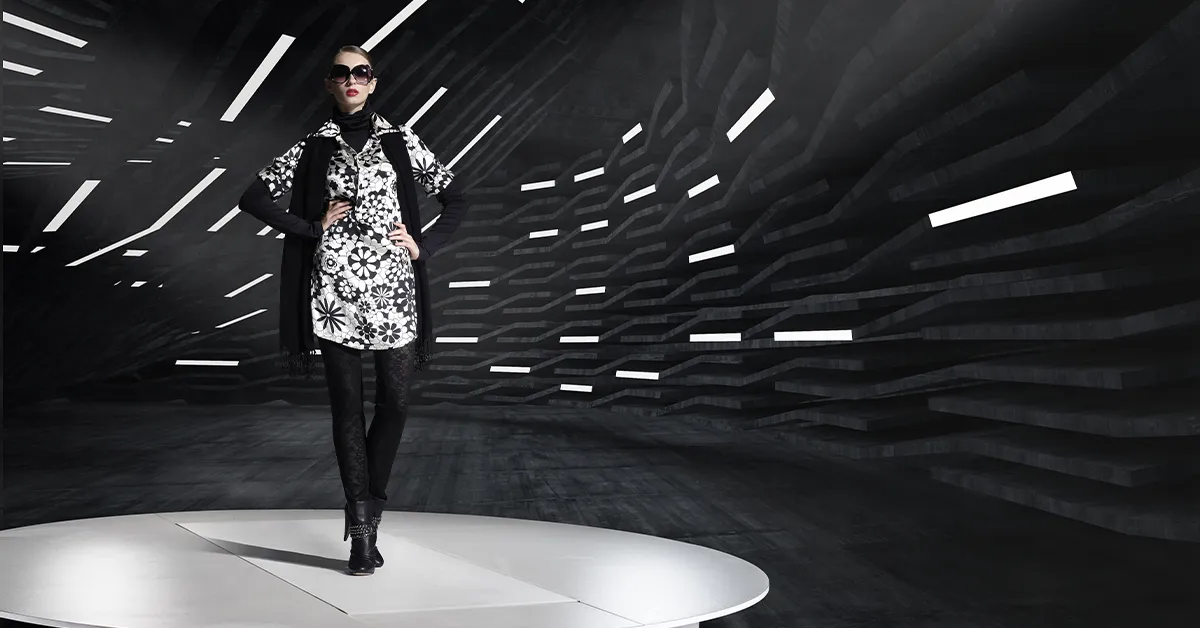
Now, let’s talk more about the Virtual Catwalk in the studio. This workstation is suited to 360° photography of both live models or objects (when the belt isn’t moving). For photography of models, the model walks on the moving belt while the platform rotates 360 degrees. Cameras remain in place around the platform, steadily capturing photos and resulting in a flying camera effect. Control the robot, cameras, lighting, and more all from a single interface with PhotoRobot_Controls.
- Easy entry and exit - The wide plate has sturdy supports to enable models to easily and safely get on and off the platform.
- Adjustable speed - Configure both turntable rotation and belt speed to perfectly suit the model and the session.
- No complicated logistics - The Catwalk and everything in the studio can remain in place, without the need to relocate between sessions.
- Adjustable level - It’s also possible to install the machine recessed into the floor, making the working area level with the platform.

7 - Taking Photos and Filming Video
During the photoshoot, whether it’s taking photos or filming product videos, using continuous lighting comes with numerous advantages. First, it’s simply a convenient solution, especially with the functionality of the Catwalk and its non-stop rotation.
This also gives us the advantage of being able to use Live View in the camera, providing a view of the scene in real-time. The visible conditions never change as the model walks on the rotating platform. It’s easier to manipulate cameras, and the lighting enables photographers to focus more on working with the model and reviewing results.
The Catwalk makes it possible to photograph dozens of models for an entire digital fashion show in a single day. Together with PhotoRobot editing software, final imagery and videos can be ready to publish shortly after sessions.
8 - Post-Production Tips
To completely answer how to film models for product videos, we also have to talk about post-production. In general, the rules for post-processing human models remain the same as for still life and packshot photography. Before anything, it’s necessary to follow the brand’s style guide, and to edit photos to achieve consistency in visual content. Then, there are a few more rules we can apply to save both time and effort in post-production.
- Pay extra attention to the fine details. Remember: an additional 2 minutes in the photo session can often save 10 minutes in post-production. Keep an eye out for any minor concerns like dust, wrinkles or creases that may call for major changes in editing.
- Don’t overdo the editing. Overall, when editing photos for eCommerce, often less is more. Heavily edited photos can increase product returns, so always aim for visual content that accurately represents the product.
- Never overemphasize color saturation or vibrance. A common mistake in product photography post-processing is increasing saturation and vibrance beyond natural levels. Always review final results and consider getting a second opinion on the impression the colors make.

For more fashion product photography strategies and tips
Looking for more content like this? Get the latest blogs, tutorials, and videos delivered directly to your inbox by signing up for our newsletter. Also find PhotoRobot on Facebook, LinkedIn, and YouTube to stay up-to-date on everything happening with us and in the industry. We’re here with all of your product photography resources, from photographing models to products of any size and shape.


