Product Photo Background Removal and Adjustment
PhotoRobot presents how to capture product photos with precise background removal, and deploy software tools for background adjustment and optimization.
Producing Photos with Precise Background Removal
Achieving high-quality product photos on a pure white background often requires minimal to zero manual editing when using PhotoRobot systems. This is thanks to wide ranging design features that support automated shadow-free object photography. These include optical glass turntable plates, and diffusion backgrounds in combination with professional studio strobes and lighting. Additionally, software integration connects robots, cameras, lights, and post-production to automatically produce professional photos with precise background removal.
In cases calling for more advanced background optimization, there are then multiple PhotoRobot software tools to remove or adjust backgrounds. Read ahead to see how semi-automatic and manual background removal tools function within PhotoRobot Controls App. We share how to remove the product background by level, by flood, and by freemask. Find out about adjusting backgrounds in still images, 360s, and 3D spins, while also configuring presets to easily repeat workflows.
Semi-Automatic or Manual Background Removal
To optimize the background in product photos, PhotoRobot Controls App software features two standard background removal operations. These tools function either semi-automatically or manually to remove the background behind objects by level, or by flood. They allow for setting a levels (brightness) threshold or flood points, choosing the effect level, and algorithmic automation of background removal.
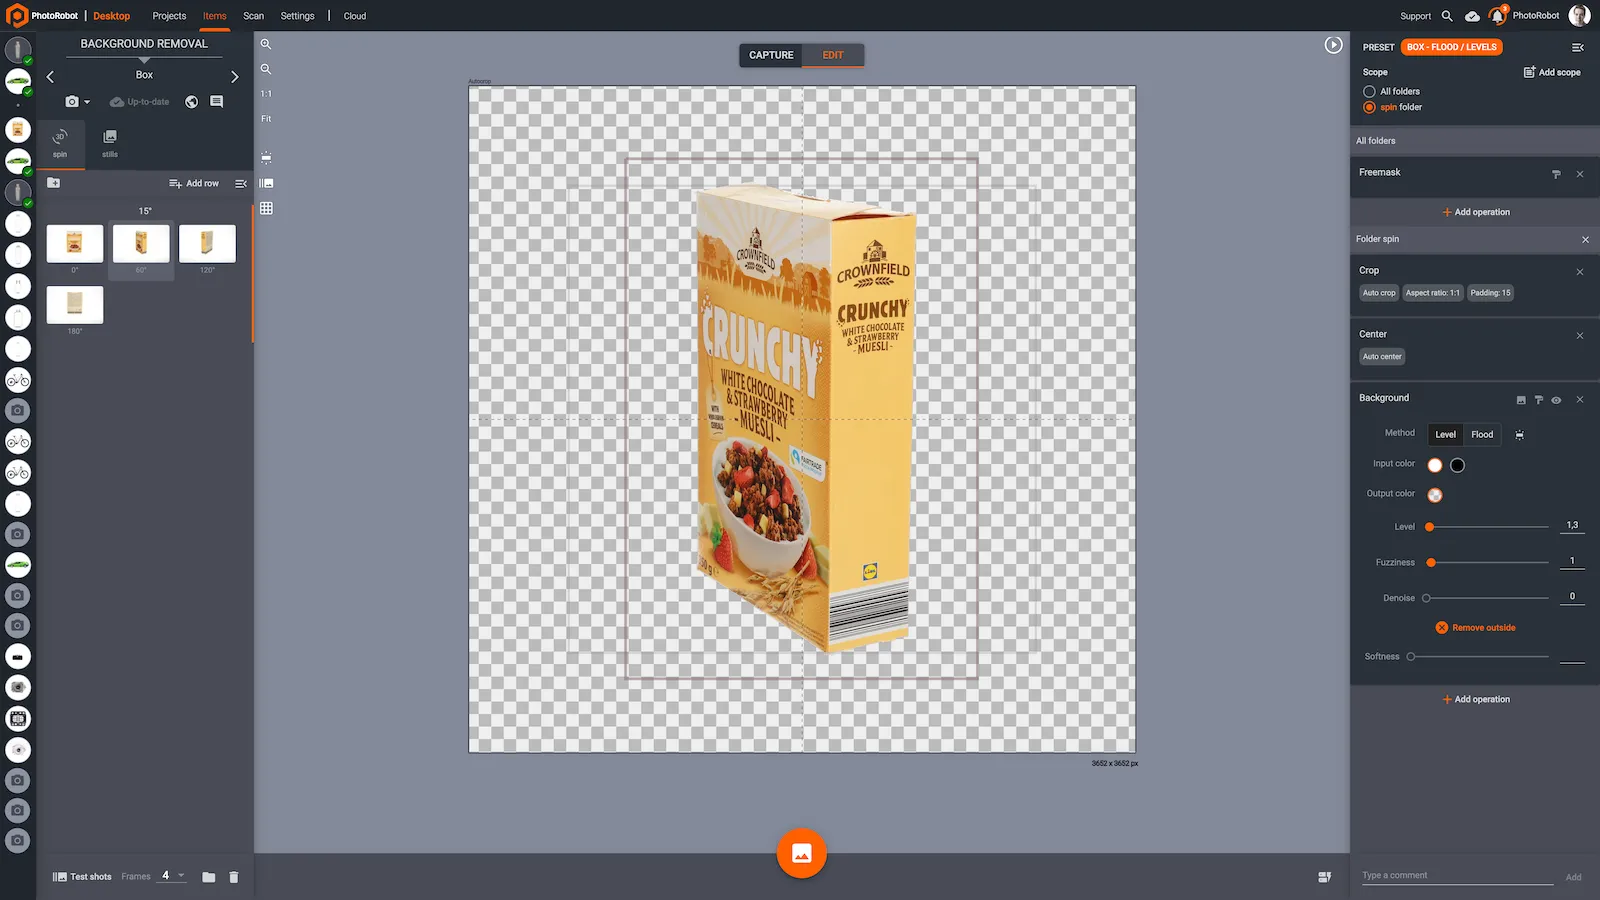
- Removing background by level uses software analysis of RGB color levels and brightness values to identify the background and foreground. Adjusting these levels in the software will make the background brighter until it is pure white. It is then possible to swap the background with a transparent one in the software, or change it to any color.
- Background removal by flood functions on similar principles as by-level removal. The operation brightens the background until it is pure white around the item. However, instead of using levels, the tool uses a selected point to identify the background and then “floods” that area. It detects edges of the object, and applies flooding to fill in the available space. Then, it is possible to make the white background transparent, or any other color in the software.
In comparison, by-level background removal is more advantageous when photographing bright or white items, and when using a white backdrop. That, and for making an off-white background disappear. Meanwhile, background removal by flood often yields better results when working with darker items.
Background Removal By Level
The by-level background removal tools in PhotoRobot Controls App allows for adjusting the brightness of the background by intensity values. Additionally, there is the ‘highlight white’ tool to detect white areas in images, helping to identify the correct threshold for removal. This is important for exposure correction, and to ensure the image background is consistent with the rest of the page.
For example, the background removal by level operation uses a simple slider to adjust the brightness of the background. Other settings allow users to control and customize by-level background removal, and save settings as presets to easily recreate workflows. In the software, by-level background removal settings include the following.
- Level - Adjust the brightness levels of the background around the object to make the background pure white. Note that if the intensity is too high, the product will also become brighter and start to disappear. Thus, it’s important to find the optimal brightness levels so that only the background becomes white, without bleeding into the item.
- Remove Outside - Remove any clutter at the edges of the image (e.g. shaders).
- Fuzziness - Make the threshold fuzzy, leading to smoother transitions between the object and the background.
- Denoise - Eliminate noise by removing solitary pixels in the background or the object.
- Output Color - Select the color of background in edited images.
- Input Color - Set to white for capturing products on a white background. Select black if on a black background.
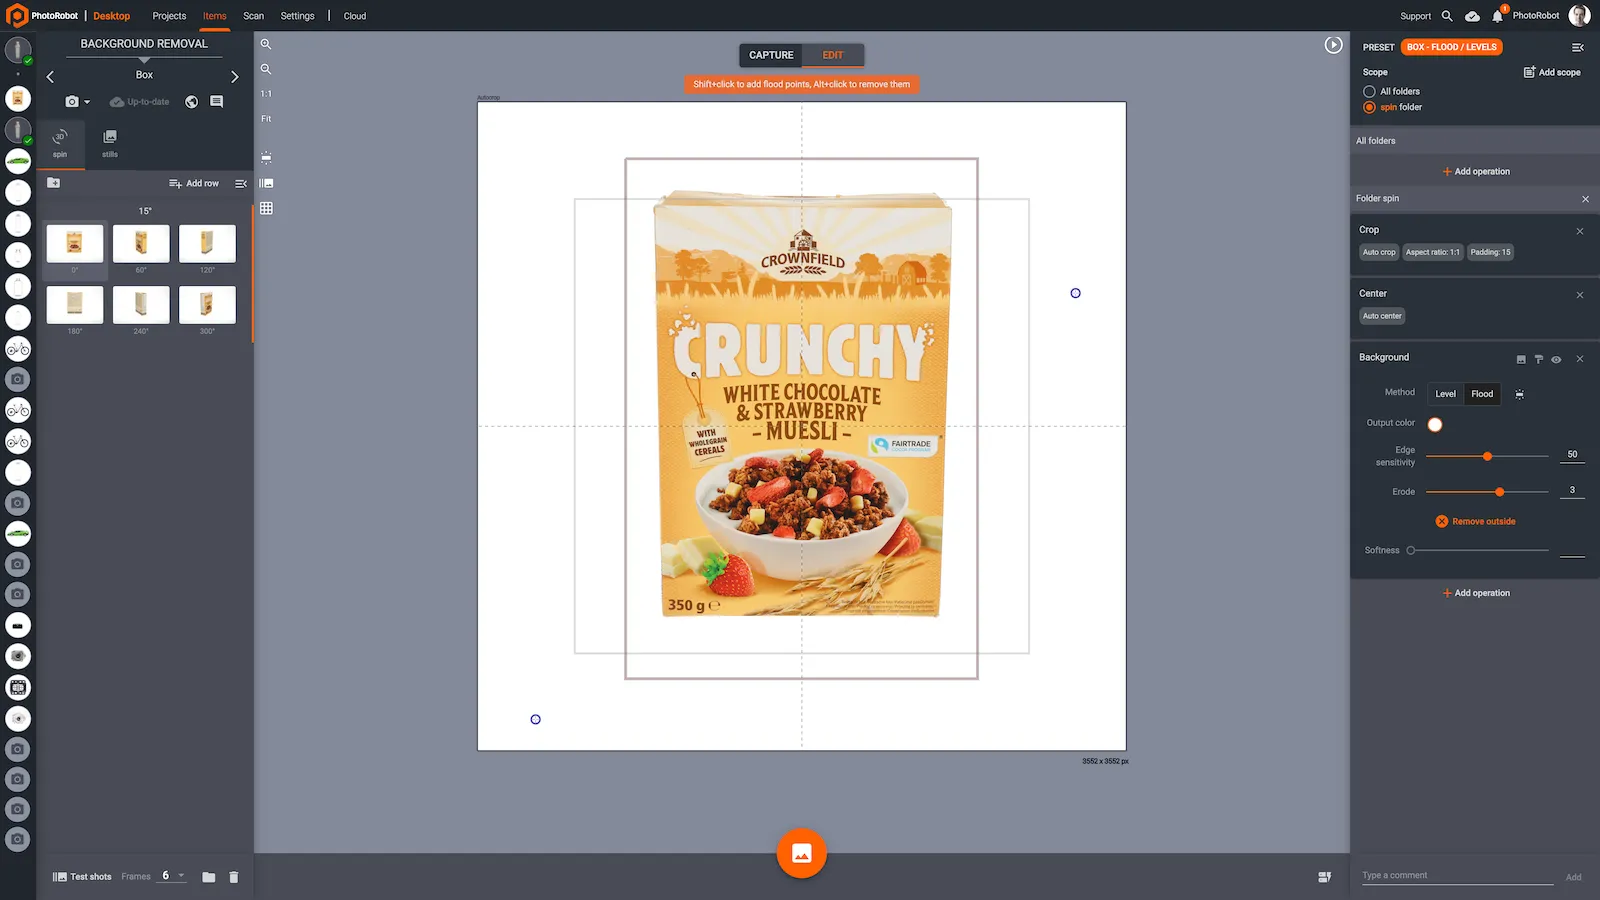
Remove Background By Flood
Background removal by flood is often more advantageous when working with very dark products. It allows users to make the background white by clicking a specific point in the background. The point helps the software to identify the available space to brighten by flooding. Meanwhile, the software also automatically detects edges of the object to more accurately detach it from the background.
If the software does not completely remove some of the background, it is possible to add more flood points manually. There are then only two settings to adjust when removing the background by flood in PhotoRobot Controls.
- Adjust Edge Sensitivity - Configure the sensitivity to detect object edges correctly.
- Adjust Erode - Remove any extra pixels from the object edges.
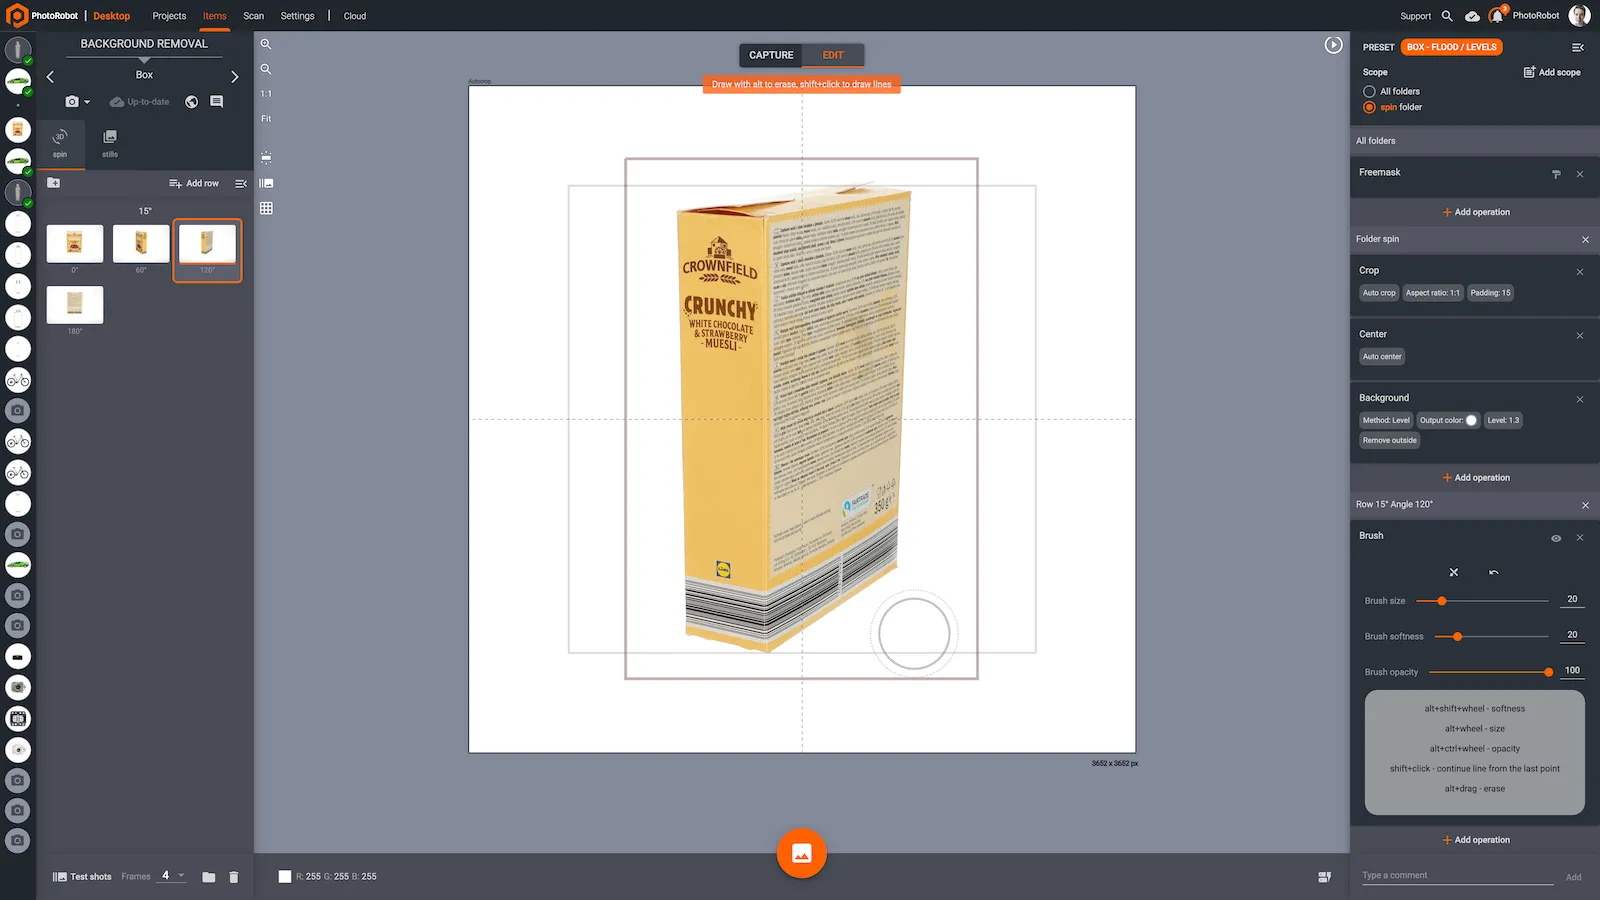
Advanced Brush and Eraser Tools
Sometimes, dust or blemishes will remain after manual or semi-automatic background removal. This can provide challenges, especially when working with 360 product spins. Product spins often contain at least 24 still images, all of which may require slight editing. To this end, the brush and eraser tools in PhotoRobot Controls allow for quickly editing all images in a set.
Users are able to edit a single photo, and then automatically apply those changes to all images. If the operation is difficult to automate, like removing dust from a scene, editing single images is easily possible. At the same time, users can return to any image without needing to edit every individual photo again. There are settings to adjust size and edge effect for more precision, and for saving work as presets for future editing.
Define Scopes of Editing Operations
For any editing operations in PhotoRobot Controls, it is possible to define the scope of operations which will apply. For example, editing operations may apply to an entire folder, to only specific swing angles, or to a single image. This is especially valuable for retouching multi-row images, no matter if it’s stills or 360 spins.
Take for instance 3D multi-row photography. 3D spins require different light settings for each row of photos. The same is true when determining the editing settings. There must be different settings to account for the variation in lighting from one elevation to the next.
To simplify this, PhotoRobot Controls captures specific swing angles (0°, 15°, 37°, etc) and assigns images to different folders within the item. It is then possible to define the scope of the editing operations to apply to specific folders. That, or across the entire item, as well as to other items that require the same operations.

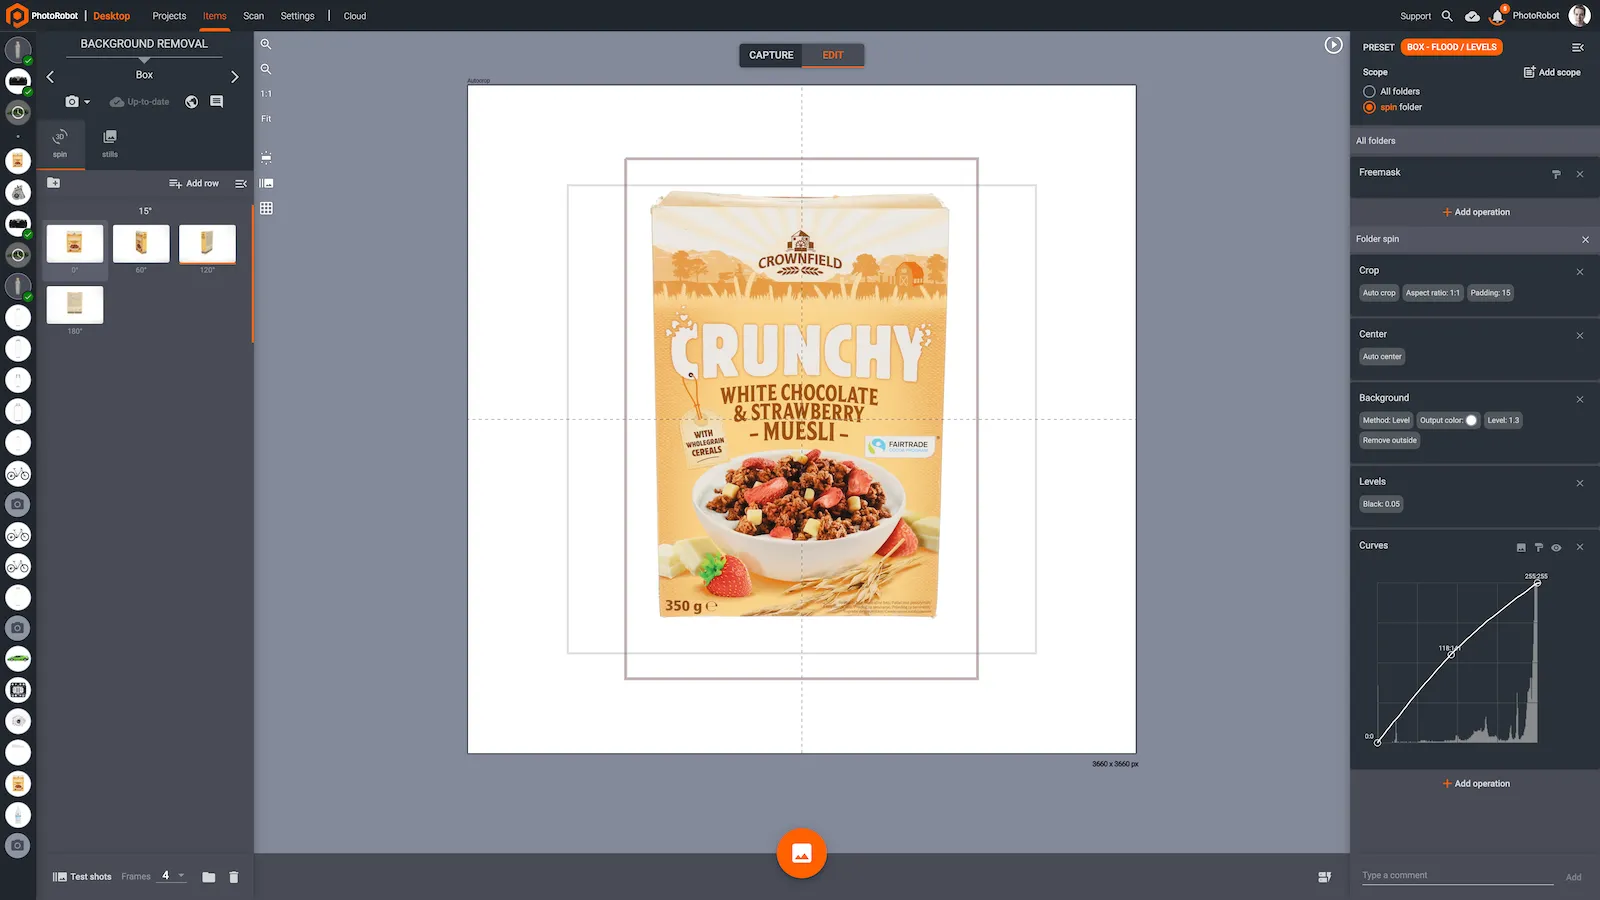
Image Masking & Adjustment
Also useful to adjust where editing operations apply, there is the PhotoRobot Controls App masking operation. Masking helps for instance to instruct the algorithms where not to remove the background. The tool enables users to both limit or to adjust where specific operations apply. It might be to adjust brightness on a specific part of the image. That, or to customize the background, clarity, levels, curves, and other operations. In this way, it is possible to experiment with all the different editing operations, and to apply unique masks for each one.
Freemask Background Removal
Removing a background from product photos by freemask requires more configuration than by level or by flood. However, it can also be one of the most precise and quickest methods.
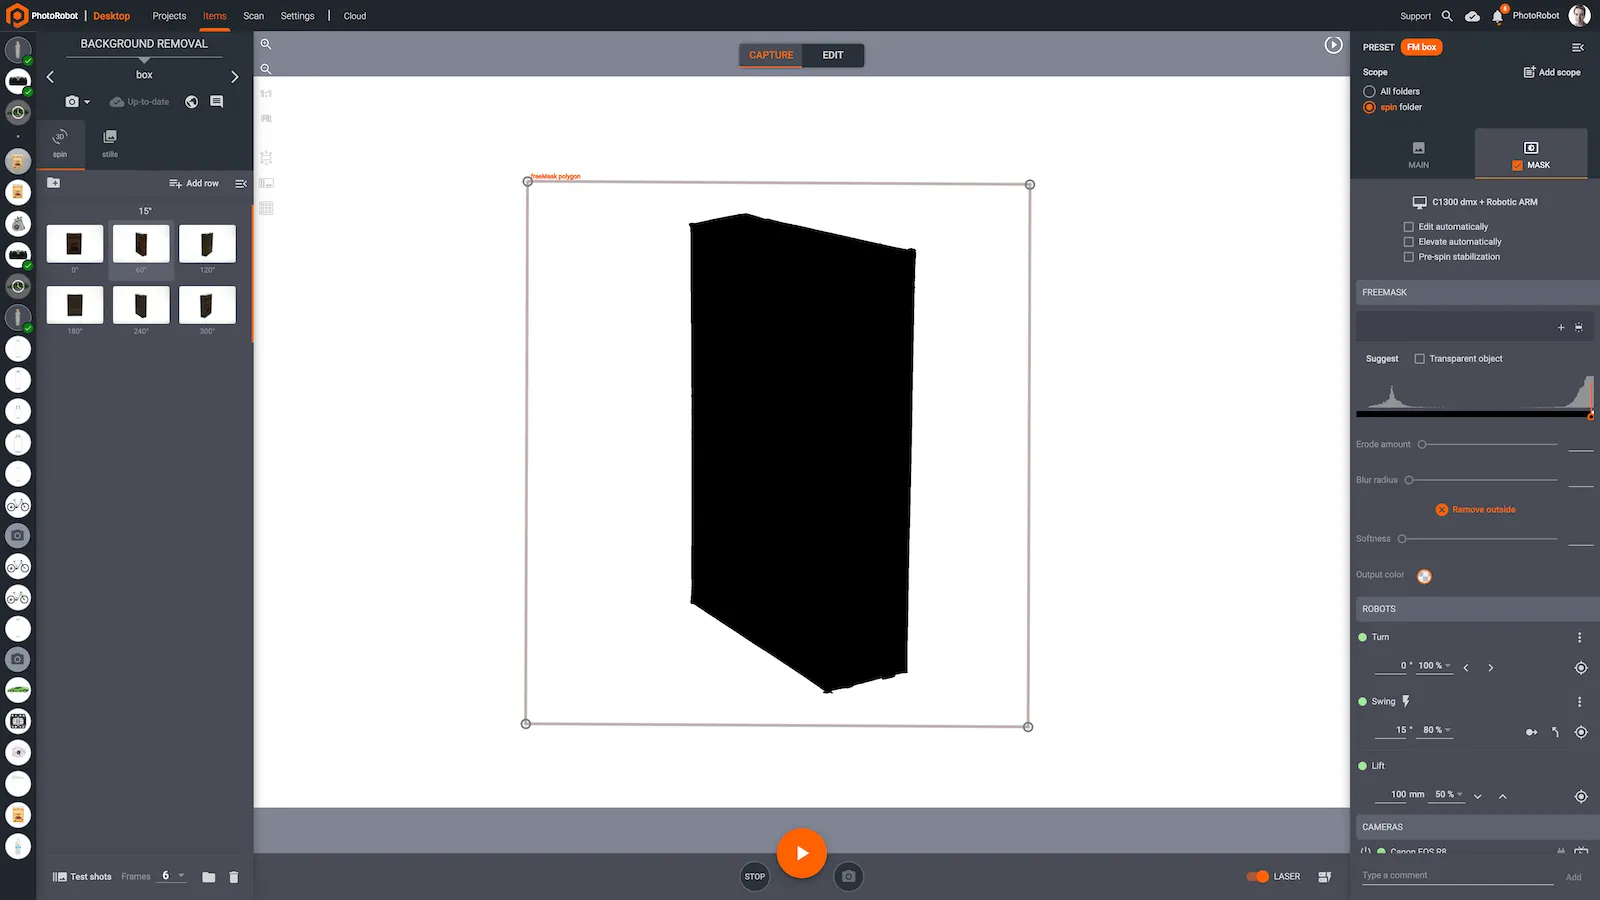
To remove background by freemask, it is first necessary to create an accurate and homogenous mask image. A mask image will reduce the amount of cut-out work after production, and requires only two photos: the main picture, and the mask image. The main picture will light only the product, whereas the mask image will light only the background.
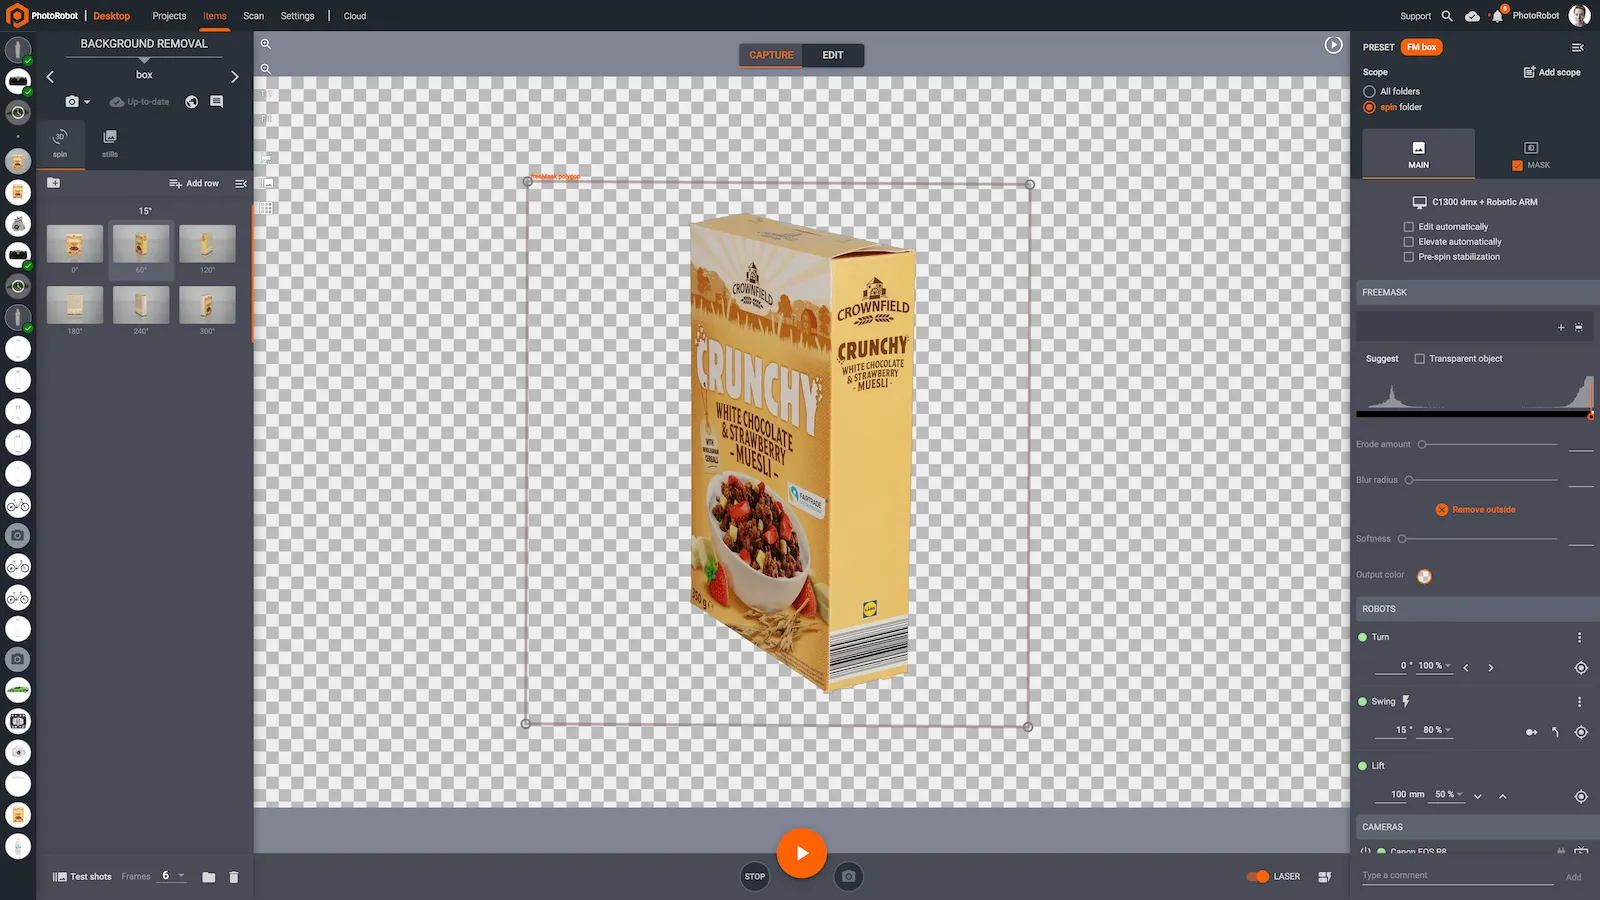
This back-lit shot will then serve as a pixel-exact mask within post production. PhotoRobot Controls software will estimate and suggest a color threshold dark enough to represent the object. Anything lighter than the threshold will register as the background, and provide the mask to apply to the main image. It is then possible to place the cut-out object onto any new color background.
Removing Backgrounds from “Difficult” Objects
For some items, freemask background removal is the only efficient way to remove the background from product photos. Take for instance objects with reflective surfaces, or items that have areas with empty space. A perfect example would be a shiny new steel frame wire basket. The material of the object not only reflects light, making automated background removal difficult. It also contains a complex network of empty space inside and around the basket.
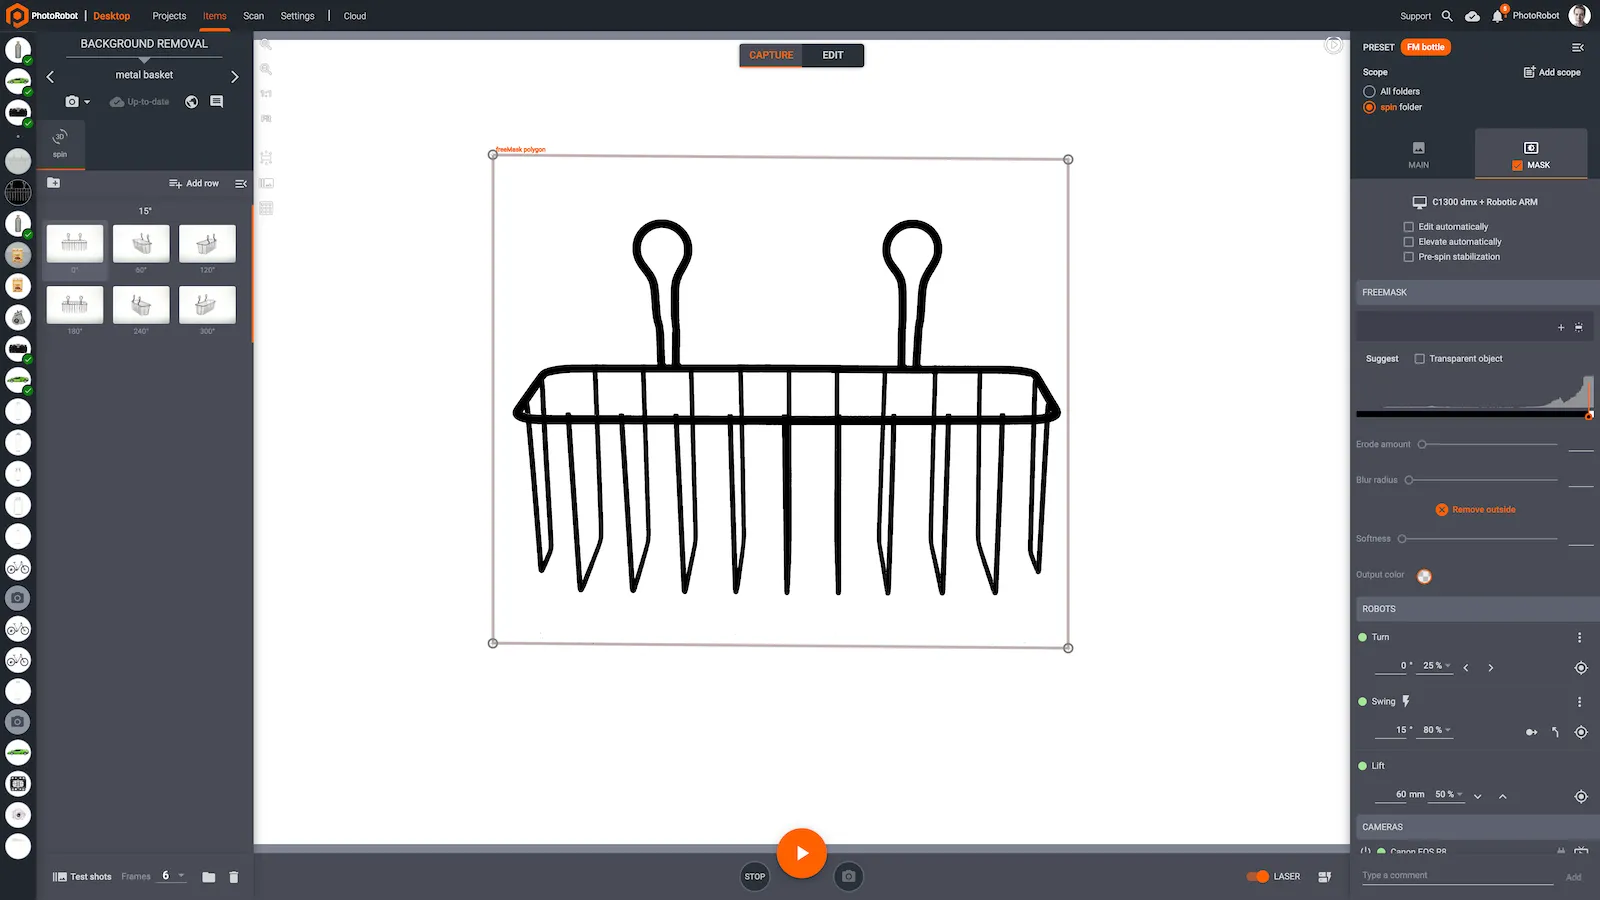
These properties make background removal by level or by flood nearly impossible. It would require too much manual retouching and editing, and likely still not meet quality expectations in any timely way. However, freemask background removal is able to accurately and quickly manage by first creating the mask of the object. This cut-out mask will help to remove both the glass plate of the turntable and the backdrop from photos. The software also identifies the object versus all empty space, while removing the background inside and behind the basket.
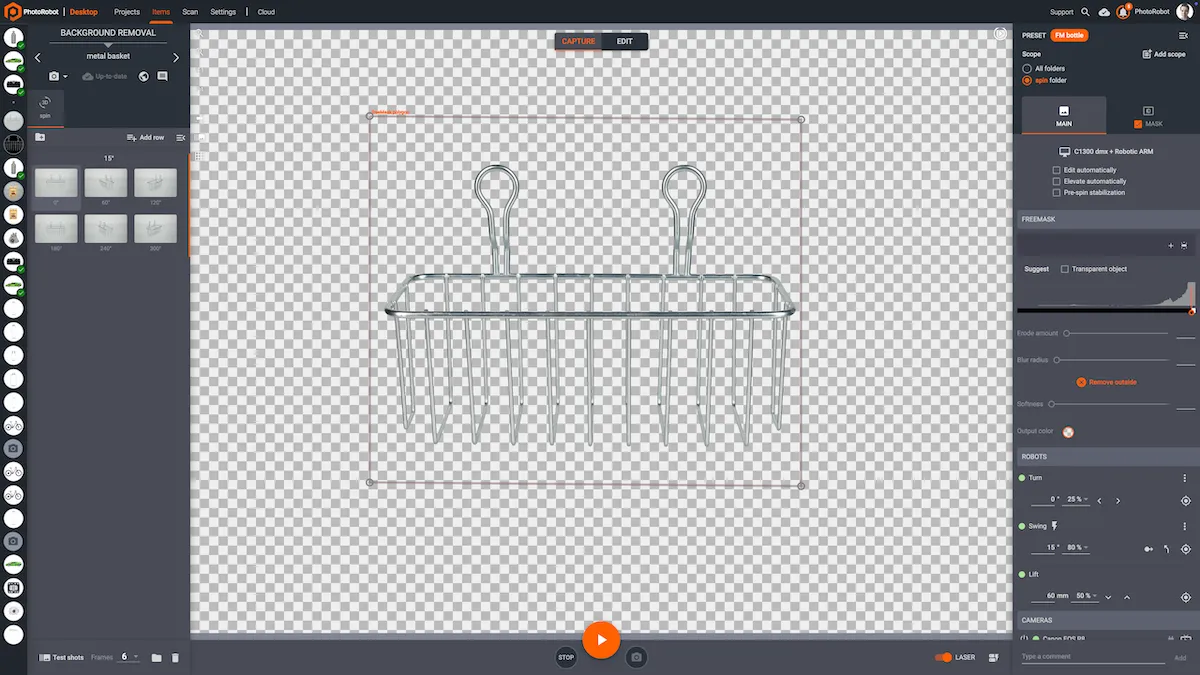
Compositing the main picture and the mask image then produces the final photos, with exact background removal in moments. This produces photos without any negative effect on product edges, and with perfect sharpness. It is also possible to accomplish this on 24+ photos in a spinset, often in under one minute. The background can then be semi-transparent, or users can replace it with a color more suitable to their brand style.
Background Removal with Transparent Items
For semi and fully transparent items, software automation for freemask background removal is also available when necessary. PhotoRobot Controls software allows users to set half transparency with a threshold of three values: black, white, and gamma.
Anything below the black point will register as the product, whereas anything above the white point registers as the background. Then, variables between the black and white points become transparent, although not completely. It is then possible to experiment with various thresholds to automate background removal on even the smallest structures, details, and transparencies.
Minimal to Zero Manual Retouching
Would your photo studio benefit from smoother workflows, and less manual background removal? PhotoRobot delivers professional, web-ready product photography with precise background removal often without any need for additional retouching.
This includes no-retouch still product photography, 360 + 3D product photography, and 3D model photography – with no clipping necessary. Create presets, and repeat workflows while consistently and quickly producing professional product photos with a distraction-free background. Does your business need a faster, simpler, and more scalable solution?
Request a personal demo to see how PhotoRobot can answer your business’ unique challenges today. We’ll take your product line and build a solution for you to test and judge by the production speeds.


