Packshot Photography - What is it, and How to Produce It

Branching off product photography, packshot photography sets guidelines to taking photos of a product typically with its packaging and labeling.
What is Packshot Photography?
Packshot photography (also “pack shot” or “packaging shot”) is one of the latest branches of product photography. Popular across everything from magazines and billboards, to catalogs and ecommerce pages, packshots are still or moving images of a product. Packshots aim to show an accurate representation of the product, sometimes with its packaging and labeling. This displays products not only as they would appear in-store, but also in a way representative of the product’s reputation.
Sharing similarities with GS1 image standards, packshot photos are a valuable tool to marketing and sales teams worldwide. Beyond enriching print and online product presentation, packshots can be a powerful stimuli to elicit in-store, on-shelf product recognition. Accurate product representations then in turn funnel into more sales, while at-the-same-time growing both the product’s and the brand’s reputation. However, just as with any product photography, quality matters. And quality revolves around possessing the know-how and the equipment.

In this product photography guide, we’ll share the resources photographers require for packshot photography. Read on for the tricks of the trade, including: what cameras, lenses, and photography lighting to use. We’ll also cover photography equipment and turntables, automated workflow software, post-production with PhotoRobot and more.
Primary aims of packshot photography
When done well, packshots accurately present a product in photos to support sales across various marketing channels. Primarily, we’re talking about hard and soft copy, whether for in-print or online product advertising. The main aim of the packshot is to display the product exactly how customers will find it in its packaging. Packshots might also show the product in a way mirroring its on-shelf display. It is not to make products look better than in reality.
Unlike lifestyle photography, which aims to create a story around the product, packshots inform on a different level. They attract attention firmly on the product, showcasing fine details & design features. Elements of a good packshot thus might include close-ups zooming into various parts of the product. Product photos might give customers a closer view of a logo, the type of fabric, or the material.

In addition, some brands use packshots to show their product alongside its packaging or labeling. Shots might also include other contents of the package, like: manuals, promotional items, or included accessories. Overall, the goal here is to accurately present the product, showing everything the customer can expect of their purchase.
Popular marketplaces & uses for packshots
While 360-degree imagery has made a splash on Amazon and other marketplaces, packshot photography is also commonplace in eCommerce. This is due to the image requirements of online marketplaces & vendors, with many setting strict guidelines. For example, Amazon and others require products to have a pure white background with specific product to frame ratio.
This helps consumers by ensuring retailers and product imagery better represent the product, something packshot photography accomplishes. After all, the goal of a packshot is to place strong emphasis on the product while also accurately portraying it. Thus, a distraction-free background is already important, equal to showing off the details that make the product unique.

Good packshots on a white background can also meet photography requirements for wider sales and marketing channels. It might be for a major brand billboard campaign, or magazine ads, brochures and banners. High-quality packshots go a long way, allowing you to meet sharpness and contrast requirements, or compose imagery well with text. They can make for effective product infographics, and / or showcase extremely small details and design features.
Packshots on transparent or colored backgrounds
Shooting on a white background isn’t the only approach to packshots, however. Creating packshots with transparent or colored backgrounds sometimes better aligns with marketing goals. Certainly, it depends on the brand style guide, as well as where and in which format they’re advertising.
In any case, PhotoRobot equipment & software makes background removal from nearly any object quick and hassle-free. And while many might think PhotoRobot is all about shooting 360s, nothing could be further from the truth. In fact, many of our clients don’t even shoot 360s at all. They photograph still images and packshots, and, with advanced background removal tools, apply any background they want to their product photos.

From transparent backgrounds for print advertising, to colored backgrounds for evoking emotion, the form depends on what you must show. Is it every detail of the product? Do you want the product shown exactly how it looks in the box? Will a colored background draw more attention to product details or fit your brand style guide? The answer to these questions will dictate the type of photoshoot, and whether it's still life or packshot photography.
Packshot requirements and guidelines
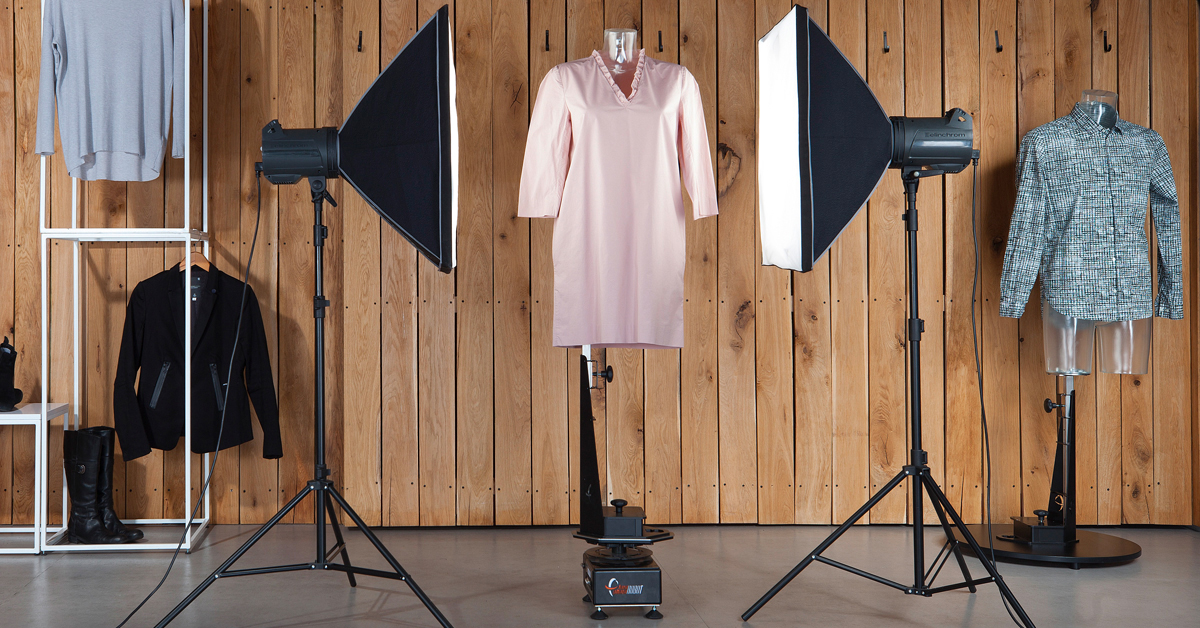
A good setup for packshot photography might revolve around one of PhotoRobot’s motorized turntables and automation software. These solutions for 360 & 3D photography offer complete control over photoshoots, from compatible cameras to lights and the workstation. Photographers can automate camera elevation & swing, turntable rotation, image capture, light intensity, strobes, post-production and even publishing.
Meanwhile, each turntable works in combination with a white diffusion cloth background for photoshoots, perfect for ecommerce packshots. Typically, if the destination is e-commerce, the white background will be a requirement. Resolution requirements then vary by vendor specifications.
If photographing packaging or labeling with text, PhotoRobot has a tool for Optical Character Recognition (OCR). Deploy OCR when capturing stills, packshots, or 360s. It extracts text directly off items to include in export feeds to webshops and product management tools.
In all cases, photographers should avoid using a blurry background or applying a creative touch to product sharpness. This breaks the guidelines of packshot photography by distorting products and distracting away from unique features.
Which cameras to use for packshot photoshoots
When deciding on cameras, PhotoRobot compatible cameras include Canon DSLR and mirrorless models. Choosing between mirrorless or DSLR often comes down to preference, with both proving capable in the PhotoRobot studio.

In fact, photographers don’t even need a high-end model to capture high-quality packshots with PhotoRobot hardware & software.
Often, a 26MP Canon EOS RP is more than enough to do the trick. Thus, the consideration tends to fall on camera sensor size, as this will have more impact on product photos.
Packshot camera sensor sizes
The decision of what camera sensor to use for packshots comes down to the category (and size) of the product. Most commonly, photographers use full frame (35 mm width) APS-C (24 mm) camera sensor sizes. These provide a higher depth of field, allowing for greater sharpness of products within frame.
For smaller, more complex products like electronics or jewelry, full frame cameras capture higher levels of resolution. This in turn allows photographers to accurately show the microscopic details consumers will want to inspect in product photos.
PhotoRobot software then provides many advanced image processing tools to ensure a full depth of field and quick post-processing. Find processing techniques integrated into the software, with tools for clarity, colors, brightness, sharpness, focus stacking and much more.
Best lens for packshot product photos
Now, just as with choosing a camera, choosing a camera lens type will depend on the product photography. Let’s compare the most common camera lenses product photographers use.
- The traditional 50mm camera lens – For product photography, this is often the go-to lens because of its depth of field. It allows photographers to capture most items larger than 6 inches without distorting the product. Typically, we suggest a focal length of at least 50mm, although higher is better.
- Macro lenses – A macro lens is a specialized optic to photograph objects with a magnified ratio, usual 1:1. Macro lenses allow for the capture of life-size images of a product. They can capture photos of extremely small items in sharp focus, detail-rich quality and peerless resolution.

On any small or complex product, a macro lens helps capture and convey the details that make the product unique. Use a macro lens when creating from multi-angle still images, to packshots and 360 spins.
How to light the product
For product photography studio lighting, PhotoRobot compatible lights include Broncolor and FOMEI strobes, and any lights with DMX support. Combine these with a motorized turntable like the Frame, and lighting products for packshot photography becomes standard routine.
PhotoRobot systems check position of the product 1000 times per second, allowing for image capture without stopping turntable rotation. Instead, we freeze the object’s movement via flash, capturing photos during non-stop spin to shave significant time off each photoshoot.
In this way (depending on the product), the capturing process usually takes, at most, 20 seconds. Now, some manufacturers who only work with continuous lighting might argue you don’t need strobe lighting. However, shutter speeds are never an issue with PhotoRobot. Nor is capturing texture, or working with white balance and color temperature.
The quicker you create product photos and get them online or in print, the better. The main concern is that you capture realistic renderings of shape, texture and color in less time. Thus, always consider long-term profitability such as with PhotoRobot, rather than short-term savings with the competition.
The best angles for packshot photography
There are 6 important angles in product photography, each with its own value-add to packshot photography. For example, the right angle might get the best view of a product’s label. It can showcase product design, and all the relevant information shoppers require. Keeping this in mind, let’s review some of the best angles for packshots.
- The front angle – Quite often the first image on a product page, this angle is the most common. Front angle shots can mirror how shoppers would encounter the product in-store, and generally showcase the product’s key features.
- Profile shots – Use profile shots to show only one side of the product, showcasing its profile. More useful on some items than others, consider profile shots to show details or branding such as in footwear photography.
- 45-degree angle – Show off both the front-angle and profile view of a product with 45-degree angles. Aim to capture as much visual information as possible, informing shoppers through the details in the shot.

Other useful angles for packshots
Other angles will vary again depending on the type of product to photograph. In packshots, these might include the following.
- The back angle shot – If your product has consumer information on the backside, use a back angle shot to convey it. These are typically one of the last images you find on product pages, tending to lack branding or eye-grabbing designs.
- Top-view shots – Useful for flat lay photography or getting a “birds-eye view” over the product, top shots are taken from the top-down. Top shots capture different sizes and shapes well, and can be useful for featuring a product in its package.
- The macro shot – Macro shots are a zoom into a product design feature to emphasize important details. Also a “close-up shot”, use these to showcase a product’s material, texture, or perhaps the logo.

Stages of post-production (with minimal retouching)
Post-production of packshots with PhotoRobot calls for minimal editing, with automation accomplishing the majority of the heavy-lifting.
- Background removal – Adjust or remove the background semi-automatically or manually. Choose between 3 types of background removal functions: by level, by flood, or freemasking. After removal, choose a background, usually white for packshots.
- Surface retouching – Brush, set as automatic by default, allows removal of any part of the image, and adjustment of size & edge softness. Use Brush before tools for clarity and color correction.
- Clarity & Colors – Improve clarity with tools to sharpen or unsharp masking of product images. Then adjust hue, saturation and lightness to find the best color pallet for your brand’s packshots.

Post-production automation tools
Thanks to PhotoRobot software Presets, photographers can automate much of the workflow for similar types of items. Configure and save capture as well as editing settings as Presets to apply across batches of products or entire folders. All it takes is a simple click of “Apply All” to edit hundreds of product images per second.
Automate basic editing like image cropping and object centering, or deploy advanced tools for background removal, image overlay, and more. Whatever the product photography requires, PhotoRobot’s advanced algorithms do the work for you. Save valuable time by adjusting contrast and sharpness automatically, and applying edits immediately after capture.

Professional packshot photography equipment
Finally, when considering equipment for packshot photography, PhotoRobot has a range of solutions. With motorized turntables for products of any size, consider which best fits your studio’s needs. Are you photographing small to medium-size objects? The Centerless Table might be for you.
Do you need a more mobile, transportable solution? Consider the Frame, a rotary turntable for easy movement to and from location. For heavier objects like machinery, there’s the Robotic Turntable, or for furniture and large items, the larger Turning Platform. There’s even a solution for motorcycles, quads and automobiles with the Carousel (in 2 different sizes, 3000 or 5000).
Many of these turntables work perfectly in combination with the Robotic Camera Arm for smooth precision and automated movement. Precise movement, robust construction and support for two camera sizes enable photographers to capture objects of any size.

Using PhotoRobot photography turntables
Keep in mind, PhotoRobot isn’t one of these product photography booth solutions you commonly find on the market. All-in-one solutions like these can offer value on a budget, but they simply aren’t half as effective as PhotoRobot.
Now, photographers will require some knowledge of flashlight operation and using light diffusers. However, beyond this, the PhotoRobot software-supported studio makes it easy to streamline processes. It also ensures quality results with minimal effort in post-processing.
Our goal was straightforward: save time where it matters most, without sacrificing on quality. Stage-by-stage automation was thus crucial, as was providing tools for immediate editing and publishing to product pages.
Revolutionizing studio workflow
Others capture locally, create backups, transfer files, post-process, backup again, upload, and then finally share – all manually. PhotoRobot flips the workflow upside-down: enabling image capture in the cloud, instant backup, automatic post-processing and publishing to the web. All while minimizing user input & effort at each stage of production.
Whether it’s capturing still images, packshots, 360s or photogrammetry 3D models, PhotoRobot enables high-quality, cost-effective photoshoots. Capturing true-to-life packshots, reducing effects and applying a background has never been so easy. All you have to do is choose the photography equipment that best aligns with your goals and your workflow.
Why not reach out to us today? Beyond tips and techniques for product photography processes, we can begin equipping you for the task. Simply contact us to learn about our solutions for you and your brand’s packshot photography.


