Experience the Standard PhotoRobot Controls App Workflow
Take a virtual walkthrough of the standard production workflow using PhotoRobot hardware and _Controls software in the studio.
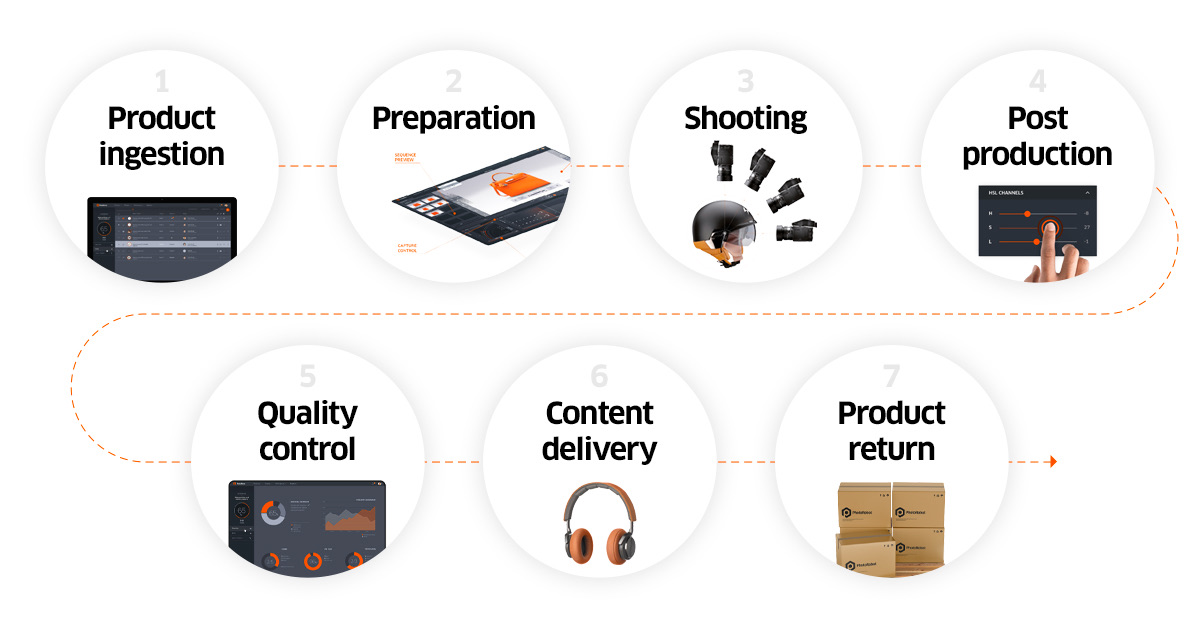
A Walkthrough of the PhotoRobot _Controls App Workflow
What is an example of the standard studio workflow using PhotoRobot automated photography systems and Controls App? To understand, start with the basic PhotoRobot-powered studio setup.
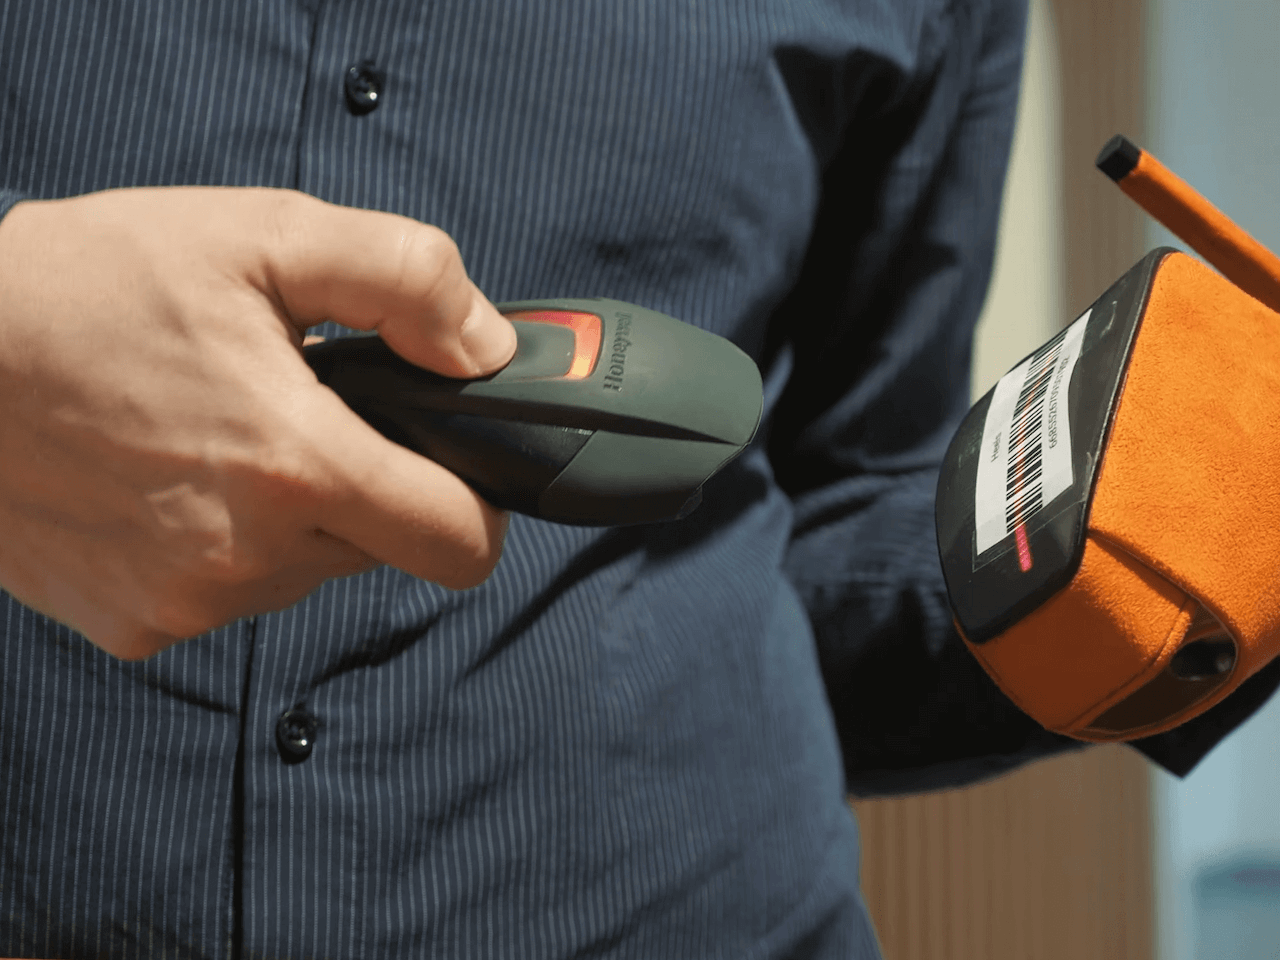
- The standard workflow integrates barcode reader technology to scan items and preset codes.
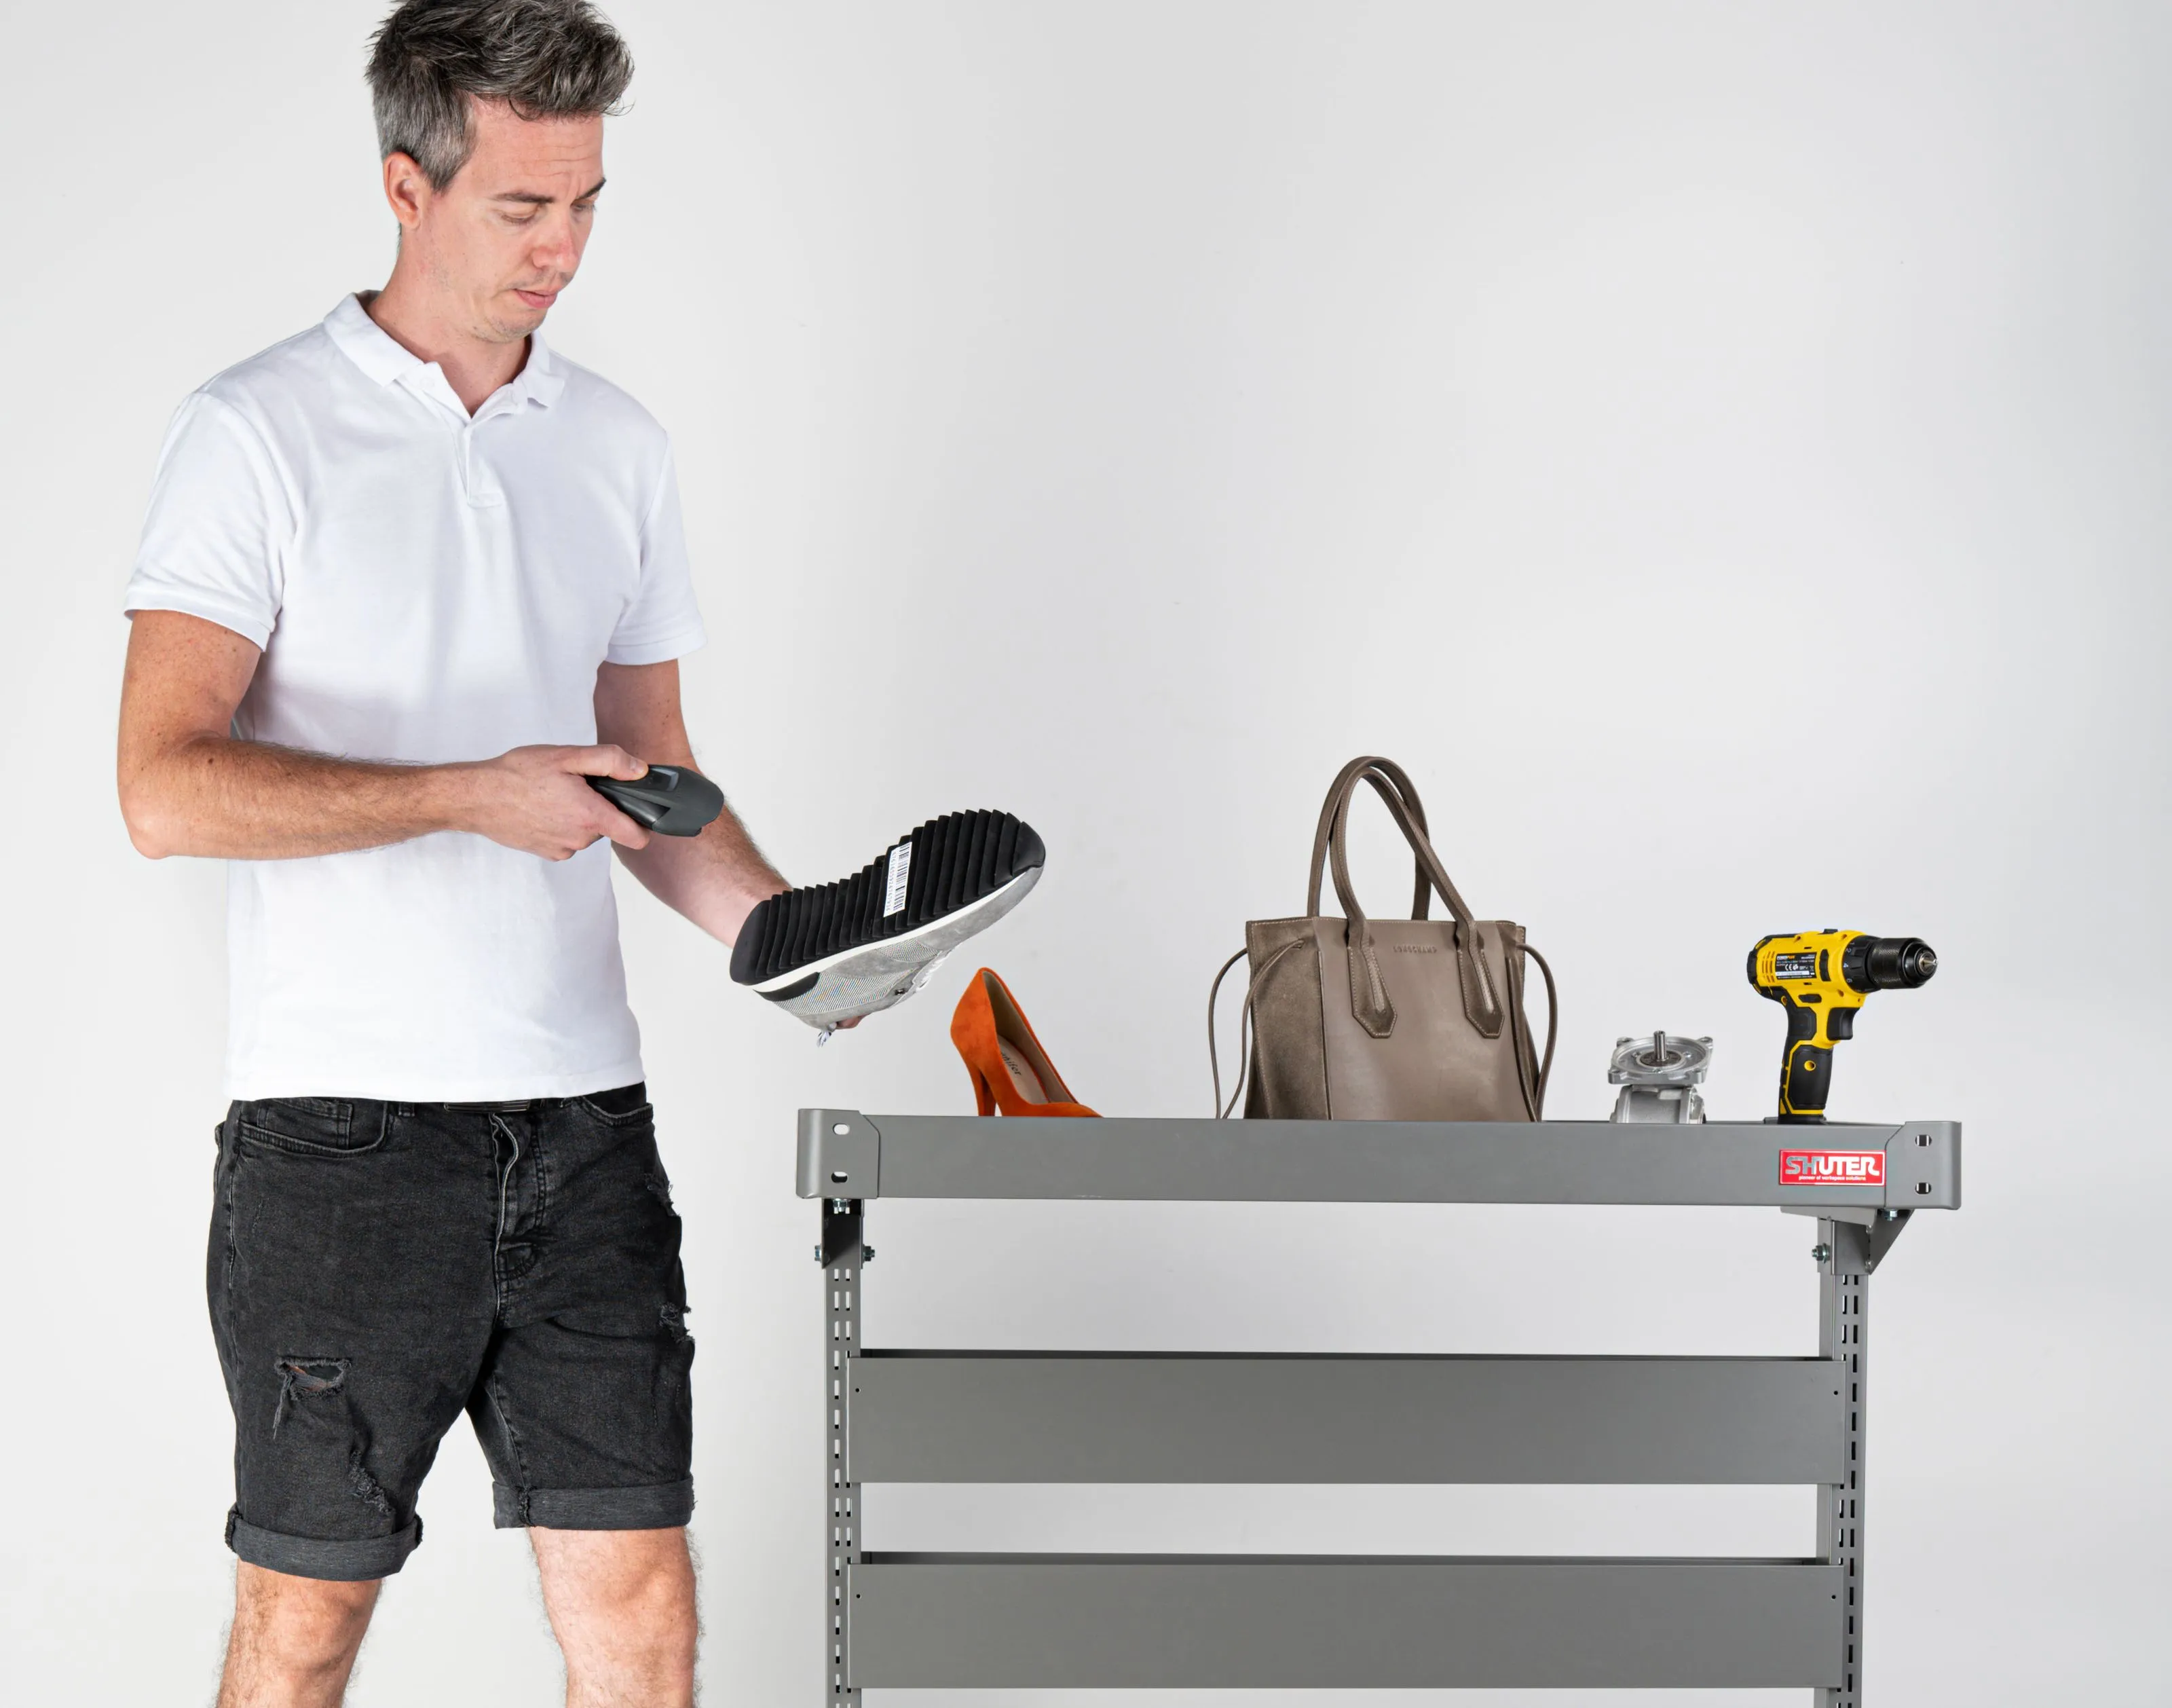
- A CubiScan dimensioning system is present to weigh & measure items, and to auto create metadata.
- The use of shelf codes enables sorting items into categories by capture & post-processing presets.
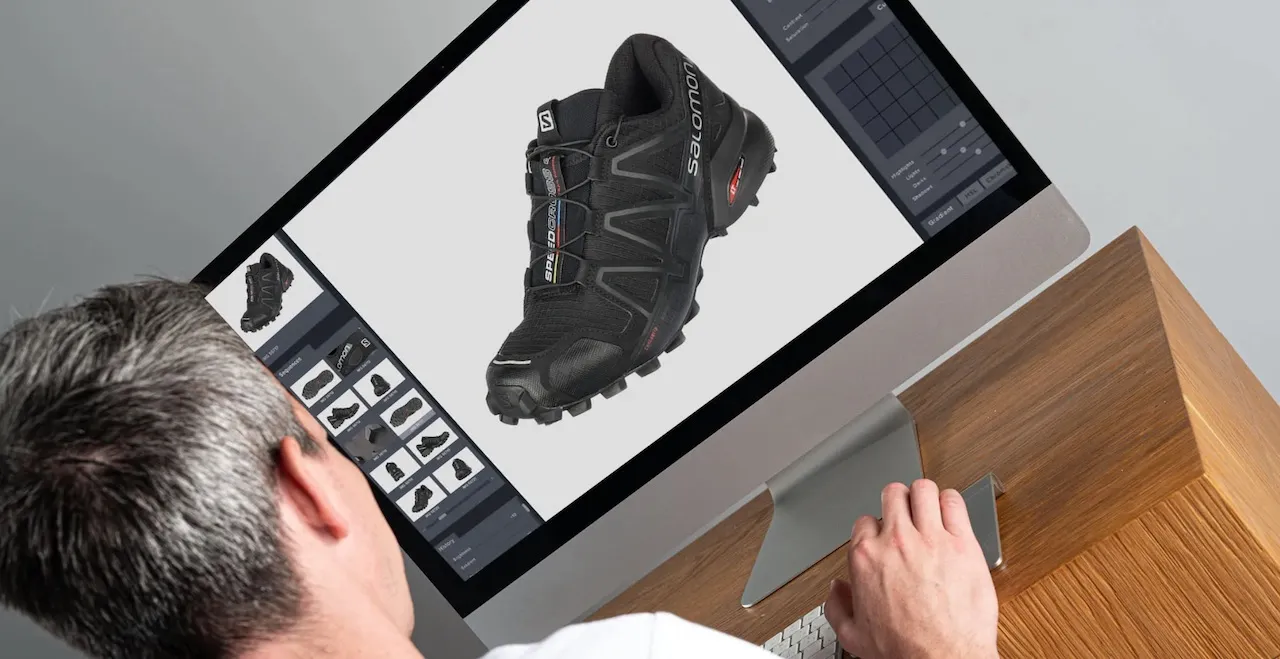
- PhotoRobot robotizes image capture (or recording video) by presets on a single command.
- Automatic post-processing occurs in the Cloud in the background, so teams can instantly start photographing more items.
- There is optional support for taking handheld and detailed shots with an iPhone while other workstations are in simultaneous operation.
- Publishing to a global CDN or via API integration occurs automatically, without any interruption in production.
This is possible thanks to software integration of robots, cameras, lights, computers, iPhones, post-processing, image delivery, and API connectivity. Discover for yourself each stage of the workflow below. We provide a simple yet complete walkthrough of the standard PhotoRobot studio production.
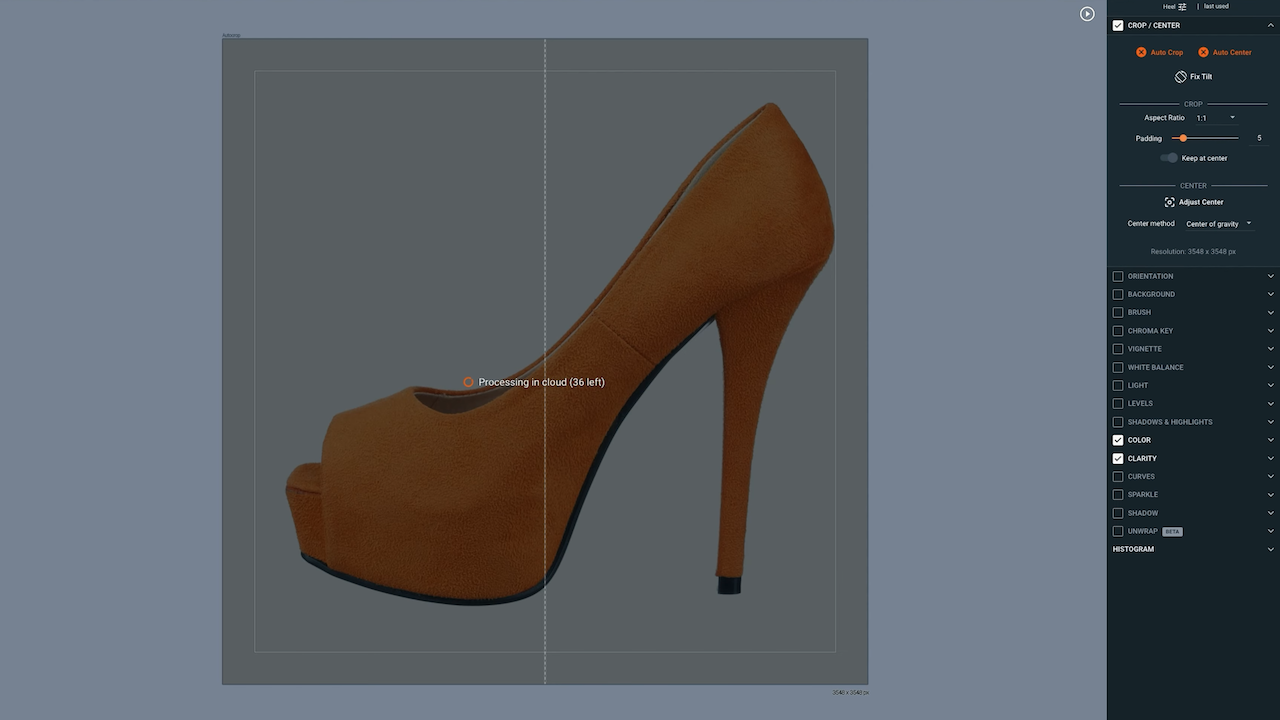
1 - Select a Workspace in the Software
The very first stage of a standard PhotoRobot workflow is selecting a software workspace in Controls App.
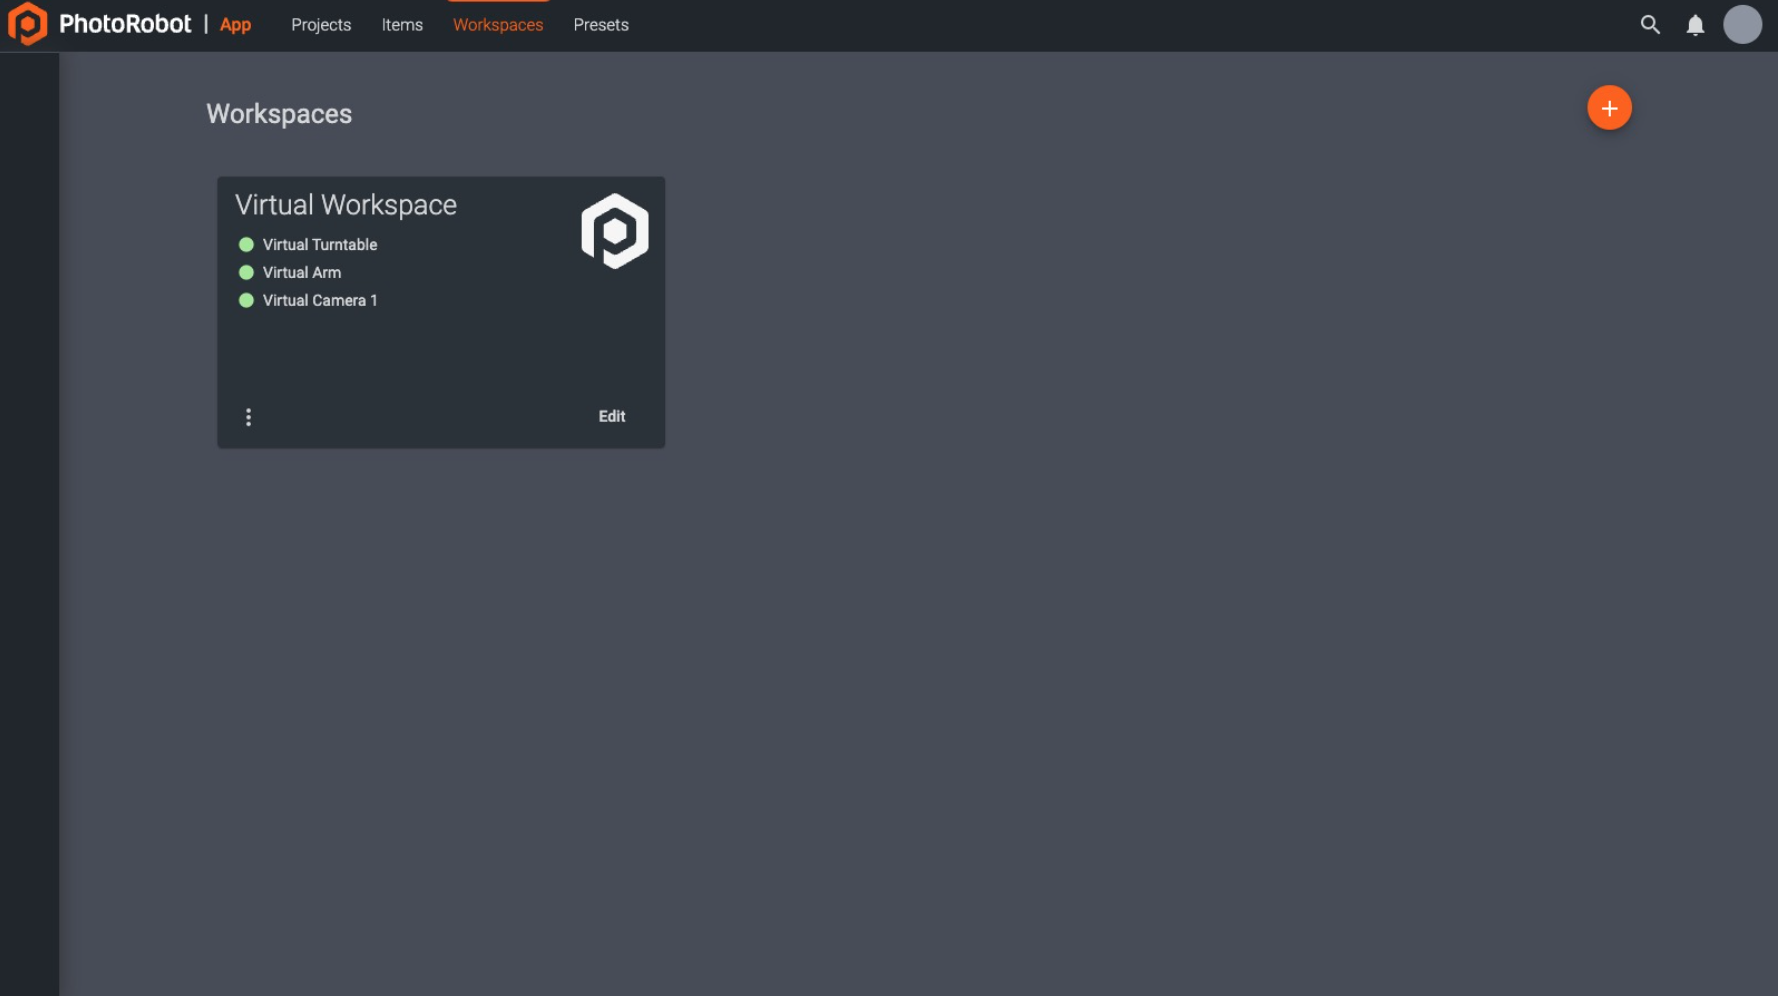
In the software, PhotoRobot Workspaces are customizable lists of hardware for specific photoshoots. Among other functions, the workspace tells the software which system will be in operation. Setting up a workspace connects the software to the system, which might be one or multiple PhotoRobot modules. This includes connection of cameras, studio lights, and other photographic accessories.
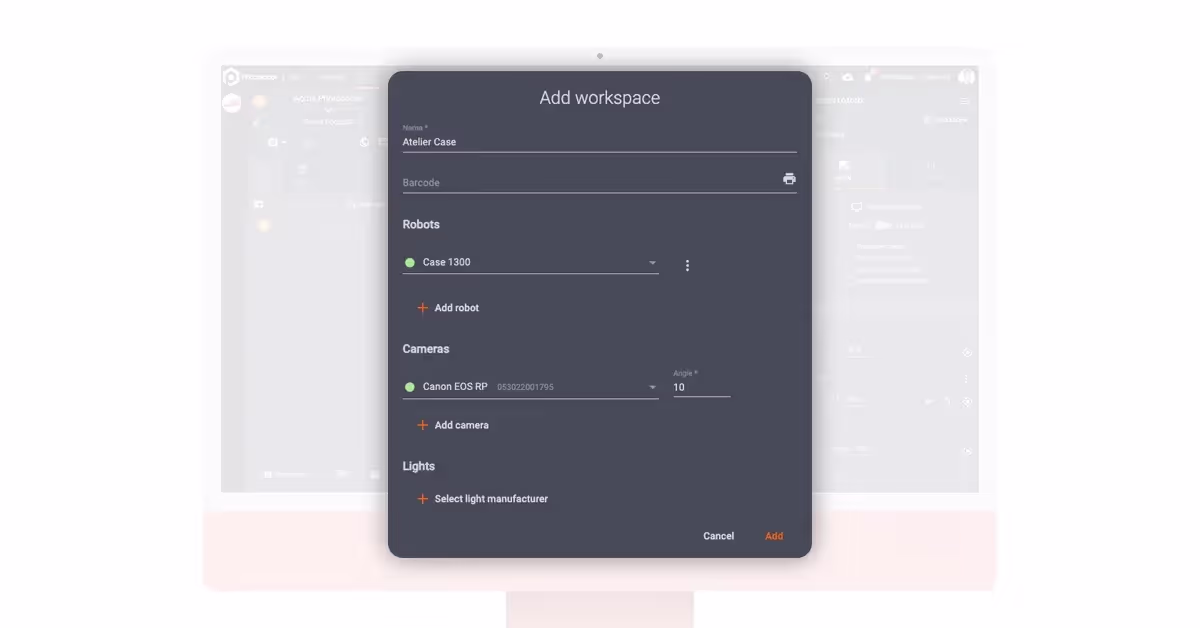
The workspace enables full configuration of robots, laser settings, light settings, and capture settings. Although, if using a module featuring a Robotic Arm or Multi-Camera rig, capture settings for all angles are fully automatic. All PhotoRobot devices connect over the same LAN as the workstation computer, while the camera connects to the computer via USB. The devices then communicate and activate via the software workspace.
2 - Import Shooting List
After configuring the workspace, the second stage of a typical PhotoRobot workflow is to import a shooting list.
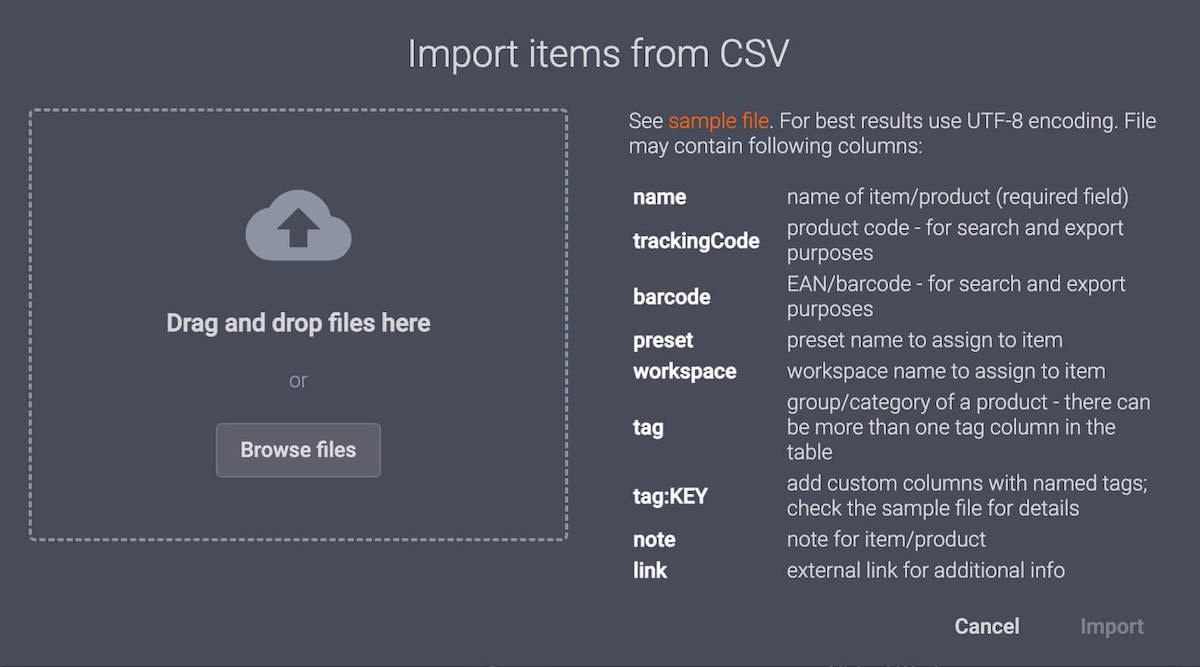
This is often via CSV file import. CSV import enables PhotoRobot operators to create an item with its configurations in Excel to import into the system. However, it is also possible to simply scan barcodes to validate inventory, ID products, and automatically receive items. In combination with CubiScan dimensioning systems, teams can then automatically record product weights & measurements, and automate photography sequences. This is in addition to generating valuable data alongside product imagery.
It is also one of the many ways that PhotoRobot simplifies and speeds up photo studio routines. There is less human interaction with the workstation computer, and quicker processes overall thanks to less movement around the studio. Meanwhile, shooting lists are fully customizable in the system with configurable variables. Operators can assign names, tracking codes, barcodes, presets, workspaces, tags, shelf codes, notes, and links to any item.
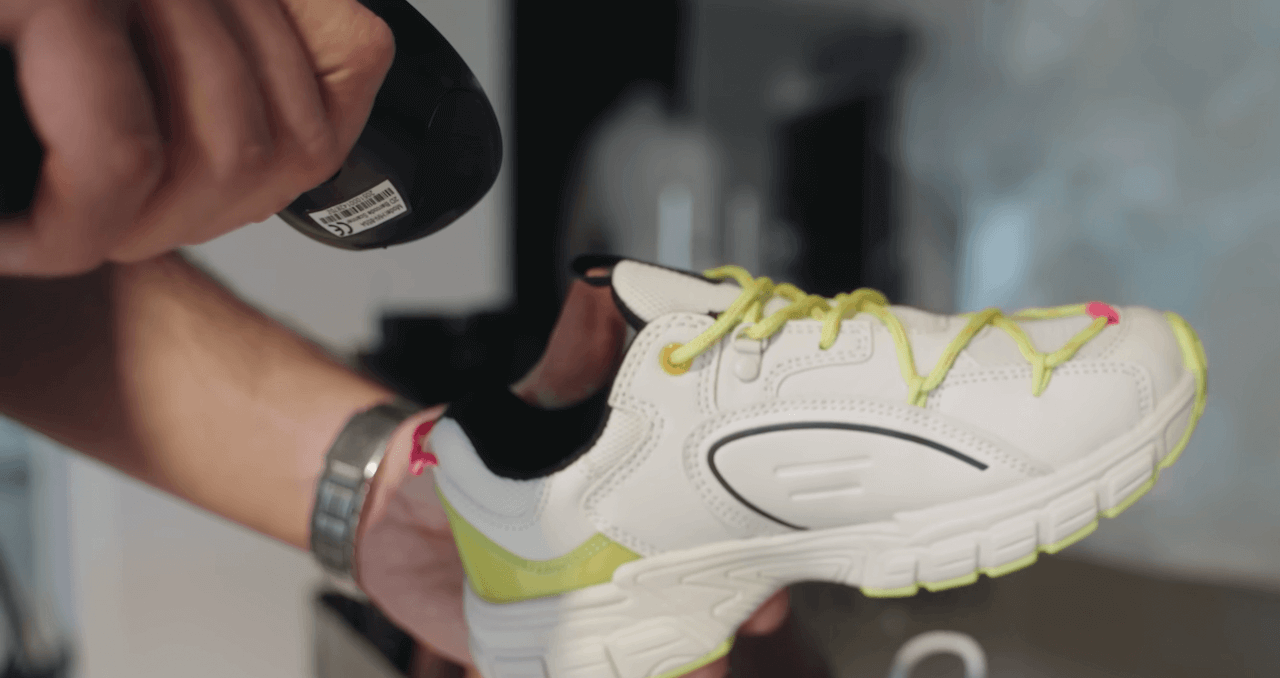
3 - Confirm Item Receiving
Following import of the shooting list, the next stage is confirming reception of the items in the studio.
This is just before weighing and measuring items. The process involves only transporting the items to nearby a robotic workstation, and then scanning barcodes to confirm item receiving. The system will automatically mark the item present in the studio, with validation immediately after scanning the barcode. If items do not have barcodes, it is also possible to generate and print unique barcodes for different items.
Additionally, wizard-guided photo studio workflow software can simplify this whole process for production line operators even further. There can be instructions for each item, from receiving it in the system, to measuring, prep, capture, and item return. This way, any human talent even with minimal training can quickly recreate production workflows.
4 - Weigh and Measure Items with CubiScan
The fourth stage of the standard production workflow involves the use of a CubiScan dimensioning system.

CubiScan is an optional device in the PhotoRobot-powered studio, but its use enables higher levels of automation and overall productivity. The device is widely popular for introducing automation into shipping and receiving lines. It weighs and measures items (in metric or imperial units), and automatically generates valuable data for every item.
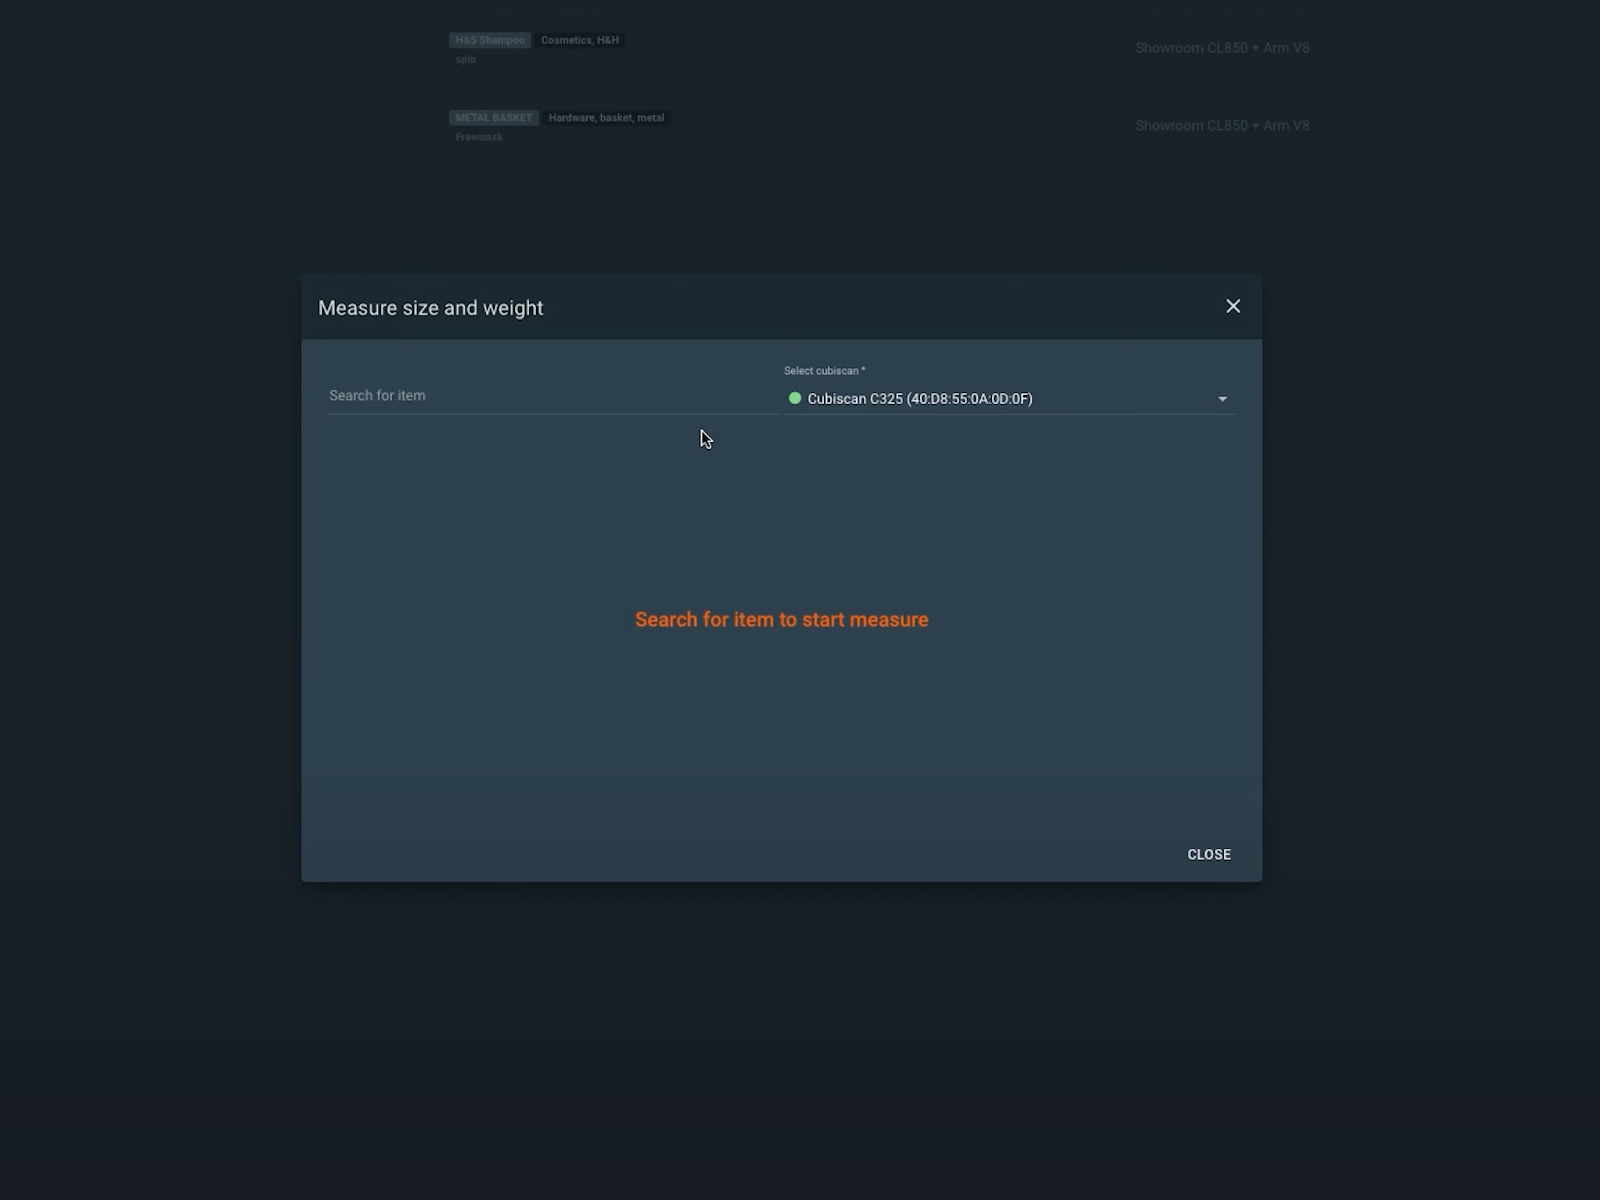
This enables the automated capture of items by their specific dimensions and measurements. The data also functions to automate elevation of the Robot Arm to the middle of the object before robotized capture begins. Additionally, all information is instantly present in a database for the automated publishing of product details alongside imagery.
5 - Sort Items to Software Shelves with Presets
When receiving, weighing and measuring items is complete, the next stage is sorting items into categories using shelf codes.
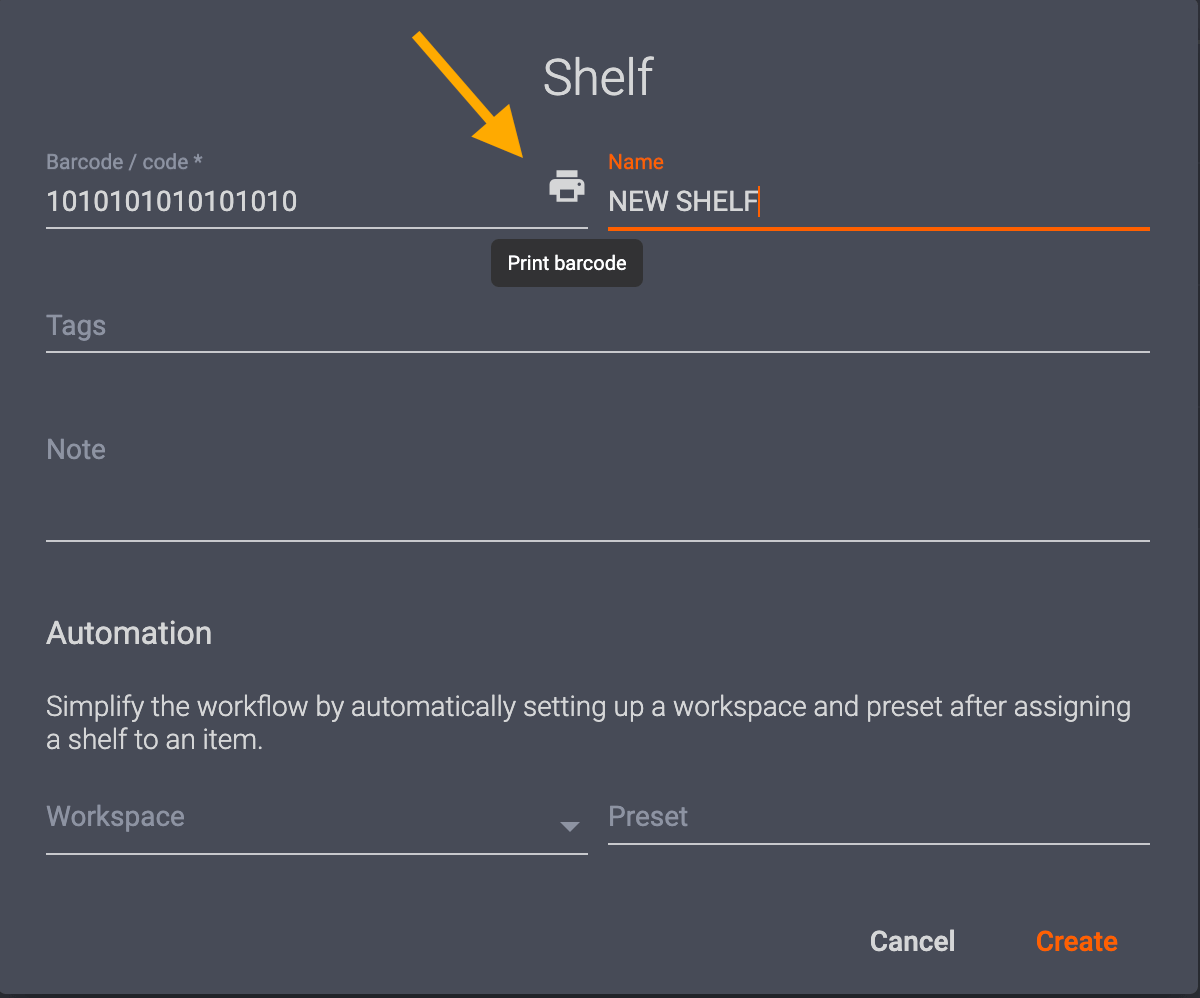
Shelf codes are a way to store configurable photoshoot settings and presets for similar types of items in the system. The item categories may include color, transparency, size, and many other photographic properties. It is then possible to print unique shelf codes to sort items in the system by their automated photography and post-processing presets. All it takes is first scanning an item barcode, and then scanning its corresponding shelf code to assign its settings.
In this way, studios can place shelf codes on racks, carts, or anywhere nearby where they prep items for photography. The closer to the robotic workstation, the quicker the production line becomes. Studios will often have shelf codes to sort items by style guides, various presets, object staging, image overlay and more. Each shelf code is fully customizable, so it depends only on the types of products to photograph.
6 - Identify the Item for Robotized Capture
After product sorting, identifying an item ready for photography requires only scanning its barcode.
This will automatically provide the system with its instructions for the robotized capture and post-processing of the item. This might include any presets within the item’s shelf code, such as for camera and light settings, as well as which outputs to capture. For example, presets may contain instructions for the system to extract specific 2D images in tandem with a 360 spin.
It may also include steps for the robotized capture of multiple elevations around the object for 3D spin or 3D model photography. With these instructions, all it takes is positioning the item onto the turntable. Afterwards, automation will take control over the entire photoshoot and post production.
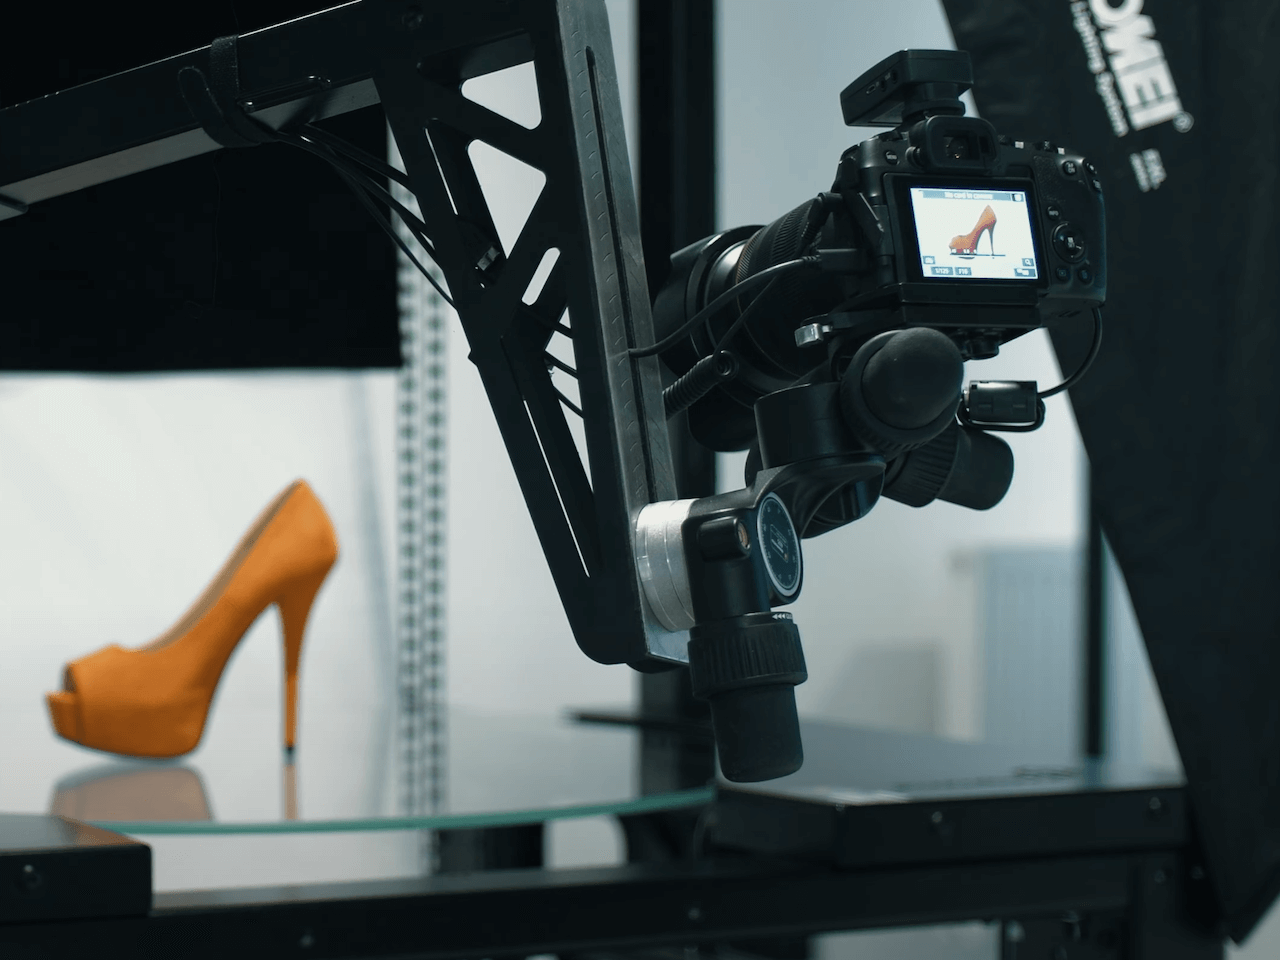
7 - Stage the Object on the 360 Turntable
Next, staging objects for photography and aligning the turntable to the Robot Arm is simple using laser-guided object positioning.
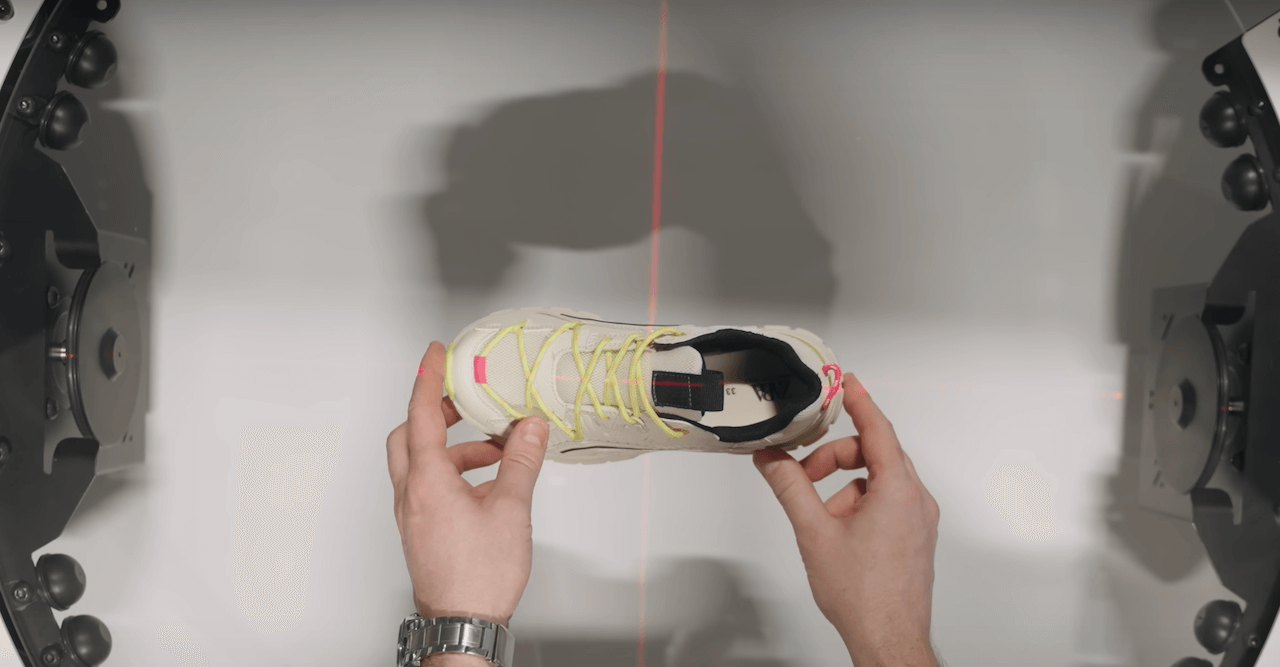
PhotoRobot 360 turntables and Robot Arms feature laser positioning systems for quick alignment of machines and objects. These help to streamline the object staging process, and ensure the robot arm and 360 turntable are in perfect alignment. The lasers provide a cross-laser to quickly position items in the center of the turntable’s plate for photography. Also, as soon as the photography sequence begins, the lasers will turn off automatically.
These object positioning systems are especially beneficial for automating 360 product photography. Accuracy is critical to ensure automation functionality, and to limit or eliminate the need for post-processing afterwards.
8 - Automate Capture of the Object
Starting the capture process requires only the scan of a barcode, a single click, or a tap on the spacebar.
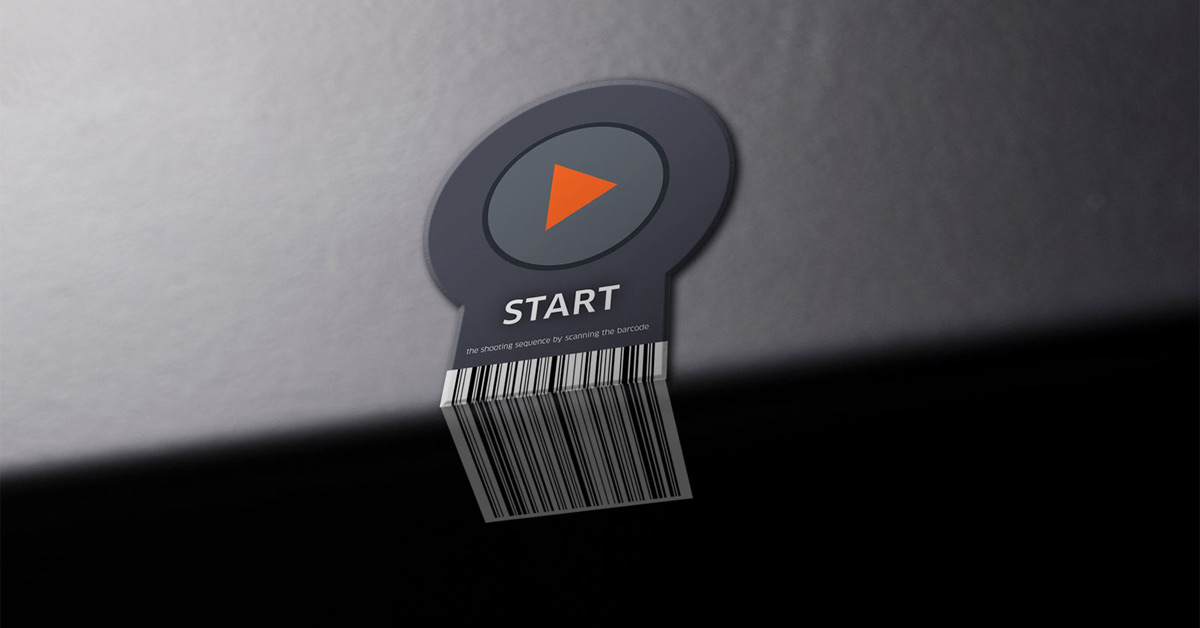
Usually, there is a start barcode on the robotic workstation to begin the robotized capture sequence immediately after product staging. That, or the operator initiates capture at the workstation computer. Starting the sequence will then turn off the laser positioning system, and trigger the automatic vertical adjustment of the camera. The camera’s horizontal level will align to the absolute center of the object’s height. This is also fully automatic, and according to CubiScan’s earlier measurements of the object’s dimensions.

After adjustment of the camera, the studio lights, robotic processes, and capture settings trigger automatically. These follow the preset commands in the system. Among other operations, the presets instruct the turntable to begin rotation, and trigger remote capture in sync with powerful strobes. All camera settings act according to the presets, while the strobe lights are also able to prevent motion blur. Preventing motion blur enables the fast capture of 360 spins, without needing to stop turntable rotation.
Meanwhile, the Robot Arm is able to move along a vertical axis to automate the capture of multiple rows of elevation. This produces multi-row 3D spins, and allows for the quick generation of 3D object models. If recording 360 product video, it is also possible to automate movement of the camera by pre-programmable timelines. The timelines combine object rotation with camera swing to create for example a flying camera effect, with fast or slow sequences.
9 - Process in the Cloud Without Asking
After a capture sequence, the lasers turn back on, and cloud post-processing begins in the background without asking.
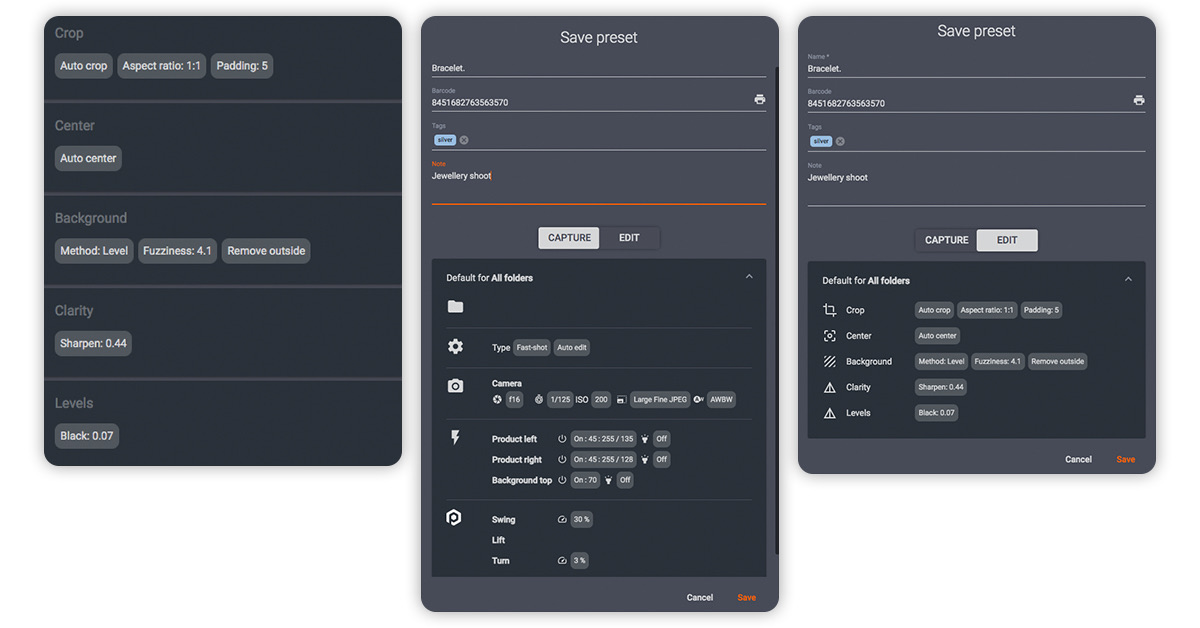
Post-processing in the cloud frees up the local computer to enable the start of a new capture process immediately. Backup of original images is automatic, while background removal and image optimizations run according to presets. The presets instruct the software to store files either locally in a shared folder, or upload to the cloud automatically. Presets can also publish files immediately after image capture to PhotoRobot Cloud, or via API to eCommerce export feeds.
In this way, there is extremely minimal to zero human input necessary. The next product workflow can begin as soon as one capture sequence completes. Operators can stage the next object on the turntable, or take handheld and detailed shots next if necessary.
10 - Start Next Product Workflow
While post production occurs in the background, operators can immediately begin the next product workflow.
The lasers on the turntable and robot arm turn back on automatically, so object staging becomes a quick, repeatable process. At the same time, recreating the workflow requires only quick scans of shelf codes, product SKUs, and the start barcode. Robotized capture is again automatic according to CubiScan’s measurements of the identified object, and the capture & post-processing presets.
All the while, images of the first product are post-processing, and often web-ready for publishing within a minute after capture. This includes multiple outputs in tandem: 360 spins, 2D still images, 3D spins, 3D models, and 360 product video. There is automatic file naming, and numerous digital asset management presets for smooth delivery as well.
In some cases, production lines may also take iPhone product photos if using PhotoRobot Touch in the workflow. These photos and other handheld shots import directly into the system for automatic post-processing and publishing alongside other assets.
11 - Capture Upwards of 500 Items Every Shift
When each workstation offers a production time of roughly 1 minute per product, that’s nearly 500 items per 8-hour shift.
That includes full sets of automatically post-processed outputs: product image galleries, packshot photography, and 360s. The production of thousands of assets is possible in one shift, even in natural warehouse environments without any climate controls. Now, imagine a large production hall with 60+ robotic workstations. These can fit into a space of approximately 25,000 square meters. It is also possible to connect all of these systems, with controls from a single software interface.
Then, if one workstation photographs 500 items per 8-hour shift, that amounts to a rough throughput of 30,000 items per shift using 60+ machines. For two 8-hour shifts, that’s upwards of 60,000 items photographed per day. Outputs are often web-ready, so the majority of images are publishable instantly. Certainly, production will not always go 100% to plan, but PhotoRobot clients have firsthand experience achieving outputs at these volumes. Imagine photographing 40,000 fashion items daily. That is the capability of the PhotoRobot-powered studio.
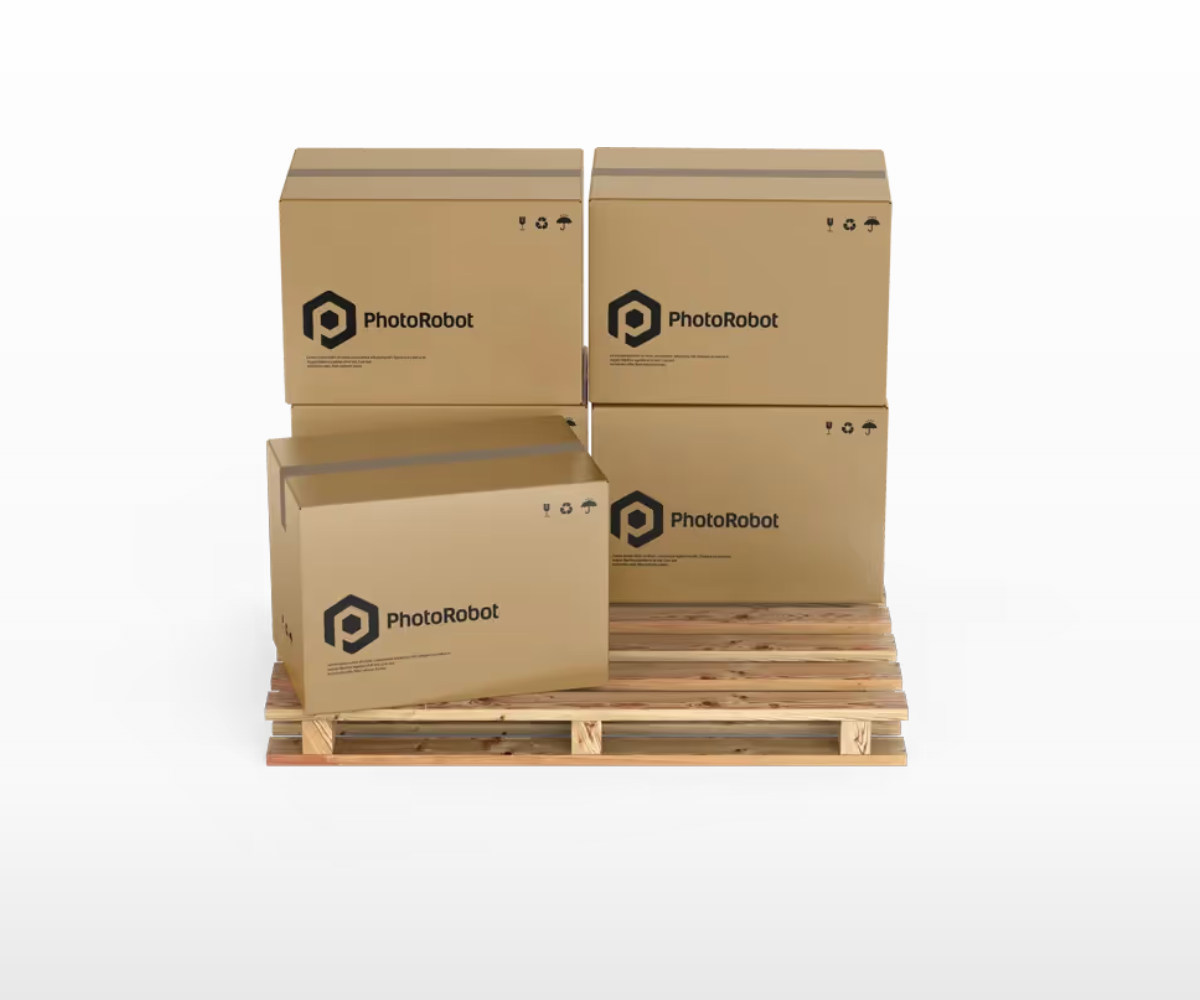
12 - Return Items with Software Wizards
At the end of the shift, software wizards direct production line operators through product return of the shooting list step-by-step.
The process is as smooth as product-in, taking advantage of barcode readers to confirm each product return. Scanning the item out automatically confirms return of the item in the system, and also generates a delivery note for the customer. This ensures that 100% of items leave the studio with 100% of the photos for each item.
Smart Photography Workflow Software for Any Business
PhotoRobot _Controls App offers customers direct access to the latest innovations right after production. Unlock the newest features and fixes with ongoing development, and every update supporting the entire PhotoRobot ecosystem. Every individual customer’s unique experience helps build the software into a platform that meets everyone’s needs. All while maintaining the flexibility to support unique requests for any business’ photography.
Would you like to see the PhotoRobot-powered studio live and in person? Learn more about PhotoRobot including how to book a custom demo around your business’ workflow in our PhotoRobot Onboarding Videos.


